Followers

Showing posts with label background tutorial. Show all posts

Sunday, April 12, 2020

Sending Hugs and Happy Thoughts in Rainbow Colours (video tutorial)


Hi all,

How are you doing? 
In the last few weeks I have been colouring a lot. What about you?

Staying at home for me means do more of  what makes you happy... ...for me colouring with Copic is - and always be -  MAGIC.

Love to give my stamps some colour and relax..


Today I will show you my little transformation  of this sweet cute digital stamp from
The Greeting Farm called Halle. Printed onto Perfect Colouring Paper.

I have prepared you a short video.. so you can see my colouring step by step .


Hope you have enjoyed it..would love to get some feedback.

I have used a darker skin tone and as I could not decide what colour hair I should come up with
 I have given her a rainbow hair look :) .


Isn't she fun!?

But why not make a background too....


The final result, the background could be anything, clouds, a rainbow, a sunny beach please let your fantasy run free .

Sending you hugs & happy thoughts .

Copic: 
Skin : E 11, E 13, E 15, E 25
Eyes : YG 63, YG 67, white gelpen
Hair : N 6, N 9, B 23, B 29, BG 49, V 09, V 15, YR 04, YR 09
Dress : E 08, E 29, YR 04, YR 09
Bow : BG 05, BG 13, BG 49, G 28, white gelpen
Background : BG 10, BG 13, BG 15, BV 0000, BV 000, B 28, YR 00, YR 02, 
multiliner black , white gelpen 

Thanks for your visit and hope your Copic will keep you company!

And I would love to see some comments on post :) .
Please stay at home and stay safe,

Hugs Blankina

Tuesday, November 12, 2019

Ice Christmas Penguin Scene Card & Video


Hello all,

Today I have a Christmas card for you..with lot of ice.
I hope it might be useful for all Copic card makers among us. 

First of all I have printed the sweet and oh so cute digital stamp
called  "Ice Christmas" from LOTV  onto transotype Perfect Colouring Paper .


Here it is ,
now let's start to colour...
I have started with the lightest colour B0000.


After having coloured the ice blocks I thought it was fun to draw an icy background too.

I am not an expert but it is great to try new techniques right? 
And practice is always the key.. It was such fun to do too ! 


Of course the cute penguin needed some colour too.

Below you can find the colouring video,
step by step to give an idea how I have created this card.


Was it clear?
It takes quite a lot of time to create videos but if they are helpful for you it is all worth it.
 It would be nice to receive some feedback in the comments .


Buon Natale means Merry Christmas in Italian...

Copics used :

Ice : B0000, B000, B00, B01, C 2, C 4
Background : B0000, B 01, B 02, C 2, C 4 , 
SP multiliner cool grey
 BG 11, BG 15, B 01, BV0000
Penguin : C 0, C 2, C 5, C 7, C 10
RV 0000 , RV 11, "0" , YR 21, YR 23
Scarf : RV 02, RV 04, BV 0000, BV 000
Envelope / ribbon : YG 00, YG 03, YG 23
Presents : RV 0000, RV 11, RV 02, RV 04
Accents: white gelly rol pen
Glossy accents
Sentiment stamp from craftemotions


Hope this hand coloured Christmas card will be appreciated, it was sure made with love.

Thanks for your visit and your kind comments,
Hugs Blankina

Sunday, July 28, 2019

Christmas in Summer

Hi everyone, it's Virginia here again, with a new tutorial for Copic Marker Europe. 

Summer is scorching in Spain and I try to keep my mind on fresh things: ice-creams, beaches, lemon hail and... Christmas time!!! Lol. So, I've finally decided to prepare my tutorial related with this season. And, to be honest, I've also seen crafters on the Internet doing Christmas projects so,  I'm not the only crazy person!! lol.

I'm spending some days on the beach, with my family, so you can imagine that I'm not really plenty of tools and different supplies to do an impressive project. That reminds me of that days when I started to do scrapbooking and how lost I was with the only few Copic Markers I had. I`ve tried to imitate that stunning backgrounds with antique appearance and it seemed to me extremely difficult. Years later I discovered how easy it is and with my tutorial I want to encourage you, who are starting to colour, to try it.


Here you have an step by step video tutorial with the process. You can find the stamp I've used in El Rincón de Setter .


The Copic Marker colours I've used are:

Background: E44-E43-E42-E41
Skin: R81-E13-E21-E00-E000
Hair: E35-E57-E47
Dress: YR27-YR24-YR21-Y00
Ribbon: RG97-YG95-YG93-YG91
Christmas Balls: R89-R39-R29-R24-R14-YG97-YG95-YG-93-YG91-YG21-B39-B37-B34-B32


And that's all. I hope you like my tutorial. Have a good summer!

Friday, June 28, 2019

WEDDING SEASON

Hi everyone!! It's Virginia here with my June tutorial for you. 

I've not done a completed project yet. I'm still thinking about what to do with my coloured stamp but, the thing is that in Spain, where I live, it is coming into wedding season. For this reason, I've been working on something useful when I colour my wedding stamps, and one of the most difficult things for me is thinking about the backgrounds. 

Today I want to give you a new inspiration to your wedding projects.


I've used this sweety Tiddly Ink stamp. I think is the ideal stamp for a wedding project.

The Copic colours I've used are:

Skin: E13-E21-E00-R21
Bridegroom suit and shoes: N9-N7-N6-N5
Bride dress and shoes: R85-R83-R81
Hedges:BG97-BG95-BG93-BG91-R21
Ground: G46-G43-G40-YG21
Sky: B0000-B91-C1-C00-Blender
Heart and roses: R39-R29-R21-R14

As usual, here you have a very simple step by step video tutorial:


And remembar that I have a step by step video tutorial about how to do the sky on my YouTube channel:


And that's all. I hope you like my tutorial and hope it will be useful for you.

See you next month. Bye!!

Thursday, March 28, 2019

Scarecrow

Hi everyone! It's Virginia here with a new tutorial. I know it's just Spring but, I'm thinking of holiday and summer so, I've decided to colour a wheat field ready to harvest as my background.

Additionally, many of you know how I do love tales. It is the reason way I've done another bookmark related to a book, 'The Wizard of Oz'. I've used a Saturated Canary Stamp, a really sweet scarecrow.


As usual, here you have the step by step video tutorial. I hope you like it.


The Copic Marker colours I've used are: 

Skin: E13-E22-E00-R30
Hair: E35-E47-E49
Hat and heaters: E39-E37-E35-E33
Trousers and shoes: E44-E43-E42-E41
Shirt: E89-E95-E93-E91
Sky: B0000-B91-C01-C00-Blender
Bushes: BG91-BG95-BG97
Wheat field: Y000-Y23-Y28-E99 

That's all!! I'd be delighted if you leave me a comment.

See you next month!

Tuesday, February 12, 2019

A romantic Gel Press Various Ink card

Hi all,

In a few days it will be Valentine's Day, 
so I have made a romantic card to get you in the mood.
Actually I am a romantic type all year long :) .

I have used my Copic Various Inks ( refills )
 together with a Gel Press to make this background.

Did you know there are different sizes and kind of Gel Presses?

For this type of card, a small shape Gel Press will do,
 as I like hexagons to make patchwork cards
 I have chosen a small hexagon shaped Gel press.


Here is a detail of my finished card,
first I wanted to add a sentiment on the front 
but I think it was so romantic and delicate without 
that I have decided to add the sentiment inside instead .


I have started like this…


Here you can see some of the prints I have made..

Perhaps the best way to get an idea
 of the making of this card 
will be to watch my little video,
posted below.

And ?
Might it be something for you to do?

Enough colours to try I would say, 
a fantastic range of 358 Copic Various Ink colours
 are waiting to be used on the Gel press!


I have used : 

Copic Various Ink : R 83, R 85, YG 91, E 34
Gel Press : Petites , Hexagon 3" ( 7.62 cm )
Gel Press brayer
Acrylic paint white 104
stamp Magenta
 die stencil chevrons cut MFT
die flowers Precious Marieke
die hexagons Action
flower foam Leanne Creatieve ( pink )
crystals

Hugs Blankina

Wednesday, December 12, 2018

Trios of Various Ink cards, no stamps required


Hi Copic friends,

Today I have three different cards for you.
Made with the same technique but different styles of cards and colours.

No stampes required :) 
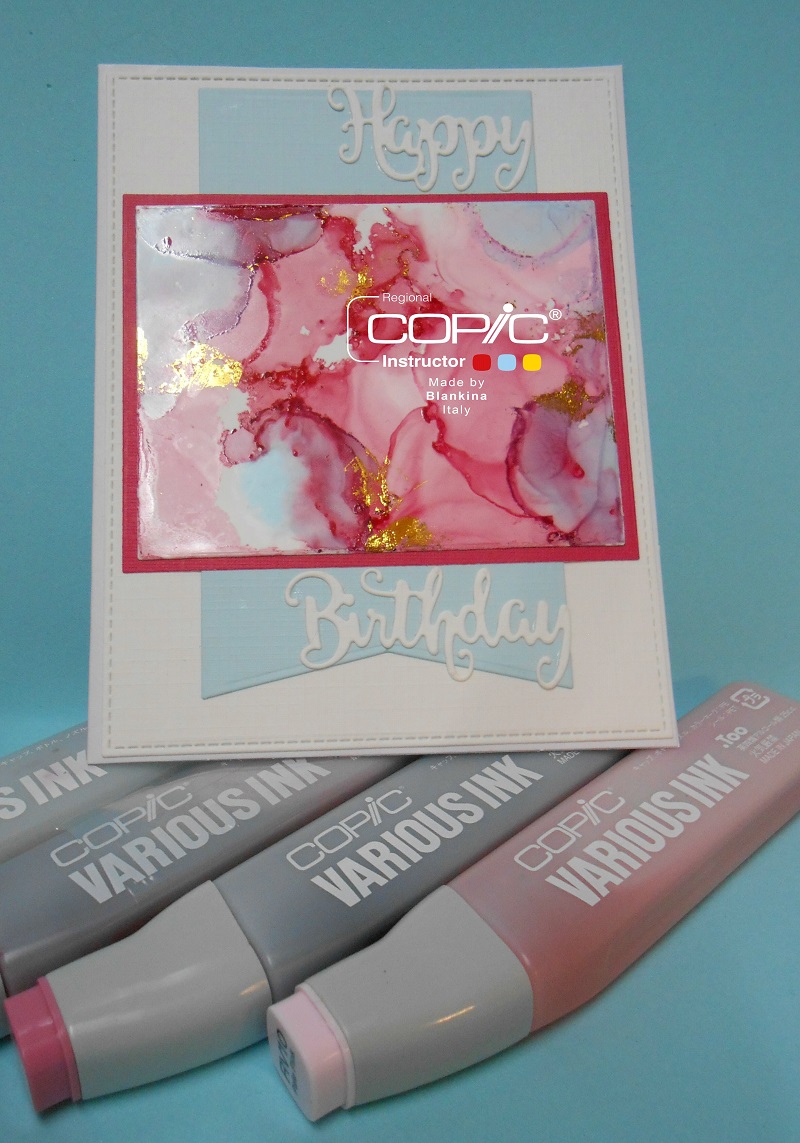
I have used YUPO paper for the background with Various Ink.

Various Inks ( refills ) are not only to fill your dry Copic markers,
there are many other fun ways to use them.

For this technique, fluid art,
you will need several Various Ink colours including the blender "0",
a straw and a dropper. 

The straw is to blow the wet various ink on the YUPO paper
to make the ink flow.
 The dropper to let drops of blender fall onto the ink to create fun effects.


GREY CARD

Okay my first card, the grey card was made with:

VARIOUS INK :"0" ,W00, W 3, B 000 , 
fab foil gold, 
a Krafty Kimmie stencil, decoglass volume : moon dust, 
YUPO paper,
dixi die, Modascrap die ,
foam sheet : white


Please follow the step by step photos


you can follow my photos to get an idea of the process, 
I have started with W00


afterwards with W 3 and blender "0"


and B 0000


Adding some gold too ,with the fab foil,
just rub the foil unto the background ( over the sticky bits ) .
The Golden side of the foil must be facing up.


I have die cut the reindeer from the background,
to the die cut reindeer I have added two layers of white foam sheets to 
give a 3 d effect. Then I have glued it into the die cut space.


BROWN CARD

For the brown card I have used :
VARIOUS INK : "0" , E 33, E 51, E 37,
 Marianne Design die , MFT die
fab foil : gold , 
YUPO paper,  avec paper 


Please follow my step by step photos...


I have started with E 51


afterwards with  E 33


and E 37


and blender "0" , drops onto the background


some gold..with fab foil


PINK CARD

To make this card I have used ;

VARIOUS INK : R 81, R 85, RV 10, "0" , B 00
YUPO paper, avec paper , 
creative expressions die , MFT die, 
fab foil : gold, 


I have started with R 85


afterwards with RV 10


R 81


RV 10 again


and a few drops of B 00 too..


again some gold with the fab foil

So these are the three cards I have made,
below you can find the VARIOUS inks used for each card.


VARIOUS INK : R 81, R 85, RV 10, "0" , B 00


VARIOUS INK :"0" ,W 00, W 3, B 000 , 


VARIOUS INK : "0" , E 33, E 51, E 37,

Which card do you like most ?
It is almost like three seasons cards, summer, autumn and winter :) .
CAS cards with Various Inks  , fun to make, please try it yourself too !

Hope you have enjoyed watching this step by step tutorial,

hugs Blankina