Followers

Wednesday, August 26, 2020

A Little Weird

Hi everyone

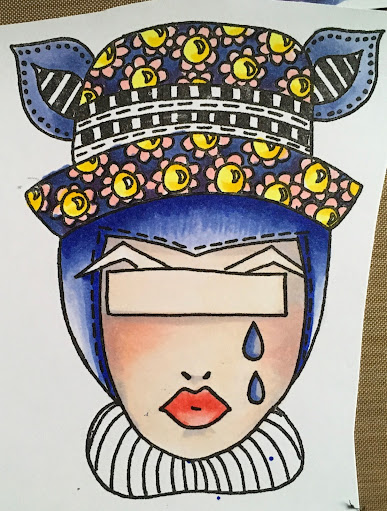
For today I have an art journal page to share. I have used Copic markers and Derwent Procolours pencils. I love using Copics and coloured pencils together, they are such a good combination. 

I always start with the skin colours first, here the E50.


Add the BV01 to create some shadow.


Add the E00 on the BV01 to create a warm skintone. 


Blend all layers together with the E000. I also decide to give her some blush with the R21. 


Her hair will be blue and I start with the darkest coloy first, the B69.


Use the B66 to blend. 


And use the lightest colour B63, next. 


I use the  R21 for her lips. 


Add the R22 next 


Than add the R24. . 


Blend all layers together with the R21. 


Her hat will be violet. I have used a lot of yellow in the background and violet/purple  is the opposite colour of yellow in the colour wheel. This means that those colours will enhance each other, but if you mix them together you will get brown.  

My first layer is BV08. 


Blend with the BV04.  I use the BV04 for her ears as well. 


Blend  the layers together with the BV02. 


Use the Y04 next. 


Add the Y08.  


I thought the flowers looked a little pale so I decided to add some more colour and to use the  R21.


Use the R22 next. 


The basic colour of her coat will be  BV02. Add some shading with the BV08. 


Blend the layers using the  BV04. 


Blend again using the BV02. 


The flowers and collar will be yellow. I use the Y04 and Y35.


Blend layers together with the Y04. 
I also used the R21 and R22 for the flowers, but unfortunately I forgot to take a photograph. 


I keep using the same colours because they go so well with the background that I want to use. 
Use the Y08 for the roof. 


Add the Y35 next. 


Blend together with the Y08 and the Y06.


Finally I use the Y04 again. 


Use the same yellow hues for the windows as well. 


For this cute house I will use the BV02. 


Than I decide to make the house more blue so I continue with the B66. 
Blend the layers using the B63. 


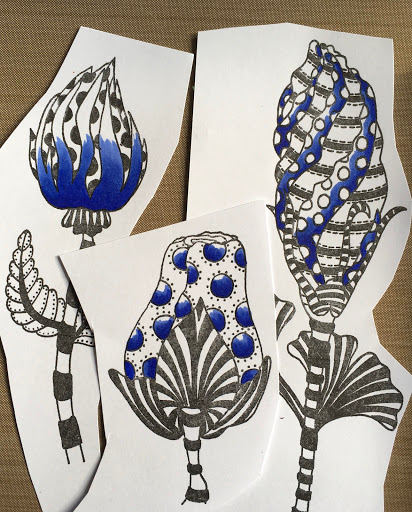
I want to use the blue in all the flowers and I start with the B69 first. 


Use the  B66 next. 

Blend the layers together with the B63.


For this flower I use the  BV08.


And the BV04. 


The leaves will be yellow-orange, I use the Y35 and the R21. 


For the largest flower I will add some yellow with the Y04 and the Y08.


For my third flower I use the  Y38and the Y36. 


Finally I add some coloured pencil as well, 
the Derwent Procolours : 09, 10, 20, 03, 27, 35, 32, 31 and the 28. 


Cut out all the images and glue them on your background. I have found the quote on the internet. For my lettering I used a  Molotow one4all marker, 1,5 mm nib , but you can use a  Copic multiliner as well.

Have a fabulous month

Love
Miranda


Wednesday, August 19, 2020

A Gorjuss Girl Video - Up in a tree

Hello everyone! It's Delphine here today to share a Gorjuss card and video :)

Here is my finished card, with a Gorjuss stamp from the Little Leaf stamp set:

I stamped my Gorjuss stamp on a masked card to have a white border and coloured the whole scene in Copics.

Here is the colouring process, and then a few words:


For the skin, please note that after I stopped filming I decided to fix the skin a bit and give it more contrast, so I added one more layer of each colour on the darkest places of the face and arms.

My idea was to create a green background to suggest the foliage without colouring detailed leaves, but rather a green blurry mass behind my character. 

Skin: BV11, E11, 13, RV02, YR000, 00
Hair: B32, N6, 8, 10
Outfit: B02, 04, 16, 28, 39, N0, 2, 4, 6, 10
Sky: BG000
Foliage background: 0, YG09, 11, 23, W5, W7
Branch: E31, 37, 39, 49

Thank you very much for stopping by today! Hugs,
Delphine xx

Wednesday, August 12, 2020

Wryn Rock Slimline Shaker Card

Hi all,

Are you ready for a new post?
Today I am showing my new slimline shaker card with this fun digital stamp from Tiddly Inks, called Wryn the rocker.

I have printed the digi onto Perfect Colouring paper and have started colouring...
inspired by my own little rocker in the house.


Skin : E00, E11, E04, R20, R22


Hair : YR21, YR12, E23, E57, E59


Skirt : B05, B28, B39


Shirt& stockings : BG23, BG49, BG78


Boots : E29, E18, E08


Guitar : E97, E99, N8, N10

The image was ready to be fussy cut ...


Behind the image I have added a rotating mechanism. This die is fun as you do not have anything popping out on the other side 


 Time to assemble to whole card..
I have cut a piece of white cardstock (17 x 21cm) and scored it on 8.5 cm to create the card base .


The slimline die was cut twice, one time out of special cardstock, and one time out of foam.

I have put a piece of acetate in between ..in this way the shaker was easy to create.
I have passed  a anti static pouch onto the acetate ..just to make sure not everything sticks to the acetate.

Slim postage die : Whimsy 
Musical notes : Marianne Design
Letters : I -crafters 
Stitched rectangle : MFT 
Rotating mechanism : Impronte D'autore 


When you move the shaker, the mini pearls and mini musical notes diecuts will move..
And if you touch the coloured image it seems she is a real rocker that moves forward and backwards.


The letters were cut out of blue green foam and black card stock.

Hope you have enjoyed my "rocker" post..see you next post! 
Thanks for visiting the blog.
Hugs Blankina