Hi ladies.
Hope you all have had a wonderful summer with a lot of sun, bathing and sunsets.

Today my image is tall, so my paper is measures 21x10 cm.
It is Perfect Coloring Paper and I have stamped my image with Memento Ink.

I started with a light yellow, Y32, that will end up as burnt grass or hay maybe

Then I blend it with a yellowish green, YG03, mixing them together.

Darken the green a little with YG17 and define the grass a bit.

Making uneven circles with fringes, just randomly scribbling them on the paper, using Y17.
That's what's great about nature, there are no right or wrong.
For the center I used E33.

Filled up the gaps between the flowers and the stems with Y13.
For the center I went in with both E37 and E49.
For the center I went in with both E37 and E49.

Just scribbling, all together your brain will read it as sunflowers.

Defined the stems and petals with YG67.

Start with a light pressure on the nib, press harder for a wider stroke and ease the pressure in the end.
And don´t overthink it. The strokes will just indicate a pattern of petals.
And don´t overthink it. The strokes will just indicate a pattern of petals.

The bottom shade for the ground was YG91.

To darken my burnt grass or hay, I used YR23 and YR24.
Leaving some of the Y32 in the top makes it glow a bit.
And for the darkest parts I used E99.
Leaving some of the Y32 in the top makes it glow a bit.
And for the darkest parts I used E99.


Just making small flick marks on top of the ground with YR23 to look likes it is left overs from the hay harvest.
I held my marker straight up to get as thin strokes as possible.
I held my marker straight up to get as thin strokes as possible.

I a wave shaped stoke make it look more like grass or hay, instead of straight strokes.

I continued with YR24, E99 and E37 for the ground. And I even put in some YG95 to get some green shades in there.

For my sunset I started with the outer glow for the sun, using Y02, and flicked it just a little bit.
Then I went in with Y00 for the center of the sun and blended the glow a little in the edge.
I started with my lightest pink, R00, to blend it with the sunglow and blended it over to B000.
Then I used R22 closest to the sunflowers, blended it over to R20 and R00.
For the blue part I now began at the top with B91, blended it with B21 and B00.
For the clouds I used C3 and some Y02.

For the shirt I started with R24.

Darkened it up with R59, R39.

Left a small shade of R24 at the edges.


For the pants I used B21-B97-B45.


Went in with B97 in the shirt.

For the fold of the pants I used B91-B93.

Skin: E11-E35-E13.
Hat: YR09-E07-E19.
Y15-Y17-E35-E37-T9-YG25-YG67
Scarf: G43-YG67
Hat: YR09-E07-E19.
Y15-Y17-E35-E37-T9-YG25-YG67
Scarf: G43-YG67

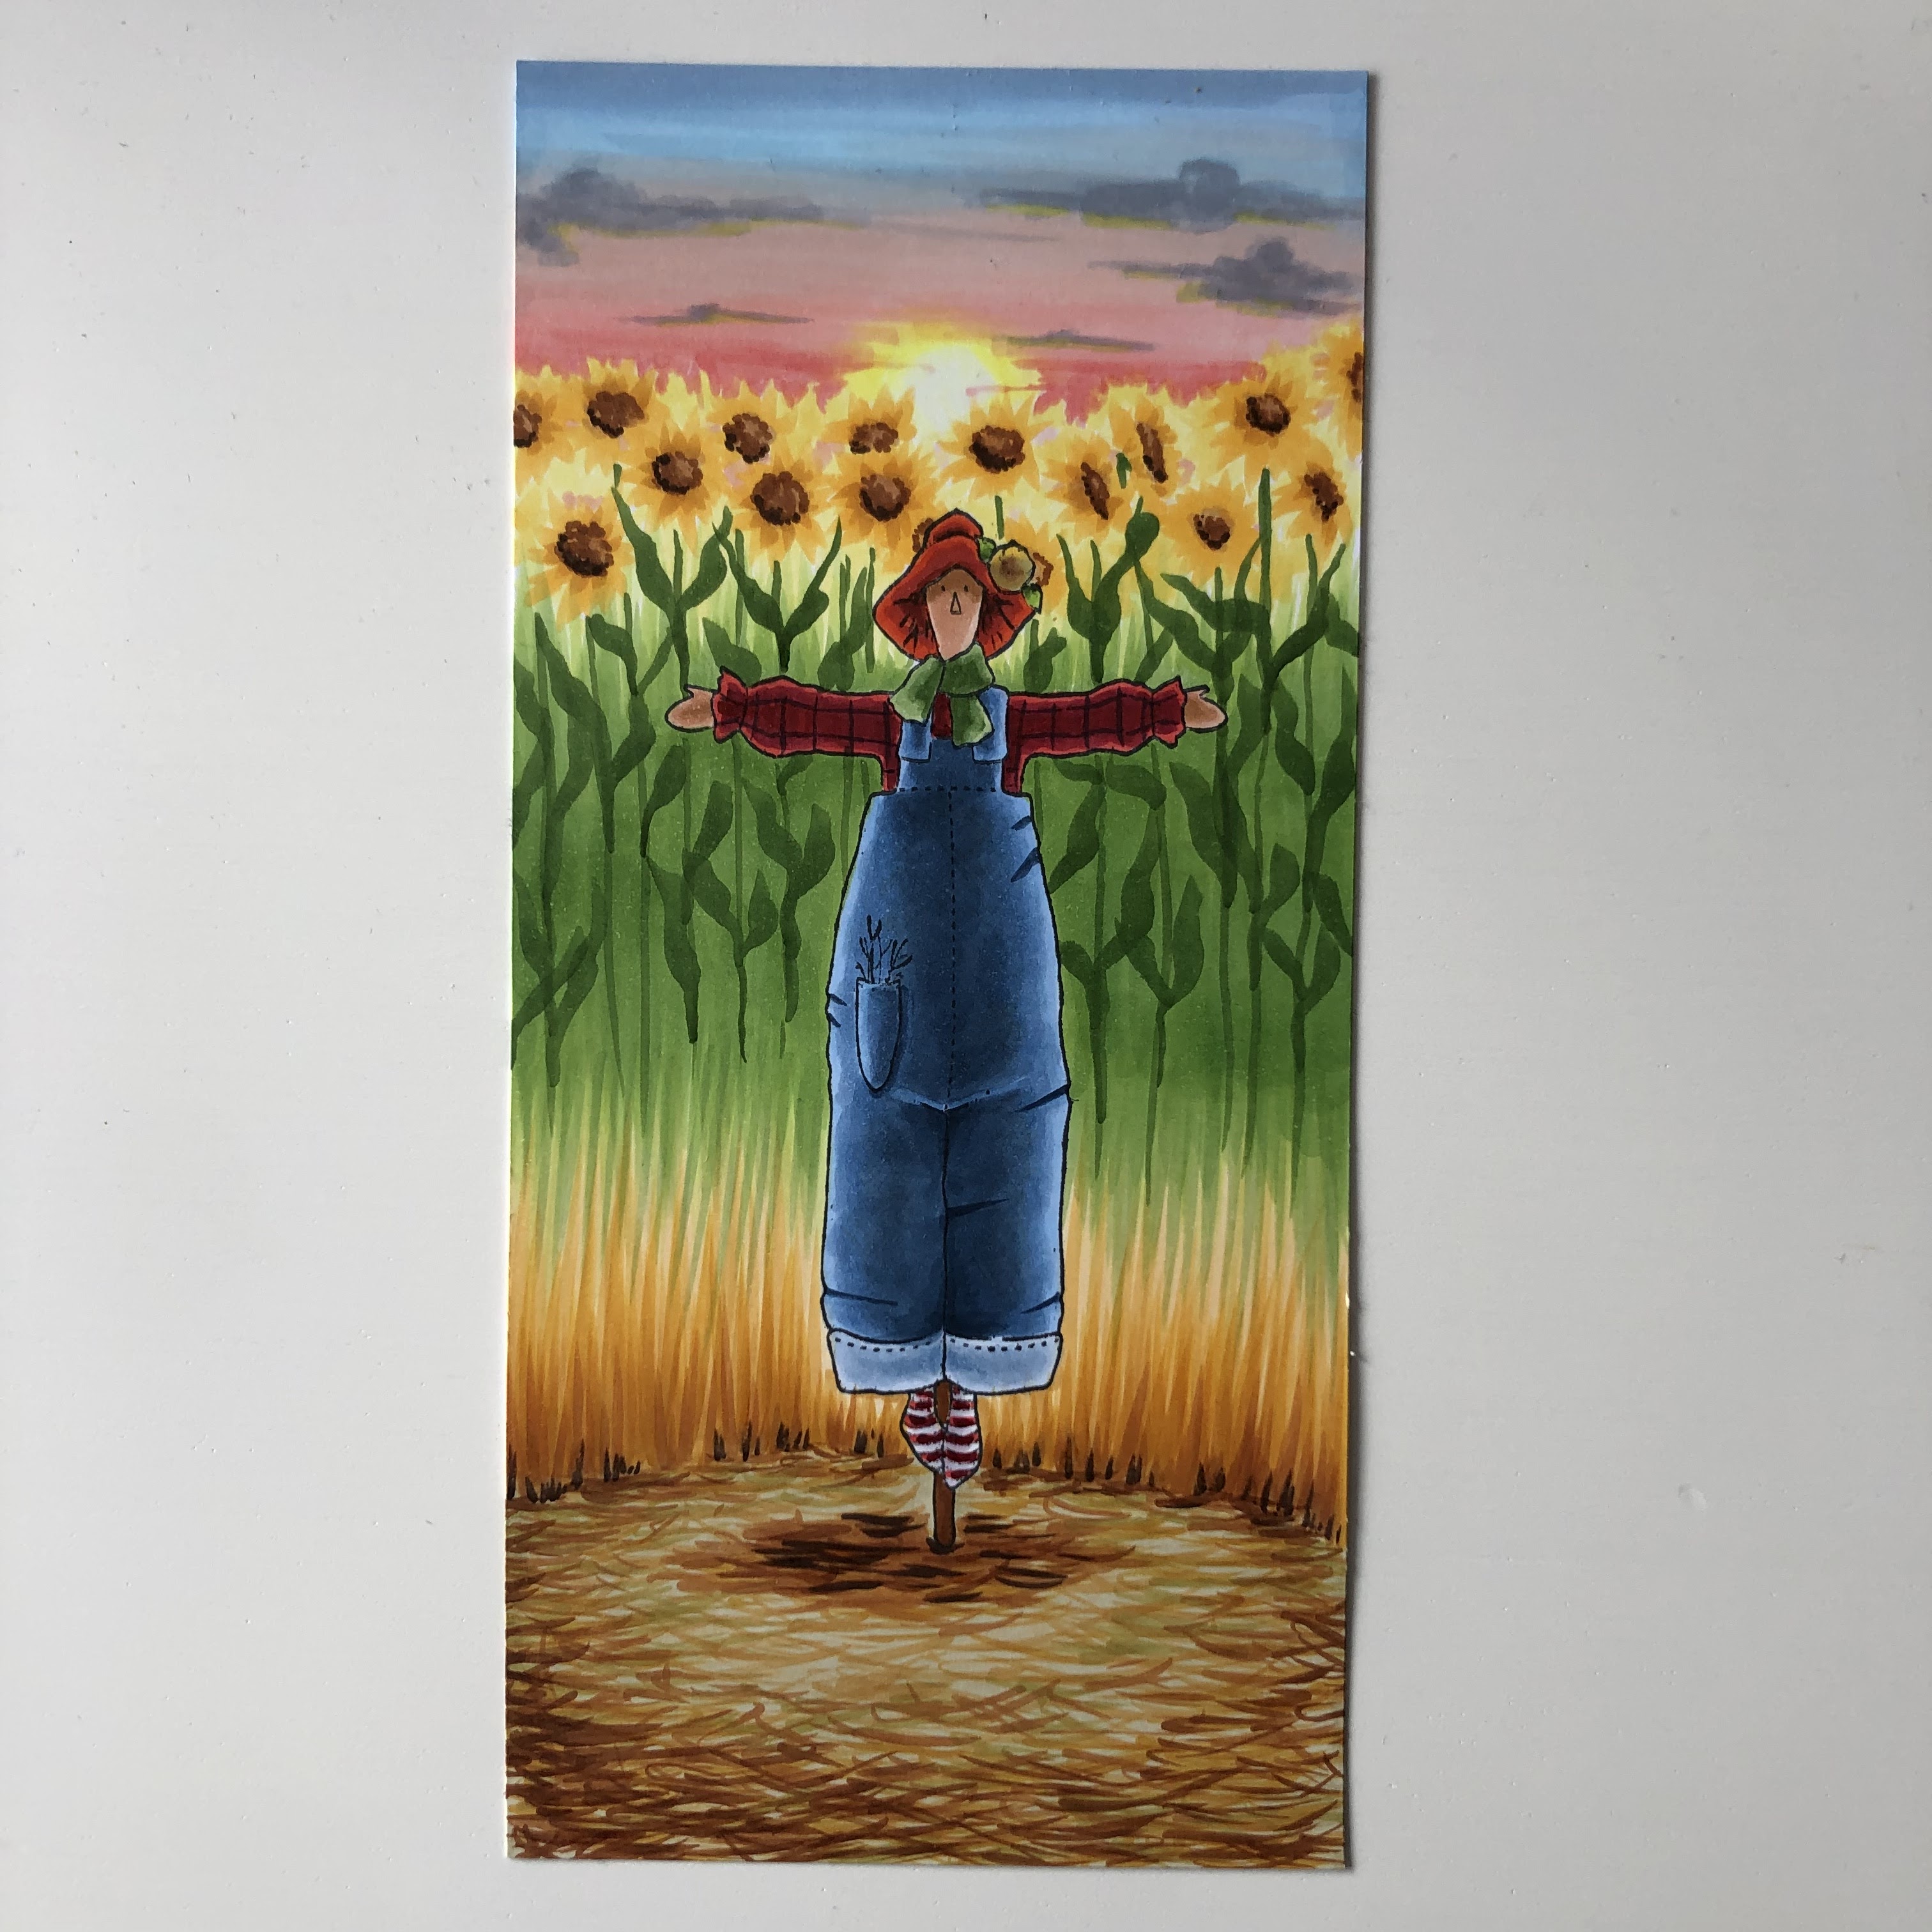
I didn´t like the light area I got in the crotch, so I went in with my B45 instead.
And here is the finished image.
And here is the finished image.