Followers

Showing posts with label Colour combinations. Show all posts

Friday, June 28, 2024

Three Colour Combinations for Green

Hi!
Helen here today.

As I had told you before I love to find and collect some older stamps.
This little guy is from a Swedish store and he was called "Sly dog" and came in many different situations.

As a friend of mine asked for a card for someone who graduated I thought of this fellow.
The receiver likes green so I picked some paper and started to colour some sly dogs.


As always I used Perfect Colouring Paper and stamped my images with a Memento Ink Pad.


My first layer of the body: G00


Body: G02 - G16 -G R02 - R11 - T1 - T3
Eyes: B000
Glasses: V000
Book: E40 - E41 - V04


First layer of the body: YG13


Second layer of the body: YG17


Third layer of the body: YG63 - 


Cheeks: R11
Eyes: B000
Glasses: E41
Book: BG0000 - BG000  - BG01 - R24 (later)


First layer of the body: YG0000


Second layer of the body: YG01


Third layer of the body: YG03


Cheeks: R02
Eyes: B000 - B00
Glasses: B0000
Shadow: T3
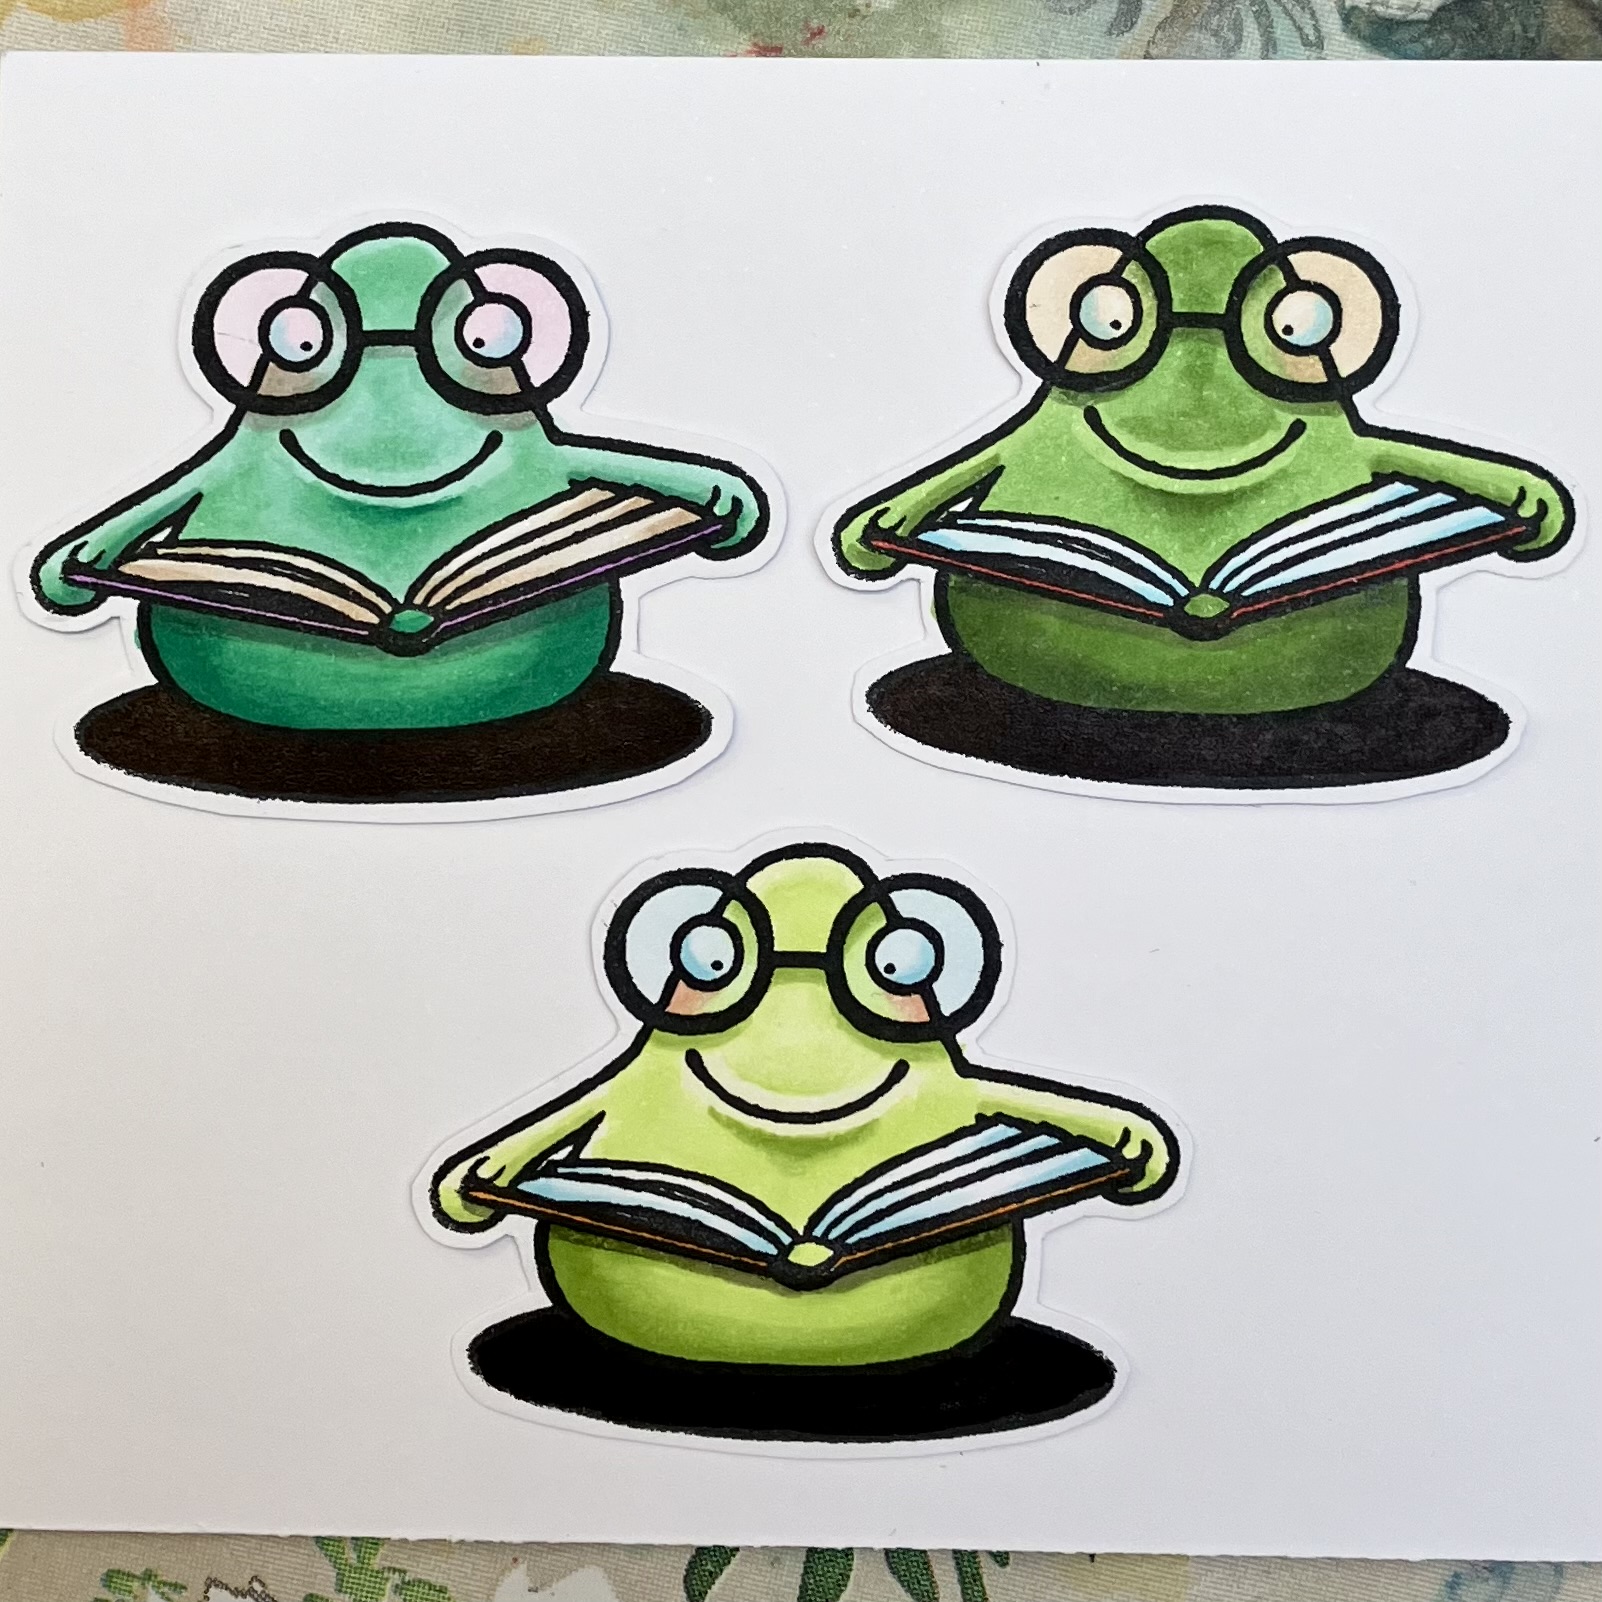


I filled in the shadows with Black 100.


Hope you colour something green today!
See you next time!
Love
Helen

Friday, March 12, 2021

A Bright Birthday Card with Flowers and Fairies


Good morning,

How are you doing?
Today I would like to share my bright birthday card with flowers and fairies.
These sweet stamps are from Kraftin Kimmie Stamps, the flowers are from the set love bugs, the fairies are from the set fairy folk and the sentiment from party time sentiments.

I have used some wicked black hybrid ink to stamp some of the flowers onto perfect colouring paper.


The first centre flower was coloured with R 81, R 83, R 85, R 89


The right flower was coloured with RV 02, RV 04, RV 09


And later I have also added some R 39 for some more contrast


The left flower was coloured with R 02, R 05, R 17, R 59


The flower buds were coloured with Y 35, Y 38, YR 18


The petals of the  flowers are coloured.


Now I have stamped two fairies with wicked black hybrid ink.


The skin of the fairies was coloured with YR 000, YR 00, E 97, E 99, R 20, R 22


The dress of the right fairy was coloured with BV 00, Y 02, Y 15, Y 18


The hair of the fairy on the right was coloured with V 04, BV 08, BV 29


The dress of the left fairy was coloured with YG 00, YG 03, YG 95


Her necklace with V 04, BV 08


The hair of the left fairy was coloured with Y 35, Y 38, YR 18


The sky was coloured with B 000, B 00, B 12, B 05


On the wings I have added some glossy accents and when it was dry I have also added some little dots with a white gelly roll pen.

A happy birthday sentiment and some other layers of coloured paper to finish the card..
The "pearls" were made with some dreamy drops from Nuvo in the colour fairy wings :).

The slimline dies are from the new Crealies collection..


I hope I have inspired you to try some of these cheery Copic combos. 
Thanks for your visit see you next month!

Hugs Blankina

Wednesday, August 12, 2020

Wryn Rock Slimline Shaker Card

Hi all,

Are you ready for a new post?
Today I am showing my new slimline shaker card with this fun digital stamp from Tiddly Inks, called Wryn the rocker.

I have printed the digi onto Perfect Colouring paper and have started colouring...
inspired by my own little rocker in the house.


Skin : E00, E11, E04, R20, R22


Hair : YR21, YR12, E23, E57, E59


Skirt : B05, B28, B39


Shirt& stockings : BG23, BG49, BG78


Boots : E29, E18, E08


Guitar : E97, E99, N8, N10

The image was ready to be fussy cut ...


Behind the image I have added a rotating mechanism. This die is fun as you do not have anything popping out on the other side 


 Time to assemble to whole card..
I have cut a piece of white cardstock (17 x 21cm) and scored it on 8.5 cm to create the card base .


The slimline die was cut twice, one time out of special cardstock, and one time out of foam.

I have put a piece of acetate in between ..in this way the shaker was easy to create.
I have passed  a anti static pouch onto the acetate ..just to make sure not everything sticks to the acetate.

Slim postage die : Whimsy 
Musical notes : Marianne Design
Letters : I -crafters 
Stitched rectangle : MFT 
Rotating mechanism : Impronte D'autore 


When you move the shaker, the mini pearls and mini musical notes diecuts will move..
And if you touch the coloured image it seems she is a real rocker that moves forward and backwards.


The letters were cut out of blue green foam and black card stock.

Hope you have enjoyed my "rocker" post..see you next post! 
Thanks for visiting the blog.
Hugs Blankina

Sunday, April 12, 2020

Sending Hugs and Happy Thoughts in Rainbow Colours (video tutorial)


Hi all,

How are you doing? 
In the last few weeks I have been colouring a lot. What about you?

Staying at home for me means do more of  what makes you happy... ...for me colouring with Copic is - and always be -  MAGIC.

Love to give my stamps some colour and relax..


Today I will show you my little transformation  of this sweet cute digital stamp from
The Greeting Farm called Halle. Printed onto Perfect Colouring Paper.

I have prepared you a short video.. so you can see my colouring step by step .


Hope you have enjoyed it..would love to get some feedback.

I have used a darker skin tone and as I could not decide what colour hair I should come up with
 I have given her a rainbow hair look :) .


Isn't she fun!?

But why not make a background too....


The final result, the background could be anything, clouds, a rainbow, a sunny beach please let your fantasy run free .

Sending you hugs & happy thoughts .

Copic: 
Skin : E 11, E 13, E 15, E 25
Eyes : YG 63, YG 67, white gelpen
Hair : N 6, N 9, B 23, B 29, BG 49, V 09, V 15, YR 04, YR 09
Dress : E 08, E 29, YR 04, YR 09
Bow : BG 05, BG 13, BG 49, G 28, white gelpen
Background : BG 10, BG 13, BG 15, BV 0000, BV 000, B 28, YR 00, YR 02, 
multiliner black , white gelpen 

Thanks for your visit and hope your Copic will keep you company!

And I would love to see some comments on post :) .
Please stay at home and stay safe,

Hugs Blankina

Wednesday, February 12, 2020

Anti stress Copic colouring with Blankina

Hello all Copic friends,

How are you? Hope fine...
Today I have a little tutorial for you: anti stress Copic colouring.

We all have stress and I have this nice and colourful way to relax, I call it anti-stress Copic Colouring. Simple and fun to do.

I have started with a sheet of Perfect Colouring paper (A4) and a pencil


And have started to  draw lines without thinking.....
Later I have  covered these lines with various Copic multiliners.


Suggestion :
Before adding Copic colouring you can still erase the pencil lines,
when you add colours with your Copic pencil lines will NOT erase anymore.

Are you curious how I have made the design?


I have used these colours ...
Please watch this little video below and discover all steps


I can highly recommend this anti stress colouring, it does help to relax and in the end you also have a colourful drawing... This can be framed or used as a cover for example. 

When you use a smaller pieces of PCP you can also make lovely cards  with these anti stress drawings. 


This is a unfinished piece of my drawing. You can see the completed design in the video !!

Copic :
Multiliner black 0.3
Multiliner black 0.5 
Multiliner calligraphy M

B02, B05, B18, B23, B24, B28, B29, B39
BG13, BG23, BG34, BG49, BG72, BG93, BG96
YG03, YG06, YG09

In case you want to see another of my anti stress designs  please visit my post tutorial-copic-anti-stress-colouring from 2018 too .

Hugs Blankina