Followers

Thursday, May 31, 2012

Meet our Guest Hazel

Hello to all you Copic Fans
Hallo an alle Copic-Fans!

My name is Hazel and I'm having to pinch myself constantly as I can't believe I'm a guest designer at the Copic Marker Europe blog - it's both amazing and scary at the same time!
***
Mein Name ist  Hazel  und ich muss mich dauernd kneifen, weil ich gar nicht glauben kann, dass ich Gast-Designerin auf dem Copic Marker Europe Blog bin - das ist gleichzeitig erstaunlich und beängstigend!

I would like to share with you a card I have made for one of my blogging friends - let's hope both she and you like it!
***
Ich möchte euch eine Karte zeigen, die ich für eine meiner Blog-Freundinnen gemacht habe - hoffentlich gefällt sie ihr und euch!


I chose a new digi image from the fabulous Krista Smith over at Saturated Canary called "Sketchie" which I thought is just perfect for this blog and for my friend who enjoys using Copics!
***
Ich habe ein neues Digi von der fabelhaften Krista Smith von Saturated Canary namens  "Sketchie" ausgewählt, ich fand das genau passend für diesen Blog und für meine Freundin, die auch gerne Copics verwendet.

Here is the full card:
Hier ist die ganze Karte:


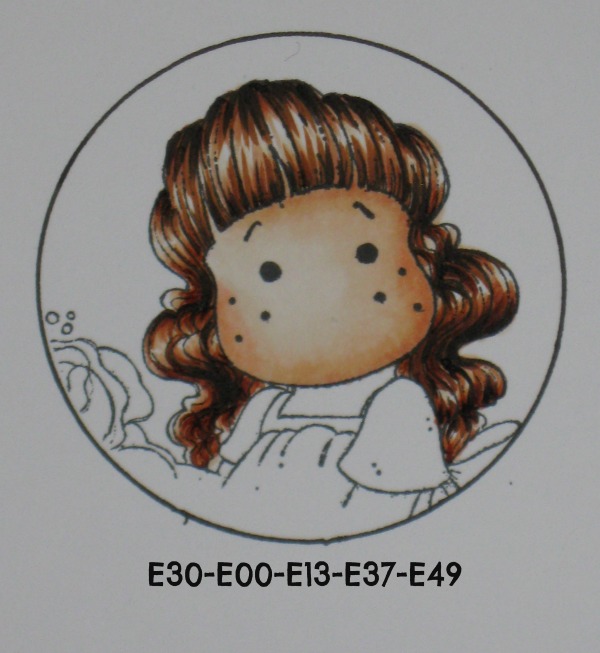
I have used the following Copics to colour her:
Ich habe die folgenden Copics verwendet, um sie zu kolorieren:

Skin/Haut:  E21 E00 E000 R20 R30
Hair/Haare:  E42 E41 E40
Wings / Leotard / Shoes/Flügel/Anzug/Schuhe:  R81 RV00 RV000 RV0000
Tights/Strumpfhose:  E42 E41 E40
Bows/Schleifen:  B00 B000 B0000
Copic Sketch Pen/Copic Sketch Marker:  C5 C4 C3 C2 C1 C0 C00 R81 RV00 RV000 RV0000
Shading/Schatten:  W5 W3 W1 W0

The lovely papers are from Nit Wit called "Hey Cupcake"; the self-adhesive pearls are from The Hobby House and the lace, seam binding and cheese-cloth are all from my own stash.
***
Das zaubehafte Papier ist von Nit Wit und heißt  "Hey Cupcake", die selbstklebenden Perlen sind von The Hobby House und die Spitze, die Band und cheese-cloth sind aus meinem Vorrat.

I have used some Glamour Dust on her wings, leotard and tights to give her a bit of bling and the sentiment was something I made myself.
***
Ich habe Glamour Dust auf ihren Flügeln, dem Anzug und der Strumpfhose verwendet, damit sie etwas glitzert und den Text habe ich selbst gemacht.

I always try to use the same layout on the inside of the card as that of the outside like this:
***
Ich versuche immer, das Innere einer Karte genauso zu gestalten wie das Äußere.


I hope you like my card and I would like to thank Copic Marker Europe for having me as a guest designer - I am still pinching myself!
***
Ich hoffe, meine Karte gefällt euch und ich möchte mich bei Copic Marker Europe dafür bedanken, dass ich hier als Gast-Desigerin sein darf - ich kneife mich noch immer!

Enjoy the rest of your day.
Genießt den Rest des Tages.

Toodle Pip!

Tuesday, May 29, 2012

Colouring Wood of a Tree

Hi Copic Friends,
Hallo Copic-Freunde,

I have chosen today to show you how I colour the wood of a tree.  I have aimed this at beginners and am using the Make It Crafty Tree image which already has some of the shading area highlighted for you.  As I prepared this tutorial I had selected E29, E25 and E53, but you will notice as we go through the tutorial that I added E50 to the mix.
***
heute zeige ich euch, wie man das Holz eines Baumes koloriert. Ich habe das für Anfänger ausgerichtet und den Baum von Make it Crafty genommen, der hat schon einige Schattenbereiche vorgegeben. Als ich das Tutorial vorbereitet habe, hatte ich E29, E25 und E53 ausgewählt, aber ihr werdet bemerken, dass ich im Verlauf des Tutorials auch noch E50 hinzugefügt habe. 


I am going to colour in sections.  This will give the tree some depth.  If I was to start and use 3 colours directly across then the image would look very flat.
***
Ich werde in Abschnitten kolorieren. Das wird dem Baum Tiefe geben. Wenn ich mit den drei Farben gleich die ganze Fläche  kolorieren würde, würde das Motiv sehr flach aussehen.

Start by using your darkest colour E29.  The darkest areas will be at the bottom of the tree, directly underneath where the branches/leaves are and underneath the branches, as indicated by the arrows in the below picture.
***
Beginnt mit der dunkelsten Farbe E29. Die dunkelsten Bereiche werden am Fuß des Baums, direkt unter den Ästen/Blättern und im Schattenbereich der Äste sein, wie es die Pfeile im Bild anzeigen.


Blend out the E29 with E25.  This doesn't have to be neat.  Trees have varying grades of colour and broken lines.
***
Verwischt die Ränder des E29 mit E25. Es muss nicht akkurat sein. Bäume haben verschiedene Schattierungen und unterbrochene Linien.

Blend out the E25 with E53, this is a lovely golden colour.
***
Verwischt die Linien von E25 mit E53, das ist ein schöner Goldton.

Repeat the process for the second segment.
***
Wiederholt den Vorgang im zweiten Abschnitt.


 By the time I got to the middle is when I decided to add some E50.
***
Als ich in der Mitte angekommen war, habe ich mich entschieden, etwas E50 hinzuzufügen.

And this is the finished Wood of the Tree.
***
Und das ist das fertige Holz des Baums.
 

Once you have practiced you can apply this principal to any tree, even if it doesn't have the shading areas identified for you.
***
Mit ein wenig Übung könnt ihr nach diesem Prinzip jeden Baum kolorieren, auch wenn das Motiv die Schattierungen nicht schon vorgibt.

Monday, May 28, 2012

Pearls and Flowers/Perlen und Blumen


Hi there, Copic Fans!
Hallo Copic-Fans!

Has summer arrived at your home by now? Here in Germany it has! That's what inspired me for this card:
Ist der Sommer bei euch auch angekommen? Hier in Deutschland ist er da! Das hat mich zu dieser Karte inspiriert:
 Isn't she beautiful? The image is called Gardenia and the artist is Mitzi Sato-Wiuff.
Ist sie nicht wunderschön? Das Motiv heißt Gardenia und die Künstlerin ist Mitzi Sato-Wiuff.

I used these Copic Markers:
Ich habe diese Copics verwendet:
Skin/Haut: E50, E51, E02
Hair/Haare: YR14, E08, E19, E59
Flowers/Blumen: Y11, Y13, Y15, YR000, YR00, YR02
Leaves/Blätter: YG11, YG13, YG17
BG0000, BG000, BG00

I hope, I have inspired you!
Ich hoffe, ich konnte euch inspirieren!
Big Hugs
Kreativmonster/Barbara

Saturday, May 26, 2012

Let's Tag It …


 another exciting weekend …
and as always, I have a crafty inspiration for everybody …
I made a menu card … something versatile and colourful …
so let's –
Tag It! 

und schon wieder ein aufregendes Wochenende … 
und wie immer, habe ich eine "crafty" Inspiration für Euch alle... ich habe eine Menu Karte entworfen – etwas flexibel und sehr bunt…
…also los, lasst uns…
Tag It!

I love to decorate my dining table whenever I host a party …
and I always personalize the menu cards –
and this weekend I made a simple menu and name card –
Ich liebe es meinen Esstisch zu dekorieren wann immer ich ein Abendessen gebe...
und ich habe immer eine persönliche Menu Karte für die Gäste
und dieses Wochenende habe ich eine einfache Menu Karte mit Namenskarte gemacht

 
[Front]
* Tag Card
* Painted background
* Flowers and Ribbons


[Back]
* Printed Menu

 
Our guests will always have a small token to bring home…
well, I always enjoy doing it and sometimes it is a challenge…
and that is why, whenever I have something that inspired me…
I create a prototype and keep it for the next get together.
Unsere Gäste haben somit immer eine klein Aufmerksamkeit zum mit nach Hause nehmen …
mir macht das immer viel Spaß auch wenn es manches mal etwas schwierig ist und darum fertige ich immer einen Prototyp an wenn mich etwas inspiriert und somit habe ich immer etwas für das nächste Essen.


Stampavie:Katie(Sarah Kay)
Hair: E49,E59,E25,E53,E50
Face/Legs: E00,E01,E11,BV00
Dress:RV000,RV00,RV11,RV13,RV17,RV19,RV99,
Blouse: BG000,BG13,BG15,BG49
Shoes: E40,E42,E44,E47
Atyou Spica #00 Clear


So are you ready for your weekend inspiration?
Seid Ihr nun bereit für Eure nächste Wochenend-Inspiration?


Friday, May 25, 2012

Tutorial on coloring with two contrasting colors or how to color a cute apple

Hello Copic Fans,
 hallo Copic-Freunde.

Today I'll show you how to color with two contrasting colors. An apple for instance isn't always just green or just red, aren't the green ones with the red blushes the best looking? Here is how I color those:
***
Heute zeige ich Euch, wie Ihr mit zwei gegensätzlichen Farben colorieren könnt. Ein Apfel, zum Beispiel, ist nicht immer nur rot oder grün - sind nicht die Grünen mit der roten Stelle die Schönsten? Und hier zeige ich Euch, wie ich die coloriere:

Step 1: The image I have used is from Some Odd Girl and it's called Gala. I start with a layer of W-grey, I just color the image like you would normally color with W1 in the darkest places, then W0 and finally W00 on the lightest places.
***
Schritt 1: Das Motiv, das ich verwendet habe, ist von Some Odd Girl und heißt "Gala". Ich beginne mit einer Schicht W-Tönen, ich coloriere das Motiv einfach so, wie man es normalerweise auch mit W-Tönen tun würde, W1 verwende ich für die dunkelsten Bereiche, dann W0 und letztendlich W00 an den hellsten Stellen. 

Step 2: Now I decide where I want the apple to be green, I now color this part of the apple with YG01.
***
Schritt 2: Nun entscheide ich, wo der Apfel grün sein soll und coloriere diesen Bereich mit YG01.

Step 3: Next I start at the darkest areas of the apple. I color those with just a little bit of YG17.
***
Schritt 3: Als nächstes beginne ich an den dunkelsten Stellen des Apfels und coloriere sie mit nur einem bißchen YG17.

Step 4: Now I take YG05 and blend from the darkest area into the lighter area.
***
Schritt 4: Dann nehme ich YG05 um die Übergängen vom dunkelsten zum helleren Bereich zu gestalten.

Step 5: I continue with YG03, again working from dark to light.
***
Schritt 5: Ich mache mit YG03 weiter und arbeite wieder von dunkel nach hell.

Step 6: I continue with YG01.
***
Schritt 6: Weiter geht es mit YG01.

Step 7: And now I finish the green portion of the apple with YG0000.
***
Schritt 7: Und nun beende ich den grünen Bereich des Apfels mit YG0000.

Step 8: Now I color the part of the apple I want to have the red blush with YR00/
***
Schritt 8: Nun coloriere ich den Bereich des Apfels, der rot sein soll, mit YR00.

Step 9: Again starting in the darkest area of the red part of the apple I put down a bit of R05. Later on I decided that R05 was to light for me so I went in again with R08, to make things easier you could start with just a bit of R08 in this stage and then take the R05.
***
Schritt 9: Ich beginne wieder im dunkelsten roten Bereich des Apfels und trage etwas R05 auf. Später habe ich beschlossen, dass mir R05 zu hell war und so habe ich mit R08 nochmal über die Stelle gemalt. Um es einfacher zu haben könnt Ihr nur ein bißchen R08 auftragen und dann mit R05 weiterarbeiten.

Step 10: Just as with the green go from dark to light, this time with the YR04.
***
Schritt 10: Wie beim grünen Bereich auch, arbeitet von dunkel nach hell, diesmal mit YR04.
 
Step 11: Continue with YR02.
***
Schritt 1: Macht dann weiter mit YR02.
 
Step 12: And now again with YR00.
***
Schritt 12: Und dann mit YR00.
 
Step 13: And finish and blend the red portion of the apple into the green portion of the apple with YR0000.
***
Schritt 13: Beendet und vermalt den roten Bereich es Apfels in den grünen Bereich mit YR0000.
This is the final picture of the apple. I have gone in again with the same colors (and the R08 as discussed in step 9) for more depth and I have given the apple little cheeks with the same red/orange colors. I finally went in with my blender pen and added small dots with that because apples often have these little light spots. Just take your blender pen and keeping the pen vertical above the paper gently press it down on the paper for a second or four. Let it dry and repeat this until you have the right amount of bleach you desire.
***
Das ist das Bild des fertigen Apfels. Ich habe die selben Farben nochmal verwendet (plus R08 wie in Schritt 9 geschrieben), um mehr Tiefe zu bekommen, und ich habe dem Apfel kleine Bäckchen mit den selben Rot-/Orangetönen gegeben. Zum Schluss habe ich mit meinem Blender kleine Punkte auf den Apfel gemalt, denn Äpfel haben oft diese kleinen hellen Stellen. Nehmt einfach den Blender Stift, haltet ihn senkrecht über dem Papier und drückt ihn vorsichtig für ein paar Sekunden aufs Papier. Laßt das Motiv kurz trocknen und wiederholt diesen Schritt so oft, bis die Punkte die Helligkeit erreicht haben, die Ihr möchtet.
And these are my finished projects. Little apple-lollipop treats. Super simple to make and aren't these cute? I'll put a tutorial on how to make them up on my blog in a day or two.
***
Und dies sind meine fertigen Projekte - kleine Apfel-Lutscher-Geschenke. Sie sind so einfach zu machen - und sind sie nicht einfach süß? Ich werde eine Anleitung dafür in ein oder zwei Tagen auf meinen Blog stellen.
I hope I have given you some inspiration!!
***
Ich hoffe, ich konnte Euch etwas Inspiration geben.
Hugs!

Copic colors used:
Green part of apple/Grüner Bereich des Apfels: W1, W0, W00, YG17, YG05, YG03, YG01, YG0000
Red part of apple/Roter Bereich des Apfels: W1, W0, W00, R08, R05, YR04, YR02, YR00, YR0000
Eyes/Augen: W9 and BG53
Wooden part/Stiel: E89, E87, E84, E81
Leaf/Blatt: W3, W1, W0, G94, YG63, YG23, YG11, YG01

Thursday, May 24, 2012

Rose Garden Tilda


Hello dear Copic lovers!
Hallo liebe Copic-Freunde!

It's me, Kathrin, today sharing another card with you and hopefully giving you some inspiration.
***
Hier ist Kathrin und ich möchte heute eine neue Karte mit Euch teilen und Euch vielleicht eine Idee mit auf den Weg zu geben.

As you see from the post title I used Rose Garden Tilda by Magnolia here. She was so much fun to color and here's a close up of it:
***
Wie Ihr aus dem Post-Titel sehen könnte, habe ich Rose Garden Tilda von Magnolia verwendet. Es hat so viel Spaß gemacht, sie zu colorieren und hier ist eine Nahaufnahme:

  
The roses have been colored with tiny dots. This makes it easier to color them and also adds a natural look by having dark and light areas.
For the jeans I went from a very dark blue to a very light one. They look natural colored like this because if you have a look at your own jeans they are dark at the seams and light on the areas over and under the knees.
The background around the image has been made using different shades of light blue to give it a look like sky. I started with a darker shade around the image and went lighter the further away I got.
***
Die Rosen habe ich mit vielen kleinen Punkten coloriert. Das macht es nicht nur einfacher, sie zu colorieren, sondern ergibt auch einen natürlichen Look mit dunklen und hellen Stellen.
Für die Jeans habe ich von sehr dunklem Blau bis sehr hellem Blau alles verwendet. Wenn Ihr Eure Jeans anseht, werdet ihr feststellen dass auch sie an den Nähten dunkel und an den Oberschenkeln hell sind.
Und für den Hintergrund, der wie Himmel aussehen sollte, habe ich verschiedene Töne hellen Blaus verwendet, dunkler direkt am Motiv und nach außen heller werdend.

These are the Copics I used:
***
Das sind die Copics, die ich benutzt habe:

 
And now I am wishing all of you a wonderful sunny day!
***
Und jetzt wünsche ich Euch allen einen tollen, sonnigen Tag!


Wednesday, May 23, 2012

And the Henry-Candy-Winner is...


...29. Elvira!

Herzlichen Glückwunsch zum Gewinn dieser zauberhaften Stempel von Whiff of Joy! Bitte setz dich mit mir unter kreativmonster@googlemail.com in Verbindung, damit ich deine Anschrift an Katharina Frei weiterleiten kann.
***
Congratulations on winning these gogeous stamps from Whiff of Joy! Please contact me via e-mail to kreativmonster@googlemail.com, so that I can forward your address to Katharina Frei.

Ganz viel Spaß mit den Stempeln!
***
Lots of fun with the stamps!

Big Hugs
CME Design Team

Tuesday, May 22, 2012

Hair colouring tutorial

Hi, Copic fans!
Hallo Copic-Freunde!

Today I'm going to show you some colour combinations for hair. There are a lot of combinations you can use for hair colouring. I decided to use my E tones for this tutorial, except one of the combinations. It's simply because these are the colours I use most.
***
Heute zeige ich Euch einige Farbkombinationen für Haare. Es gibt viele veschiedene Kombinationen zum Colorieren von Haar. Ich habe mich entschieden, für dieses Tutorial die E-Töne zu verwenden, mit Ausnahme einer der Kombinationen. Einfach, weil dies die Farben sind, die ich am meisten verwende.

I usually colour from light to dark when I colour hair. It works best for me.Others like to colour from dark to light. The  important thing is that you have fun with your way of colouring.
***
Normalerweise coloriere ich Haare von hell nach dunkel. Das fällt mir am leichtesten. Andere colorieren lieber von dunkel nach hell. Wichtig ist, dass Euch Euer Weg zu colorieren Spaß macht.

The image I've used for this tutorial is Tilda with Peony. I've  also used the same skin colours in all the examples:
E0000-E000-E21-E11-E93
***
Das Motiv, das ich für dieses Tutorial verwendet habe, ist Tilda with Peony. Ich habe für alle Beispiele die gleichen Hautfarben benutzt:
E0000, E000, E21, E11, E93 

Let's start!
***
Laßt uns anfangen!


This combination gives you a dark brown hair with golden stripes. One of my favourites!! I often use this when colouring Magnolia images.
***
Mit dieser Farbkombi erhaltet Ihr dunkelbraunes Haar mit goldenen Strähnen. Eine meiner Lieblingskombis!! Ich verwende diese oft, wenn ich Magnolia-Motive coloriere.


This gives a golden blond look.
***
Diese Kombi ergibt einen goldblonden Look.

The E40 tones also gives you dark brown hair, but no golden look.
***
Die E40-Töne ergeben ebenfalls dunkelbraunes Haar, aber ohne den goldenen Touch.

I think this combination is well known to those who have had Copics for a while. I use this a lot when colouring light blonde hair.
***
Ich denke, diese Kombination ist all denen sehr gut bekannt, die ihre Copics schon eine Weile haben. Ich verwende diese Kombi oft für hellblondes Haar.

This combination also gives dark brown hair. Also a favourite for my Magnolias!
***
Auch mit dieser Kombi erhaltet Ihr dunkelbraunes Haar. Auch dies ist eine meiner Favoriten für Magnolia-Motive!
 

 Finally, I will show you this combination for red hair. I learned this combination when I went to a Copic certification class. It's fantastic!! It's my first attempt with these colours and I'm pretty happy with the result. I will definitely use this combination again.
***
Zum Schluss möchte ich Euch diese Kombination für rotes Haar zeigen. Ich habe diese Kombination kennen gelernt, als ich an einer Copic Certification Class teilgenommen habe. Sie ist fantastisch! Es ist mein erster Versuch mit dieser Kombination und ich bin mit dem Ergebnis sehr zufrieden. Diese Kombi werde ich auf jeden Fall wieder verwenden!


I hope this little tutorial gave you some inspiration. Just grab your markers and have fun!
I wish you a great day:)
***
Ich hoffe, dieses kleine Tutorial gibt Euch etwas inspiration. Also schnappt Euch Eure Marker und habt Spaß!
Ich wünsche Euch einen tollen Tag :) 
 
Hugs,
Hanne