Dear Copic fans!
***
Liebe Copic-Freunde!
Today Iwant to show you how you can make beautiful, colorful backgrounds in like no time by working directly on a big stamp. I learned this technique by Diny.
***
Diesmal möchte ich euch zeigen, wie ihr schnell schöne, farbliche Hintergründe zaubert, in dem man direkt auf einen großflächigen Stempel arbeitet. Diese Technik habe ich bei Diny gelernt.
This is what you need:
***
Dazu benötigt ihr folgende Materialien:
a stamp with a big surface - round or square, glossy paper, two or three different Copic markers, Copic Activator and for stamping afterwards Archival Ink or StazOn and a stamp with a smaller image.
***
einen großflächigen Stempel - rund oder eckig, Glossy-Papier, zwei bis drei verschiedene Copic-Stifte, Copic-Activator und danach zum Abstempeln Archival Ink oder StazOn und einen Stempel mit einem kleineren Motiv.
First color a part of your stamp with one of your Copics markers. I went with V15 here.
***
Zuerst wird mit einem Copic Stift ein Teil des Stempels coloriert. Hier habe ich V15 gewählt.
Then color the rest of the stamp with a second color (BG 96).
***
Danach mit der zweiten Farbe (BG96) den Rest des Stempels ausmalen.
Then spray some of the activator solution over the colored stamp - don't make it too wet. If you want to you can turn the stamp a bit to mix the colors and...
***
Anschließend mit dem Aktivator den Stempel (nicht zu nass) besprühen. Eventuell den Stempel leicht drehen, damit sich die Farben miteinander mischen und...
stamp immediately on the glossy paper - press down the stamp hardly.
***
sofort auf dem Glossy-Papier abstempeln und fest andrücken.
If the color was too dry you can repeat these steps which creates a new look again.
***
Falls die Farbe zu "trocken" ist, kann der Vorgang auch wiederholt werden. Dadurch entstehen wieder neue farbliche Hintergründe.
Let the paper dry and stamp a small image on top of it using Archival Ink or StazOn. Here I used a stamp by Heindesign that stamps four different trees.
***
Das Papier gut trocken lassen und danach mit Archival Ink oder StazOn ein kleines Motiv stempeln - hier habe ich den Stempel von Heindesign mit vier verschiedenen Bäumen gewählt.
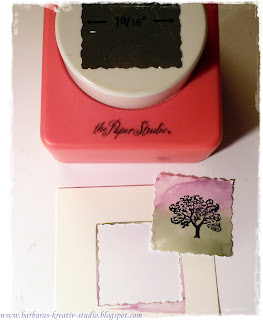
It's best to punch or cut out the image.
***
Am besten ist es, wenn das Motiv ausgestanzt oder ausgeschnitten wird.
Here are a few other samples using different colors and stamps.
***
Hier noch einige andere Musterbeispiele mit verschiedenen Farben und Stempel.
And here are the finished cards - I went with 4" x 4" as the card size.
***
Das sind jetzt die fertigen Karten. Ich habe als Kartengröße 4x4 Inch gewählt.
On this sample I additionally added some script to the image using Mica Gloss Old Gold and afterwards I embossed two times with Amazing Glaze. Here I used the markers # BV04, E77 and YG23.
***
Bei diesem Muster habe ich noch zusätzlich eine Schrift auf das Motiv mit Mica Gloss old gold gestempelt und anschließend mit Amazing Glaze zwei Mal embossed. Dazu habe ich die Copic-Farben BV04, E77 und YG23 verwendet.
Just give this a try!
***
Probiert es einfach mal aus!
Herzlichst Barbara


7 comments:
Thank you!
hallo barbara
wat een geweldig duidelijke uitleg en een verrassend mooi resultaat,dan ke wel!
groetjes van corry
leuk:-) ik vraag me alleen waar ik de activator kan kopen??
Hi,
Nice idea ! I love that you get a different result each time.
Helga
It looks great i must try this again to.
Hugs Erna
love this technique ... projects are really cute and versatile ... can just add it easily as embellishments.
That is a pretty idea :)
Post a Comment