Followers

Monday, June 22, 2020

Melons, Strawberry, and Blueberries Color by Cicci

Hi Copic Lovers 
Cicci here posting today I'm going to color some melons and strawberries!!
It's summer, and summer for me is lots of strawberries and melons

Step 1
Draw the strawberries and melons

Step 2
I started to color the shell 
I started with G29 and YG17 blend with YG03
Add all 3 colors again and blend a lot with YG03

Step 3
Add R14

Step 4
Add R29
Also on the strawberries

Step 5
Add R35 
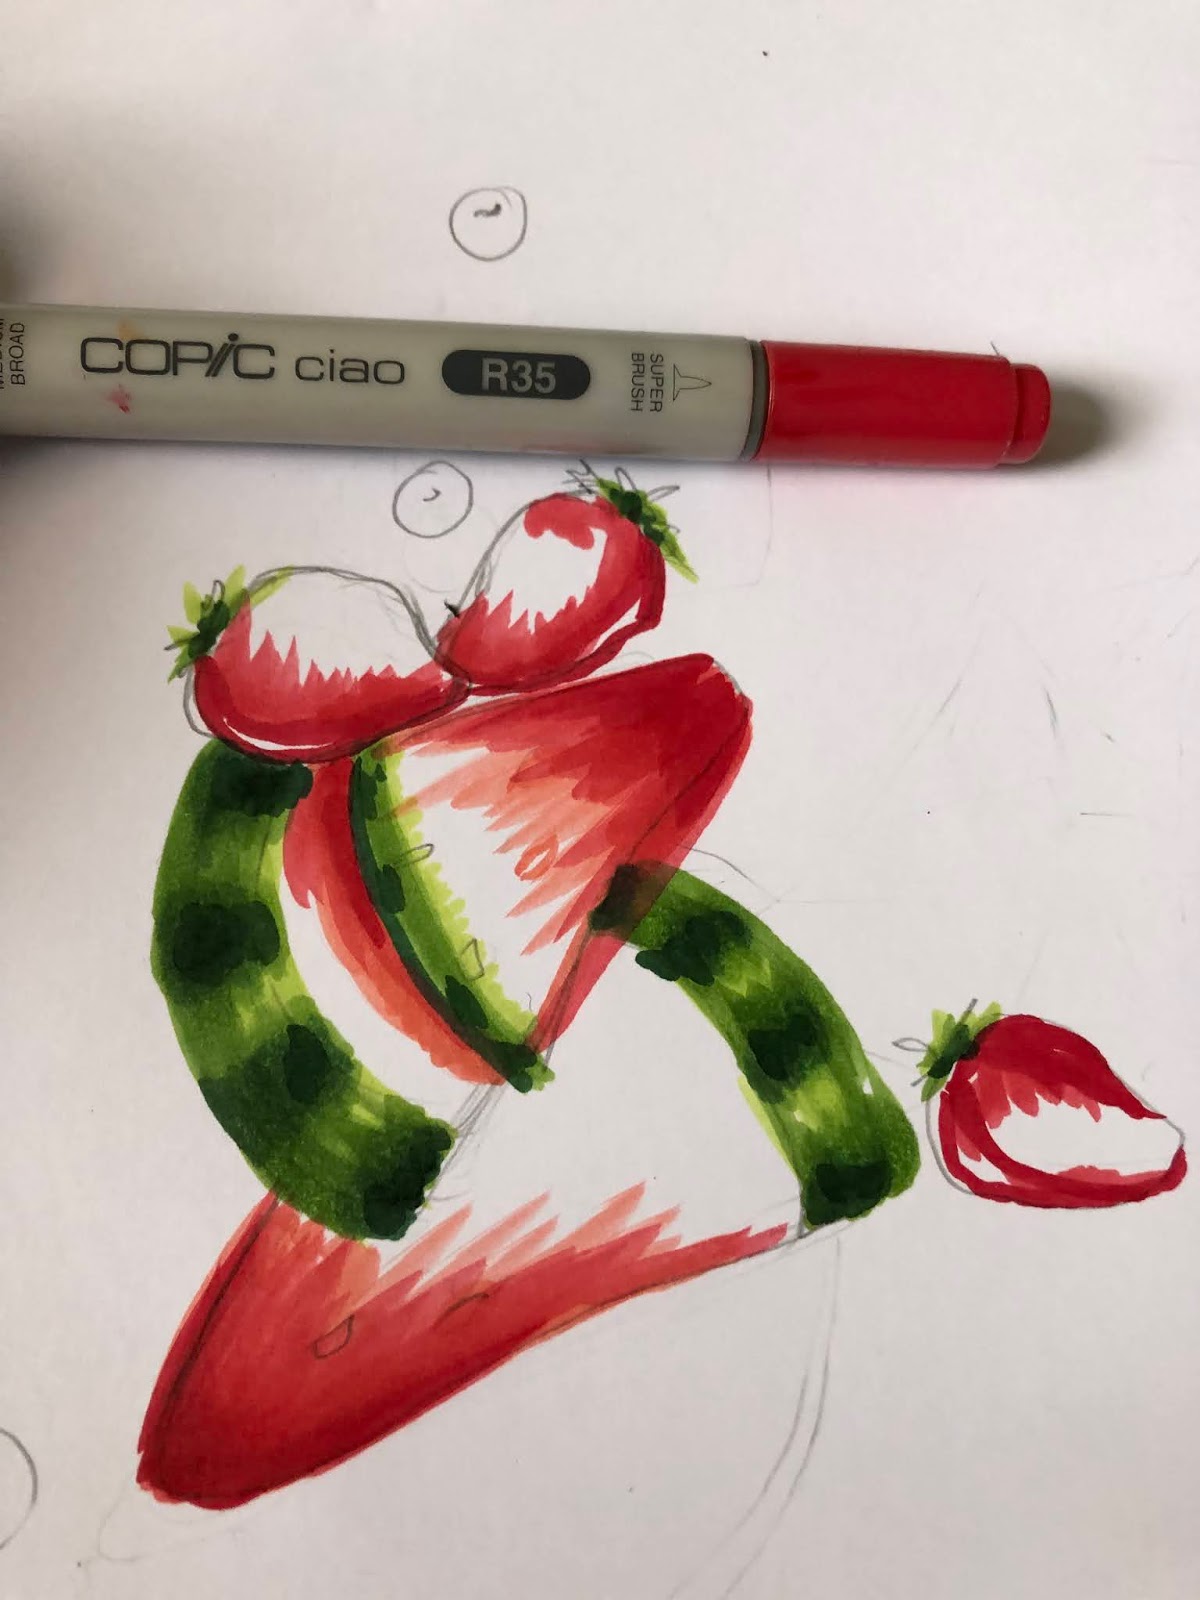
Step 6
Color with YR07

Step 7
Add Y02 to the strawberries

Step 8
Blend with YR02 on the strawberries

Step 9
Add E93 

Step 10
Add R89
And I have added some highlights with a Gel pen

Step 11
Add more of all the colors one more time in the same way 

 Step 12
Color the blueberries with B39, B95 and blend with B000

DONE!!


 Have a wonderful Day Everyone!!
See you in July

Lots of Hugs and Smiles from Us at Copic Europe
Cicci 

Thursday, June 18, 2020

Purple and Peach Video


Hello everyone! It's Delphine here today to share a colouring video, featuring purple and peach Copics, and a beautiful image by Tiddly Inks called Everyday Magic.

Here is my finished card:


You can see the video of the colouring process below, and then a few explanations :


- For the background, I used my lightest colour as I could have used the blender to prepare and wet my paper which makes it easier to blend and achieve smooth colouring.
- For the hair, I like adding another colour when I colour black hair, a V or BV works well and gives a richer colour to the hair. Instead of leaving white highlights, you can see I added touches of peach using a colour from my background.


Skin: E11, YR000, 00, V25 (RV02 for cheeks)
Hair: 100, BV04, C7, E93
Dress: BV08, 11, 13, 17
T-Shirt: BV000, 00, 01, C3
Wings: BG000, BV00, V000, YR000, 0000
Flowers: B41, RV42
Leaves: BV08, 11, 17
Background: E93, R00, 01, RV42

Once all the colouring was done as shown in the video, I stamped heart leaves from a Penny Black stamp in black ink - I think you get a striking contrast and nice result when adding black to a coloured background.
As a final touch, I added Wink of Stella to my fairy's wings.


Thanks for stopping by today! Hugs,
Delphine xx

Friday, June 12, 2020

Gorjuss Bubble Fairy with Video


Hi all,

Today it is my turn..
I have coloured up my new Gorjuss stamp, it is called bubble fairy and it is quite a big size.

I have stamped it with Memento Tuxedo Black onto Perfect Colouring Paper
and have started to colour the skin with E51, E53, E33


Afterwards I have coloured the wings with B0000, B000, B00


Her dress was coloured with B60, B63, B66, B69, B79


For the colouring of her hair I have  made a speed colouring video


Hope it was fun to watch. I have used these colours YR21, YR24, E18, E29, This is a great hair colour combo - at least I love this one .    


 The stockings with C0, C3, C5 , gelly roll pen white 
                                         

her boots with B60, B63, B66, B69


Some details on her dress with stardust rolly pen, white rolly pen.
On the wings I have added some glue with a quikie glue pen and sprinkled some glitter on top...


The background shadowing with BV0000, BV 000, BV 01


In the same stamp set there are some smaller stamps too,
like these stars which I have added with some Memento Danube blue ink.


I has become a cover of a kind of book..
I have used a Crealies die to cut the stitched tag shape, and the strapped pages edges were cut with a die from Joy.

Some ribbons and it is ready..


Thanks for your visit, I would love to receive some feedback.
Hugs Blankina

Friday, May 22, 2020

Cicci Colors some Blueberries

Hi friends!
Cicci here today posting for you. 
Today I'm going to show you how I did some blueberries


I have used this copic Markers
B000
B99 95 41 45 37 39 BG02 BG72

Step1
Draw a blueberry with some light Markers
I have used B000 


 Step 2 
add BG72 for some green touch  in the coloring


Step 3
Add B37 


Step 4
Add B39


Step 5 
Add and  blend with B41


Step 6
Add and blend with B45


Step 7
Add and blend all color together with B93


Step 8
Add more of B39 


Step 9
Add and blend with B45


 Step 10
Add more of  B99 and blend witb B95 and B45 B41
I also added some light  blue I used BG02 

You can work more to make the color go together if you like, I'm going go do some more blueberries now and I hope you also try to make them.

Have a Wonderful day
Hugs and Smiles from us here at Copic Europe Blog


Monday, May 18, 2020

Black and White Video plus Tips!


Hello everyone! It's Delphine here today sharing some black and white... and a video! I thought I would share a few tips about colouring monochrome and you will also find the recording of the colouring process below.

For my card, I used Make it Crafty Maiden Emoni, one of the Medieval Ladies, so I thought playing with a bit of black and white for ancient times would be nice :)

Here is the finished card :


I cropped my image and printed it on an SMLT bristol haiku card. I added some washi tape to keep a white margin around my image and then coloured everything using the N range - N0, 2, 4, 6, 8, 10.

Here is the video of the colouring process, and then a few explanations and tips :)


A FEW TIPS: 
- If you don't have the N family, you can easily achieve the same result using another grey family fom the Copic range.
- If you only own Ciaos and no Sketches, you can use odd numbers (plus 0 or 00) from the C or W family and add black 100 as your darkest colour, it works very well too.
- The order I coloured the different parts is:
1. Skin: N0, 2, 4 (0)
2. Background: N2, 4, 6
3. Clothes: N0, 2, 4, 6, 8
4. Hair: N4, 6, 8, 10
5. Details

- Start colouring using light colours, you can always go darker, it's more difficult to correct your colouring to make it lighter, it's also why I start with the skin, and choose and build the colours from there.
- Make sure the parts that are side by side are not in the same tones - so a light area, next to a dark area - alternate between light and dark.
- Think about shadow and light when colouring, it's even more important than usual, when playing with a limited number of markers and black and white - and it's a very good exercise ;)
- Don't force yourself to colour everything, don't be afraid to leave some white areas for highlights, it will give depth to your image!


Thanks for stopping by today! Hugs,
Delphine xx

Tuesday, May 12, 2020

A special mixed media gift midori & card


Hi all Copic friends,

How are you?
Here in Italy we still have to stay at home so I have done a lot of colouring lately :) 
and have tried new things too. Today I show you one of these "new"  things.

I have a fun die from Studiolight to make booklets/album or midori, instead of leather for the cover  I wanted to try something different .
So I have used the Transotype Synthetic Paper !!


With the die I have cut the shape

+

On the TSP I have used a pretty butterfly stencil from Kraftin Kimmie and with a spatula I have added some glitterpaste. ( Ferrario -  malta glitter iridescent ).

After drying I have played around with some Various inks ( refills ), just let drops of ink and blender fall on the TSP  and with a little tool I have blow the ink. You could also use a hairdryer ( cool air ).


this was the result

When everything was dry I have added some paper on the outside and inside, ribbons and an elastic cord to keep everthing together.


It almost looks like a little purse , doesn't it? 

Please watch the video to see the rest....


Copic used :
Refills ( Various Ink ) : V 12, E 70, RV 10, R 81, blender "0"

Card : 
Animal : E 70, E 71, E 74, E 79, W 7
Cheeks /inside  ears : E 04, E 70, E 71
Accents : gelly roll white
Background : B 000, B 02, B 05, RV 10, RV 13, V 12
Edges : E 70, E 74, E 79
Grass : YG 91, YG 94
Flower : RV 10, RV 13, YG 91, YG 94

A sweet gift idea..hope this post will inspire you to try something like this too!

Thanks for your visit here on the blog, in case you would like to see more videos from my cards and creations. I suggest you to follow me on you tube: blankinacreations on video

Hugs Blankina

Tuesday, May 5, 2020

Two-tone Tulip

Hi everyone! Today I am sharing a two-tone colouring of a tulip. The tulip stamp and the sentiment stamp are both from Stamping Bella


For the stem I used YG01, YG21, YG23 and, the for the darkest areas, YG17


I started with my yellow mid colour, Y13 and flicked inwards from the edges, just to get an idea of where I wanted the red to be. 


With R35 flick outwards from the centre, leaving a line up the middle. 


Apply some Y38, again, in a flicking motion, to the edges of the R35


Apply R37 to the centre of each petal


Go back in with Y17, blending the colours


Use Y11 around the edges. Apply some red up the centre of the yellow strip and blend out using Y15 and Y13. 

Repeat the application of  the colours until you are happy with the tone and the shading/blending. 


Finally, use the blending marker to get rid of any colour that bled outside the lines, and add some white gel pen for highlights. 


Stamp the sentiment under the tulip and make a DL card measuring 100mm x 210mm


Thanks for dropping by
Sandie
xXx