Followers

Showing posts with label CC Designs. Show all posts

Sunday, January 28, 2024

Grouchy Cupid

Hello there!

Soon it will be Valentine's Day and I would love to inspire you to make that card for someone loved.
I´ve used the stamp "Grouchy Cupid" from CC.Design Stamps.


I stamped my image on Perfect Colouring Paper, using Memento Ink.


Fur: Y21.


Fur: YR24 - Y26 - W5


Eyes: B000 - 0 Blender, YG00 - YG63
Diaper: BG70 - BG72


Wings: BG70 - BG72
Bow: E31 - E35 - E37
Hearts: R24 - R37


I didn´t like how the cat stands on top of the clouds, I wanted the clouds to enclose the paws,
so I had to make another one :P.


I masked the legs before stamping the image.
First layer of fur: C1


Cheeks, ears and nose: R11 - R22


Second layer of fur: C3


Details in the fur: C5
Eyes: B000 - 0 Blender


Eyes: YG00 - YG63
Diaper: B000 - B00 - 0 Blender
Bow: E31 - E35 - E37
Hearts: R24 - R37
Wings: B70 - B72 - 0 Blender


For the clouds I used a stencil from MFT Stamps and Distress Ink.
And I´m happier with how the cat stands in the clouds now.


Hope to see your Valentines cards uploaded to our Facebook.

Wish you all love and chocolate til next time!
/Helen


Tuesday, February 28, 2023

Snowman with Bird

Hi there.
Hope you all are fine today!

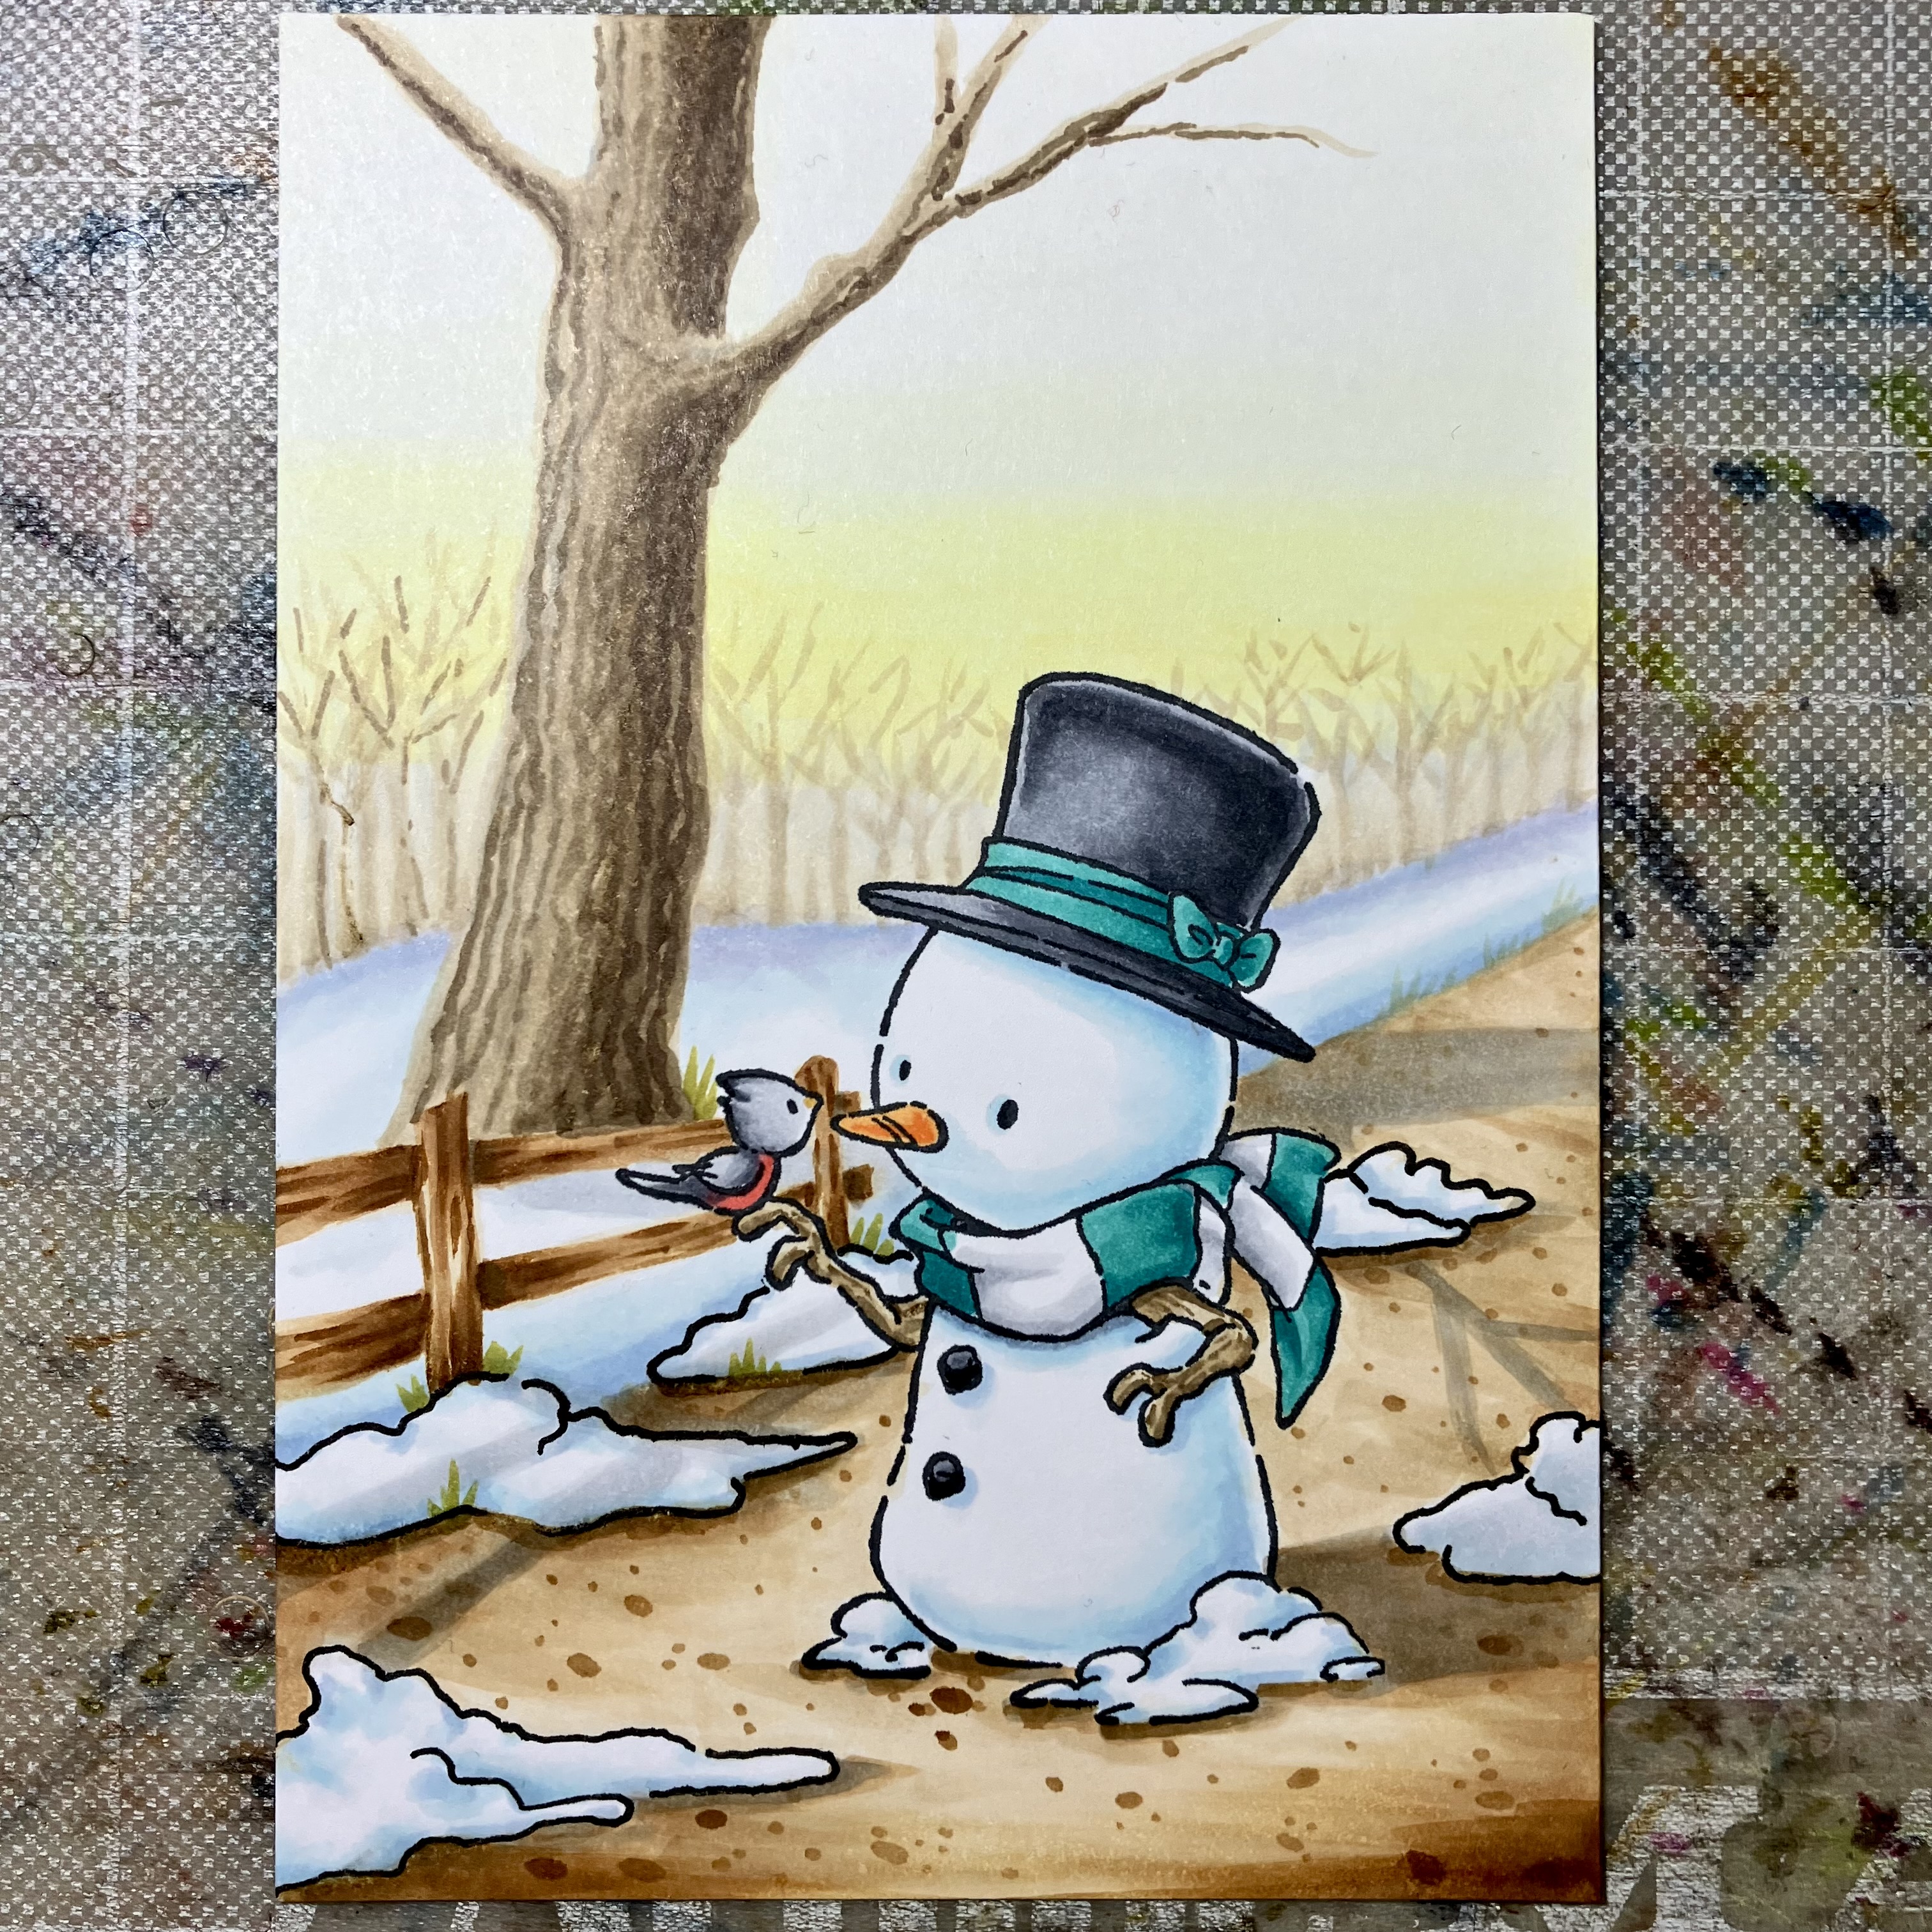
Helen here, and today I will show an image from CC Design, Snowman and Bird.
I got it as a rubberstamp, but you can get it as a digital stamp from Whimsy Stamps today.

As always I stamped the image on to Perfect Coloring Paper with ink from Memento.


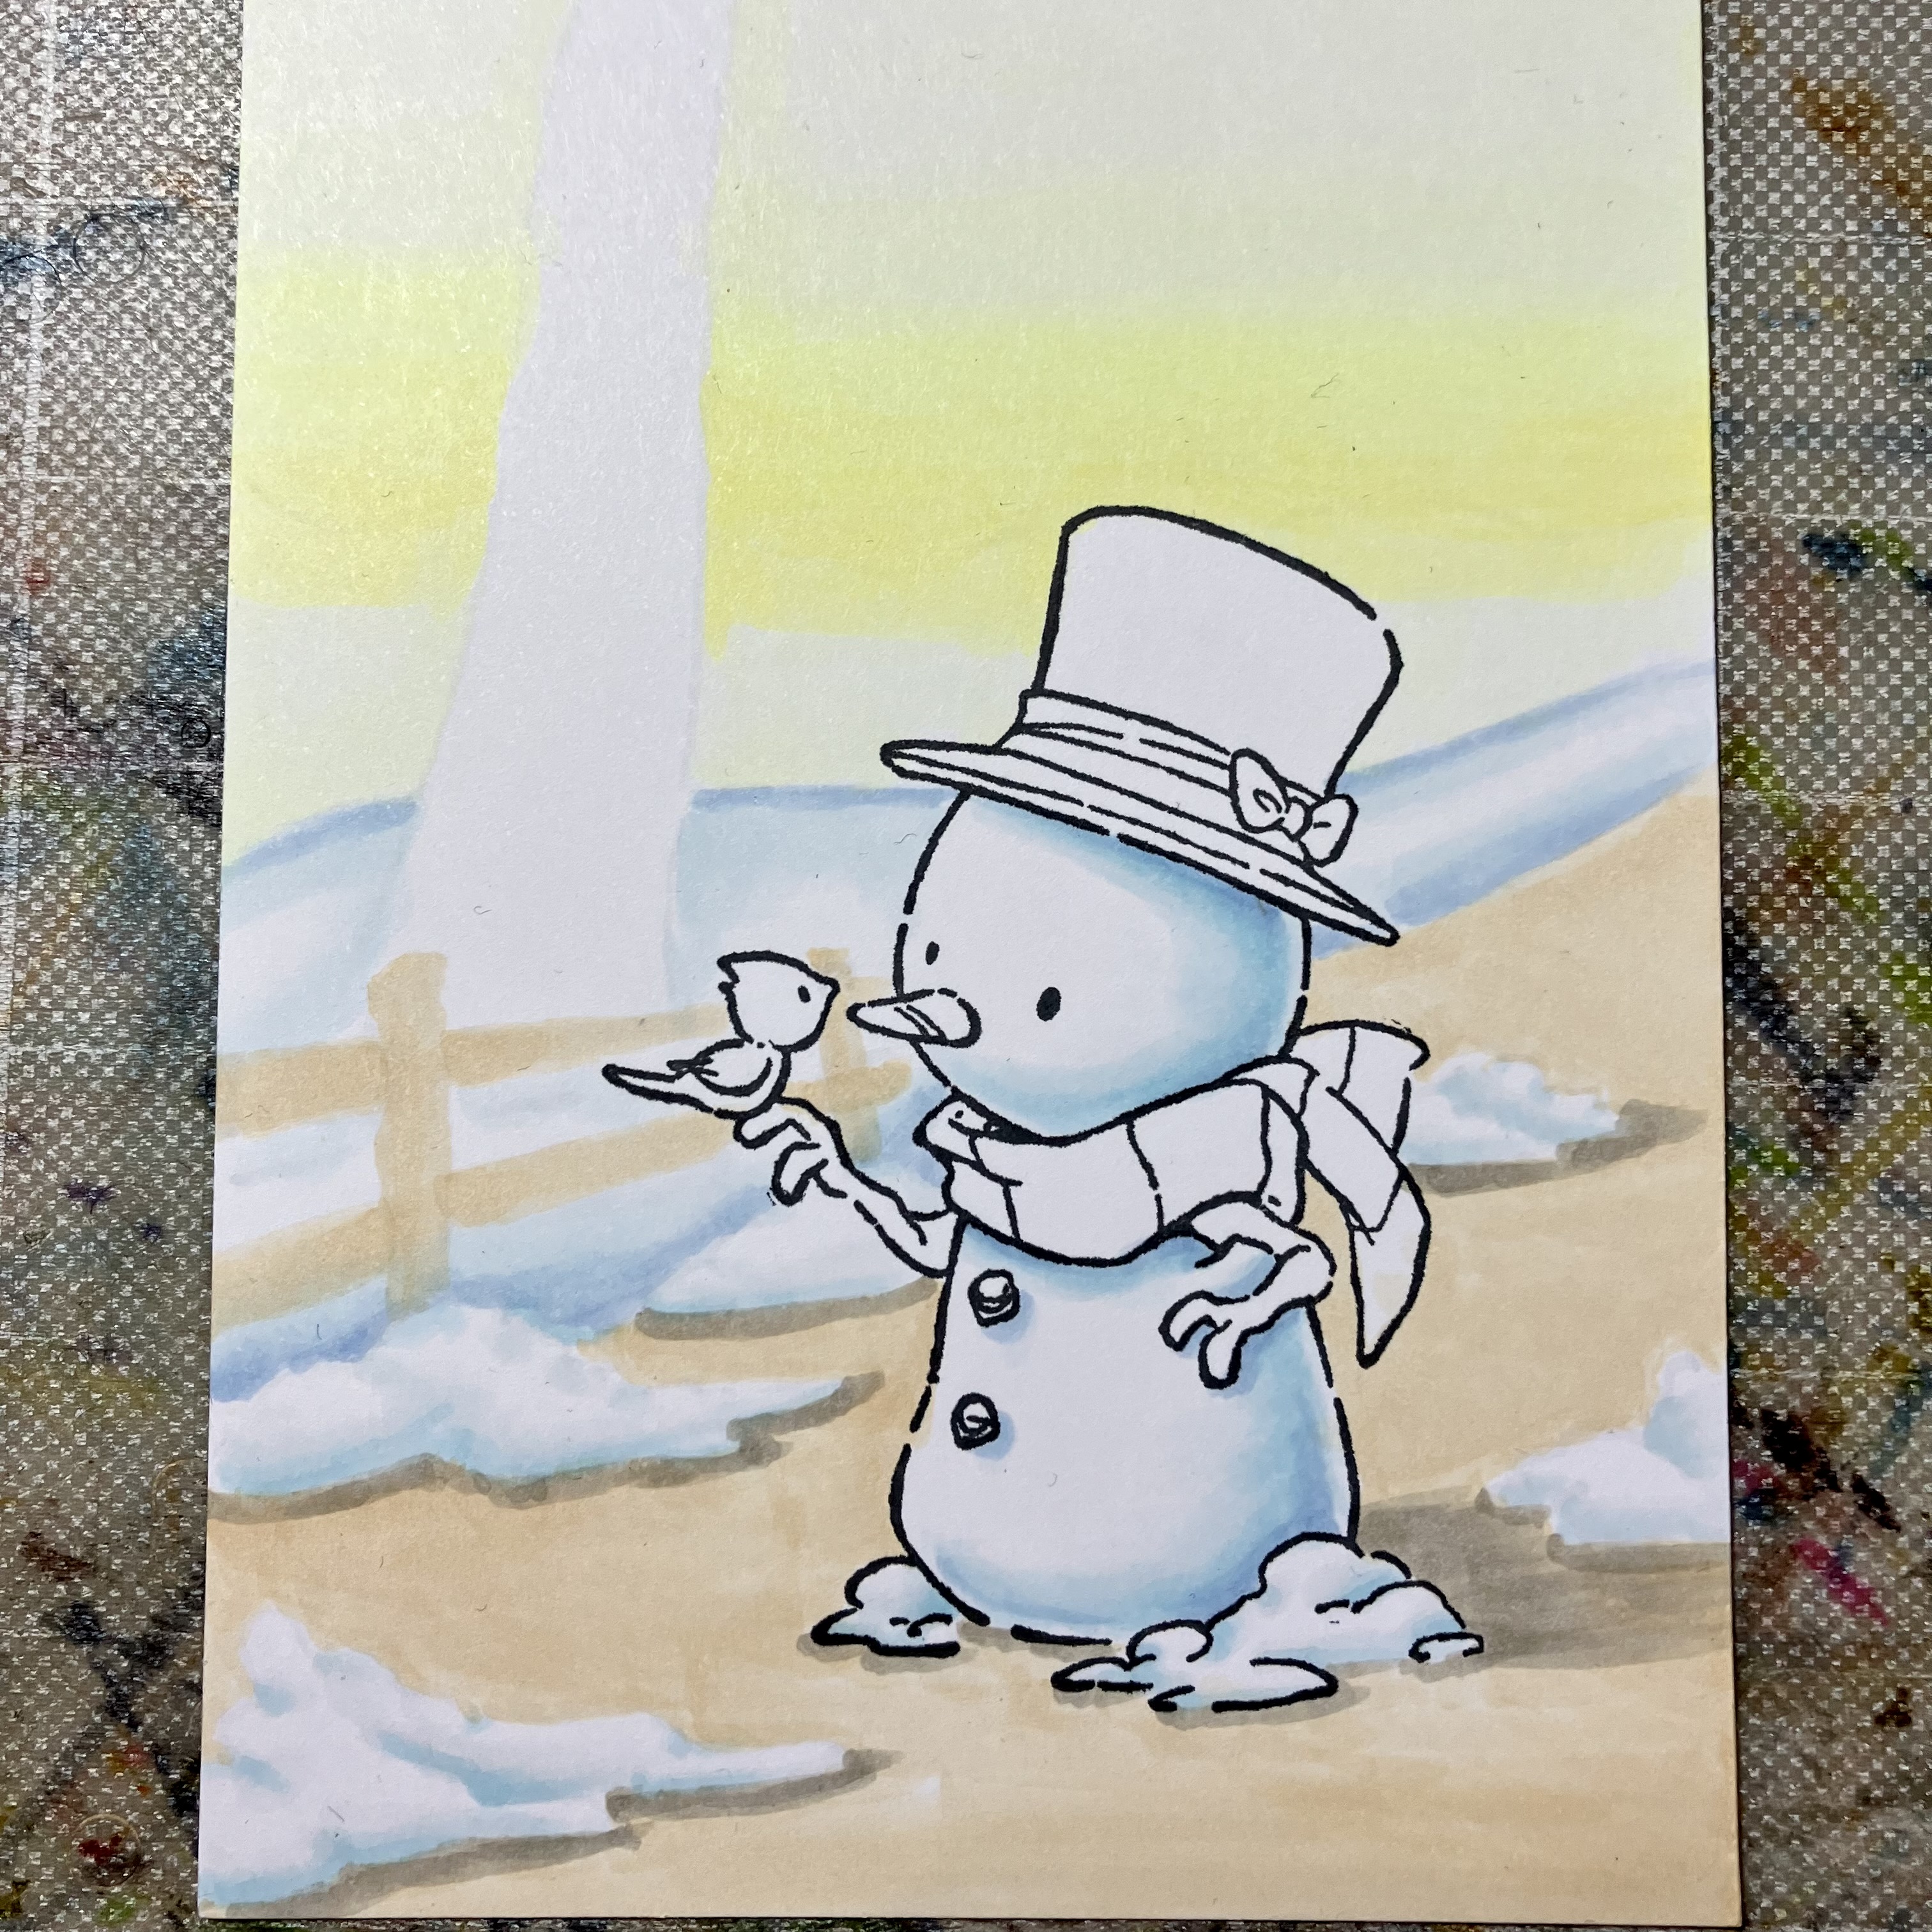
Started off by sketching in the background using C0.


The snow got B70 - B0000 - B000 - B45


The sky got Y000 - Y11 - Y00


The first layer off the ground got E30, and shadows W3.


I outlined the piles of snow with a multi liner.
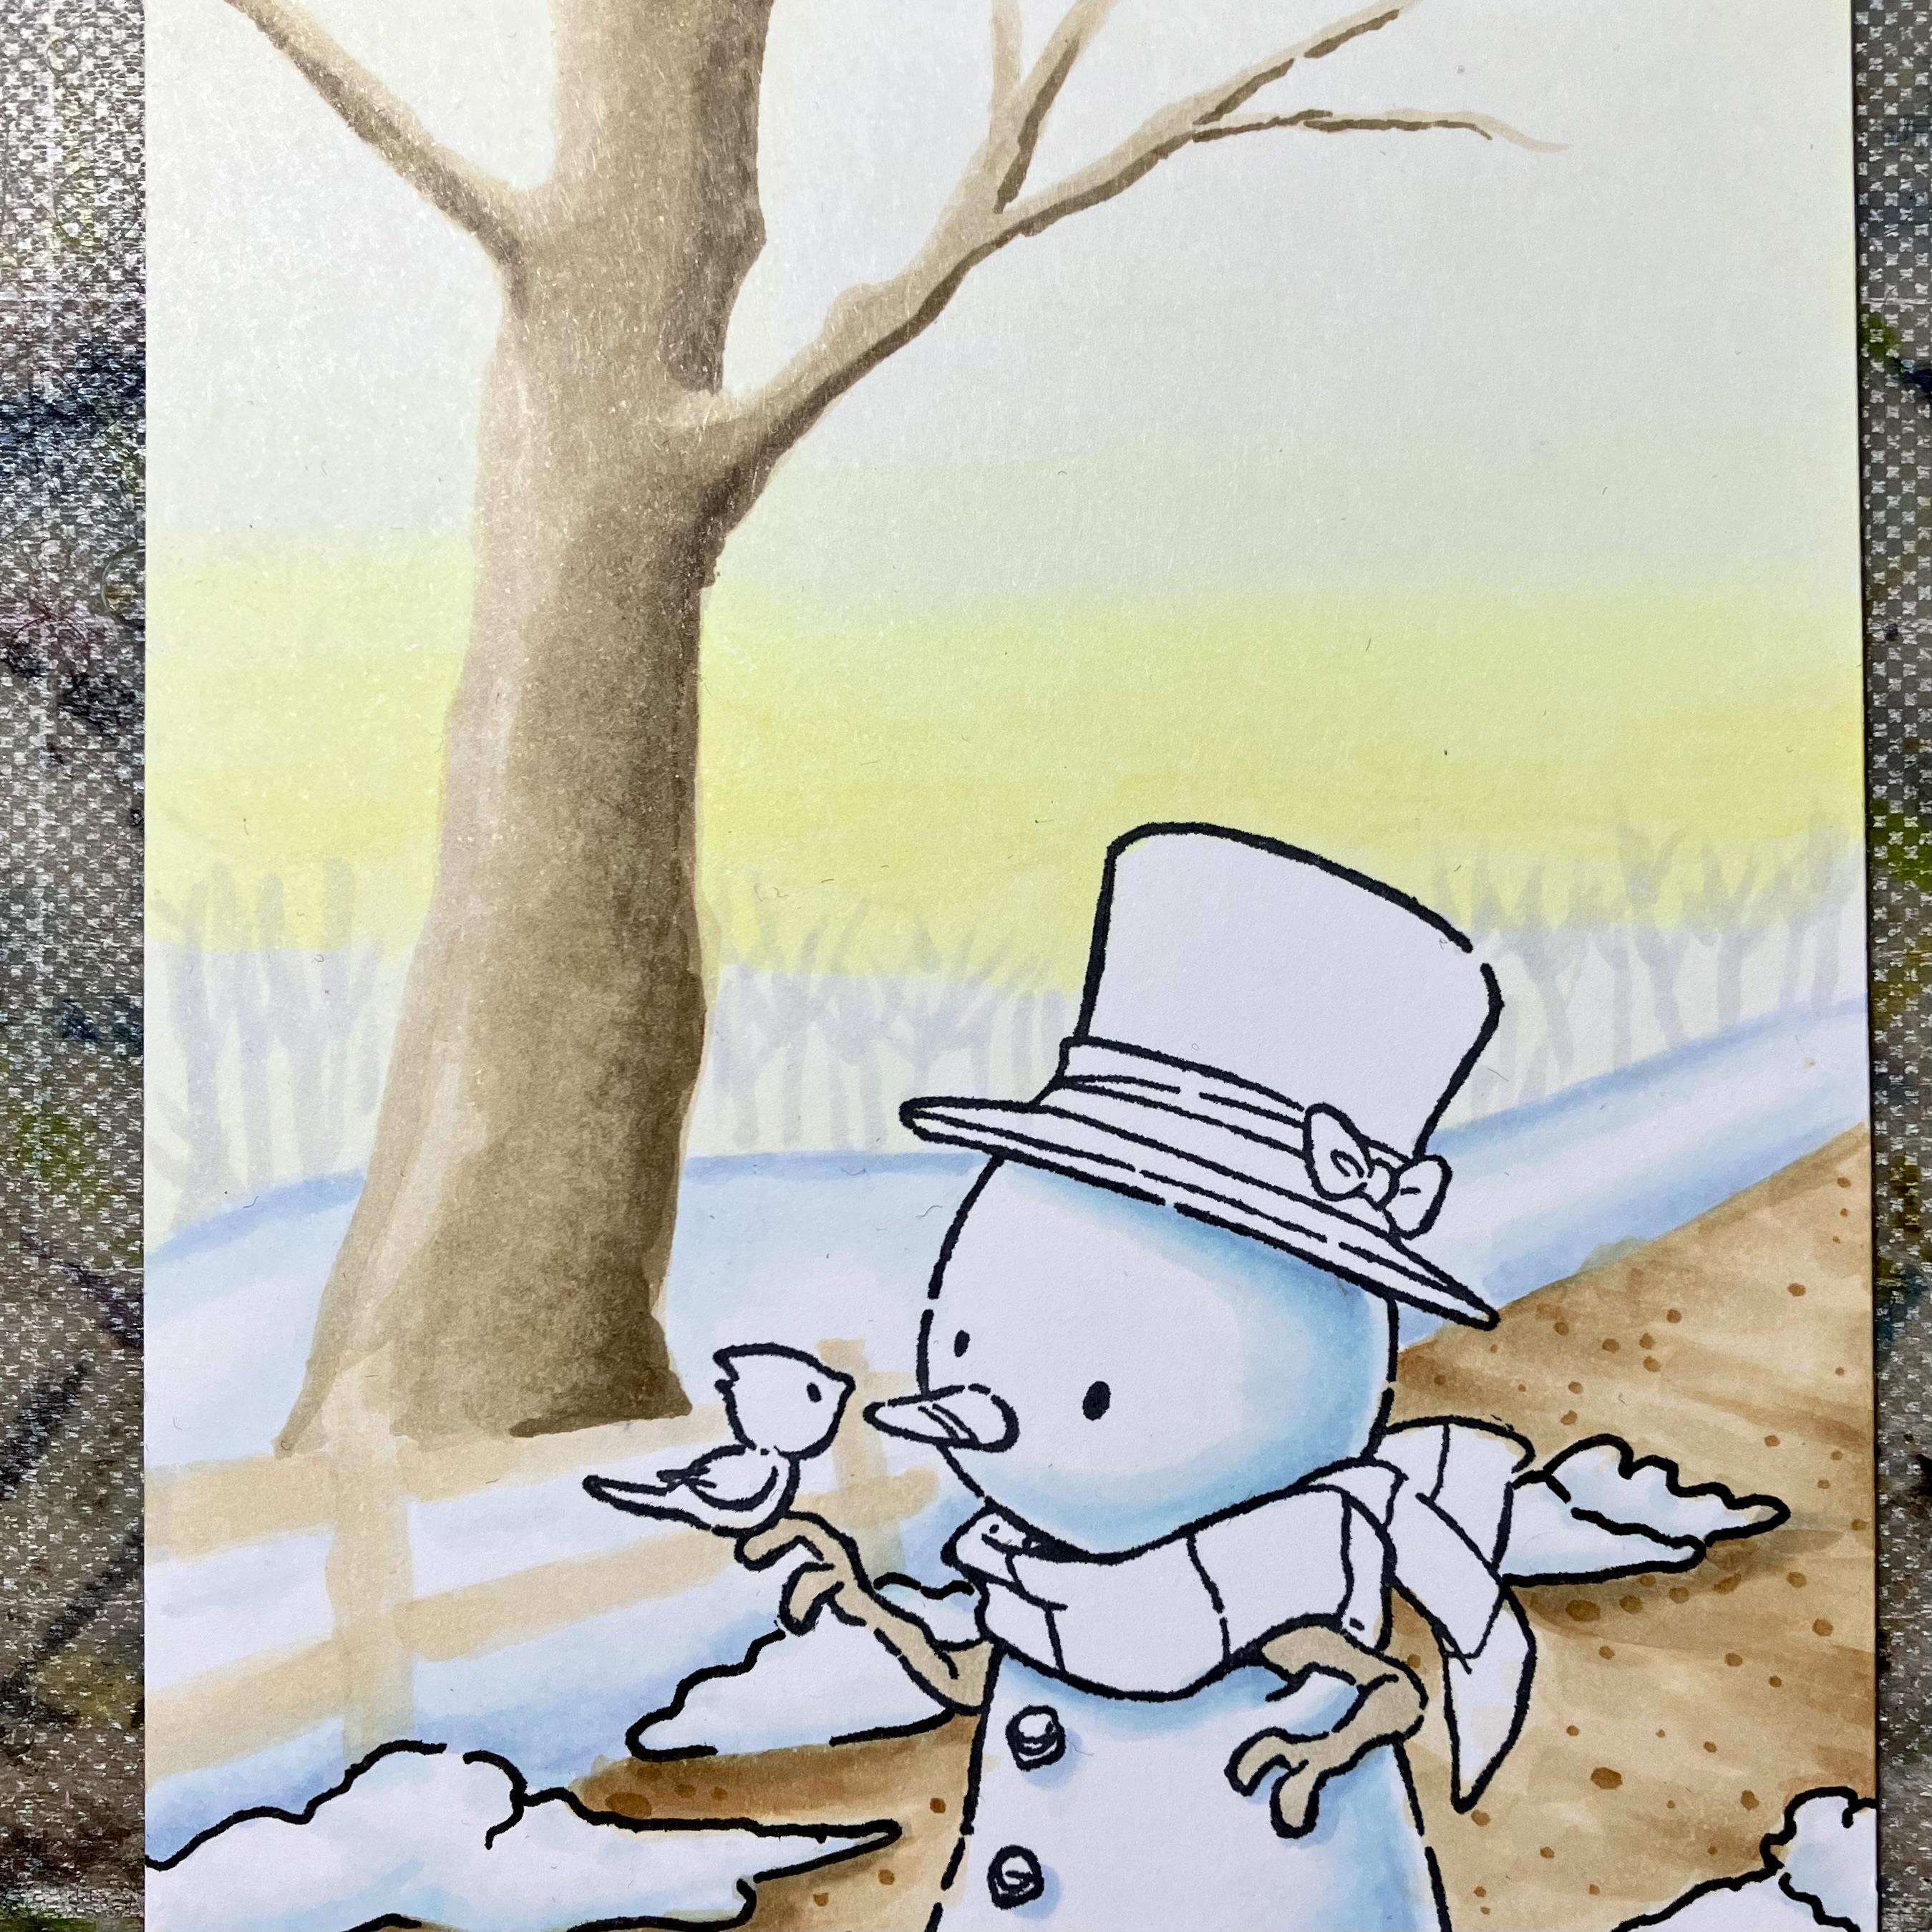
The ground got E31 - E33 - E35 - E37


The first layer of the tree was E42.
The first layer of the fence was E30.
Sketched a line of trees in the background with C1.


The darkest area of the tree is E47 and the mid-tone is E44.


Scribbled in the bark of the stem with E47 and W3.
I used the very tip of the nip with light pressure, and randomly I got heavier pressure to get the pattern for the bark. The fence got layers of E33 - E35 - E37 - W5


Smoothed the bark pattern out by going over it with E44 - E42.
The shadow on the tree is E47.


The hat and buttons got C3 - C5 - C7
The carrot got YR14 - YR07
The snowman's arms has the same color as the tree.


 The bird got C1 - C3 - C5 - R24
The scarf and the ribbon got BG13 - BG49 -  C1 - C3
And the ground and snow got some shadows from the tree and fence with W3 - C1.

I made an inventory among my stamps and I got a lot of different snowmen and I just want to color them all. Maybe there will be a snowman next time as well...

Have a nice, copic coloring day!

Tuesday, May 16, 2017

Sweet Birthday Wishes

Hi everyone! It's Sandie here today with a card I made featuring the super sweet C.C. Designs stamp, Swiss Pixie Rose with Balloon


I stamped the image onto Perfect Colouring Paper with Memento Tuxedo Black ink. 


To colour Rose I started with the skin, using E000, E00, E11, R20. 


For the hair I used E50, E51, E53, and applied some E33 as my darkest colour. 


For the colouring on the clothing I used my favourite pink colours R81, R83, R85 and R39. 


On the balloon I used Y13, Y15, Y17, Y19. 


and for the shoes, E42, E43, E44. C1, C3, 0


I added some shadows to the white areas using cool greys, C1 and C3. The cool greys have always been my go-to greys, but recently I bought the Neutrals (N) and I am just loving them. I will definitely be using them more. 

I like to melt the C1 and C3 together with the colourless blender. 


I applied white gel pen to make the little dots on her dress, and for the highlight on the balloon and shoes. 


I also added some 'ground' underneath her feet, using the C1, C3 and colourless blender, but the sentiment covers most of it up. 


Thanks for dropping in today. I hope it inspires :)
Sandie

Friday, February 10, 2017

Super Unique

Hi everyone! 

It's Sandie here with my very first post for Copic Marker Europe and today I am sharing a card I made featuring a C.C Designs Stamp - Super Hero Birgitta. 


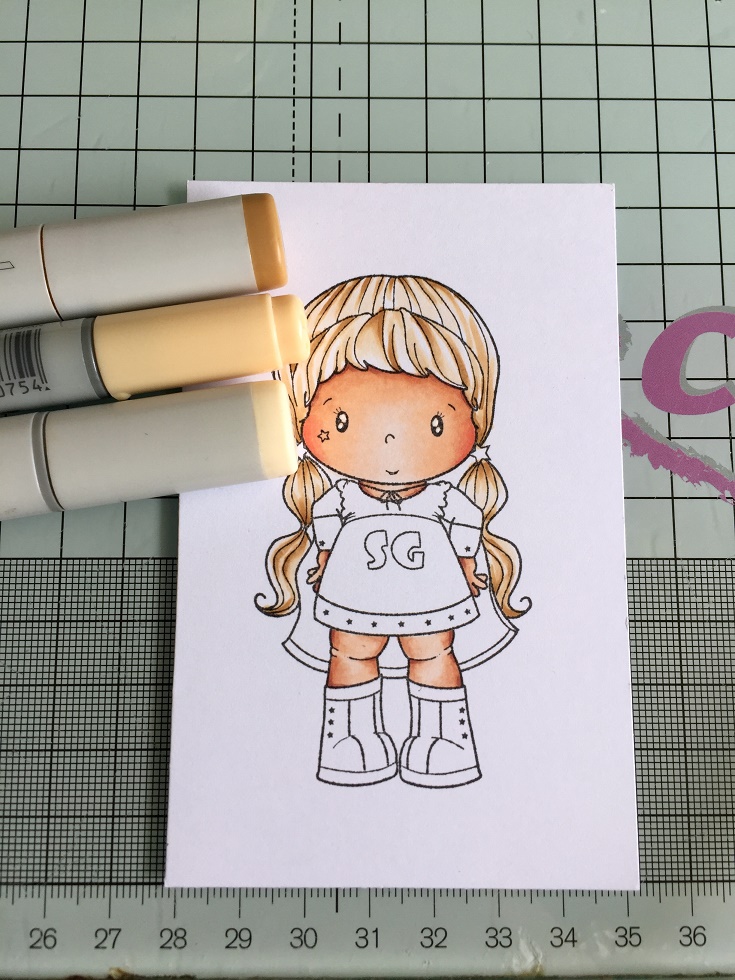
To colour Birgitta I used the following skin tones
E000, E00, E11, E04, R20, R22


E04 adds a deep shadow so use it sparingly in the hair line, and anywhere else you want a shadow. When you lay the E04 colour down, pull it out gently with the E00 marker, to remove the hard line. 


For the hair I used E50, E53, and added my darker shadows with E55. 


On the dress I used R81, R83, R85 and added some R39 in the very corners of her dress and boots. 


For the cape and ground I used C1, C3 and blended with 0. 


On the edges of her dress, boots and earrings I added some Pink spica pen. 
You can see the sparkle in the next photo. 
I also coloured the bottom of her cape in pink


This is Birgitta all finished. 


Full list of Copics used:
Skin - E000, E00, E11, E04, R20, R22
Hair - E50, E53, E55
Pinks - R81, R83, R85, R39. Pink Copic spica pen
Greys - C1, C3, 0

Thanks for dropping by today, 
I hope you are inspired to pull out your copic markers and colour.
Sandie
xXx

Sunday, January 29, 2017

My heart belongs to you!


Hi Copic friends!!!

Deborah here with some inspiration for you.
Today I've got some valentine inspiration. Yes, I made a valentine's card! 
I love to make them but mostly I don't sent them to anyone, maybe it's time for a change... 😉


I choose to work with this cutie by C.C. Designs and she's called "Tiny Heart". I think she's so adorable! I always colour the skin first and after that I do the hair. 
Here you can see a picture when I did that and here I mapped out where the shadows are going to be. I always do that with a light colour first, and if I'm happy with that, I do the same with the darkest colour.  I guess it's just how you like to work.


Here are the Copic colours I've used: 
skin: E04, E11, E21, E00, E000, E93
hair: E59, E25, E23, E41
turqoise: BG18, BG13, BG11, BG10
pink: RV69, RV17, RV55, RV52
white: C5, C3, C1
red: R59, R46, R24


 After I coloured this little girl, I did the background with some Distress Inks, drawed some hearts with a white gelpen and I stamped some hearts with a fushia ink to give it some more life.


I added some sequins for a finishing touch.

Thank you for stopping by, 

Deborah