Followers

Showing posts with label Spica. Show all posts

Wednesday, September 5, 2018

Sparkling Birthday Queen

Hi everyone! Today I am sharing an image I coloured using both Copic Markers and Copic atYOU Spica pens. The stamp I'm using is Oddball Birthday Queen from Stamping Bella


First I coloured the image with my Copics
Skin - E00, E53, E11 and E04. On the eyelids I only added a touch of E00 as I will be colouring them in a different colour later. 


For the hair on this image, I love to use bright pink! 
The colours I chose were RV14, RV17 and RV19. I started with RV14 to lay out the lines


I introduce the RV17 and RV19 and play around with them until I am happy with the colour. 


On the dress I used B12, B14, B16 and B18. Again, I take the lightest colour and mark out where I want my pleats to go. 


Going to from light to dark I introduce each of the blues. 


For the crown I used Y21 and Y26. 


Boots - N3, N5 and N7


Taking the same pink as for the hair, RV17, I colour in the stripes on the tights. 
On the cake I used E51 and E53 for the sponge, V12 and V15 for the frosting/icing, RV14 for the filling and C1 on the plate and skull. 


Once my image is fully coloured I picked matching glitter pen colours. Sky Blue and Baby Blue for the dress and Gold for the crown. I also use a white gel pen for the highlights. 


First I apply dots of glitter to the dark areas with Sky Blue. I let it dry a little in between colours and in between reapplying any of the colours. 


I then use the Baby Blue in the lighter areas - again, letting it dry before going to the white gel pen. 


I add the white gel pen to the lightest areas and I also add some crosses to give the impression of sparkle. 


I also apply the blue glitter to the eyelids and apply the Gold glitter pen and white gel pen on the crown. 


And now the image is ready for a card. I hope you enjoyed today's tutorial and that it inspires you to take your markers out today. 

Sandie
xXx

Tuesday, December 13, 2011

Snowflakes are falling down.....


Today i made this card for you with lots of glitter and glamour.
Because that is for me what christmas is all about.
The stamp i used is from Magnolia and also the paper is from Magnolia.
Instead of the blue sky i used this time green to make some sky or shadow around her.
The tiny little hearts at the end of her scarf and the big heart on her head are colored with my chocolate spica pen.
And on the snowflakes i put some stickles diamond.
Heute habe ich eine Karte mit jeder Menge Glitzer und Glamour gemacht.
Das ist für mich, worum es bei Weihnachten geht.
Der Stempel, den ich verwendet habe, ist von Magnolia, das Papier auch.
Anstelle eines blauen Himmel habe ich dieses Mal Grün verwendet
um Himmel oder einen Schatten um sie herum zu machen.
Die kleine Herzen am Ende ihres Schals und das große Herz auf ihrem Kopf
habe ich mit meinem Spica Chocolate coloriert.


I try to make her hair dark blond. So i mixed up some colors together and this is the result of it.
Ich habe versucht, ihre Haare dunkelblond zu machen. Dafür habe ich einige Farben zusammengemischt und das ist das Ergebnis.


These colors i used:
Diese Farben habe ich verwendet:

Face/Gesicht: E00, E21, YR02 and R02
Hair/Haare: Y23, Y28 and W5
The coat/Mantel: R20, R22, R24, R29, W5 and W6
shadow around her/Schatten um sie herum : G0000, G00, G000, G02 and the colorless Blender
Scarf, hands, head/Schal, Hände, Kopf: E42, E43, E44 en E47
Boots/Stiefel: E40, E41, E42, and E43 W1, W3 and W4
Stockings/Strümpfe: W2, W4, W5


That was all i had to show you today, i hope i give you some inspiration with this card.
I want to thank you also for all the lovely comments i recieve from you.
If any of you have question please feel free to ask i love to answer them.
Or maybe you have sugestions for us please let us know and maybe we can do something with it.
Das ist alles, was ich euch heute zeigen möchte, ich hoffe, ich konnte euch mit dieser Karte inspirieren.
Ich möchte mich auch bei euch für all die lieben Kommentare bedanken, die ich von euch bekomme.
Wenn jemand von euch Fragen hat, bitte zögert nicht zu fragen, ich antworte euch sehr gern.
Auch wenn ihr Vorschläge habt, lasst uns das bitte wissen, vielleicht können wir das dann umsetzen.

X

Erna

Sunday, November 27, 2011

Little Fairy ...


Today i made a card for you Copicfans. I cut out the card with my Silhouette Cameo.
Heute hab ich eine Karte für euch Copicfans gemacht . Die Karte habe ich mit meiner Silhouette Cameo ausgeschnitten.

The flowers i made with a Spellbinders die from Donna Salazar.
Die Blumen sind selbst gemacht mit einer Stanze von Spellbinders von Donna Salazar.


I first colored the wings and after that i covered the whole wing with a Atyou Spica pen clear.
I hope you can see the s pica on the photo.
Ich habe zuerst die Flügel mit Copics coloriert und danach habe ich Atyou Spica "Clear"aufgetragen.
Ich hoffe, man kannden Glanz des Spica auf dem Bild sehen.

I also used stickles.
Ich habe auch Stickles benutzt.


And these are the Copics i used.
Hier sieht man die Copics, die ich benutzt habe.


I hope you like my card and thanks for all the nice comments you leave at our blog.
Ich hoffe, meine Karte gefällt euch und vielen Dank für die lieben Kommentare, die ihr hier schreibt.

X

Erna

Saturday, October 22, 2011

65th Wedding Anniversary/Eiserne Hochzeit

Hello, dear Copicfriends,
Hallo, liebe Copicfreunde,

The card I want to show you today has been made for a very special occasion: My parent's 65th Wedding Anniversary! In Germany, we say it is the "Iron Wedding".
Die Karte, die ich euch heute zeigen möchte, habe ich für einen ganz besonderen Anlass gemacht: Den 65. Hochzeitstag meiner  Eltern, ihre Eiserne Hochzeit!
I have been thinking about this project for a very long time, because I had absolutely no idea, but then I saw the sweet image "Bird Swing" from Wee Stamps, I knew at once that this is just perfect! My parents have been hobby-ornithologists for many years and - even more important for my decision - this is the picture they used on the invitation for their celebration:
Ich habe sehr lange über das Projekt nachgedacht, hatte so gar keine Idee, bis ich das süße Motiv "Bird Swing" von Wee Stamps gesehen habe - da wusste ich, das ist perfekt! Meine Eltern sind schon seit vielen Jahren Hobby-Ornithologen und - was noch viel wichtiger für meine Entscheidung war - sie haben dieses Bild auf der Einladungskarte für ihre Feier verwendet:
Aren't they sweet, my little old  folks?
Sind sie nicht süß, meine kleinen alten Leutchen?

The Designpaper I used is "Mr. & Mrs." by Best Creation Inc. The flowers are glittering as if I had used stickles on them, but that was already in the paper. I applied a little bit of stickles "Star Dust" to the roses, it is difficult to show it on the photo. That is why I decided not to use any embellishments, the paper is sooo pretty and I wanted the focus on the image.
Das Designpapier, das ich verwendet habe, heißt "Mr. & Mrs." und ist von Best Creation Inc. Die Blüten darauf glitzern schon wie mit Stickles bearbeitet. Ich habe Stickles "Star Dust" auf die Rosen aufgetragen, aber das ist schwierig zu fotografieren.
Das ist auch der Grund, warum ich keine weiteren Embellishments verwendet habe, das Papier ist sooo hübsch und ich wollte die Aufmerksamkeit auf das Motiv fixieren.
The two birdies are coloured using only warm grey-tones, I just added a sweet little blush to her cheeks with R20. The swing has an iron shimmer, because I used atyou Spica silver on it.
Die beiden Vögelchen sind ausschließlich mit warmen Grautönen coloriert, ich habe nur ihr die Wangen mit R20 ein wenig angehaucht. Die Schaukel hat einen eisengrauen Schimmer, weil ich sie mit atyou Spica Silver coloriert habe.

On the inside, there is the sentiment, I cut it and it's shadow with my Craft Robo and colourerd it with atyou Spica Black. The space on the right side is for all the autographs of the family, they will use golden and silver gel-pens.
Auf der Innenseite ist der Glückwunsch, ich habe ihn und seinen Schatten mit meinem Craft Robo ausgeschnitten und mit atyou Spica Black coloriert. Der Platz auf der rechten Seite ist für die vielen Unterschriften der Familie, sie werden mit goldenen und silbernen Gel-Stiften unterschreiben.

I used the following Copic Markers:
Ich habe die folgenden Copic Marker verwendet: 
Birds/Vögel: W1, W3, W5, W7, W9, R20,
Beaks/Schnäbel: Y21, Y23, Y26
Leaves/Blätter: G21, G24
The yellow aura around the birds is pastell chalk.
Die gelbe Aura um die Vögel ist Pastellkreide.
Liebe Grüße vom
Kreativmonster

Thursday, October 6, 2011

Airbrushing glittery flowers.


Today it is my turn to show you a youtube about airbrushing flowers with Copics and Spica Pens.
Heute bin ich dran euch zu zeigen, wie man blumen airbrushed mit copics und Spica Pens.

I wish you a lot off fun by watching this youtube.
Viel spaß beim anschauen dieses videos.


Hugs - Liebe Grüße

Erna

Monday, September 26, 2011

Tutorial: coloring gold

Hello dear Copic fans!
Christmas is coming closer and gold will be a much used color for the next few weeks or months. So I thought I would share how I color an image golden.

***

Hallo liebe Copic-Freunde!
Weihnachten rückt immer näher und gold wird in nächster Zeit eine viel verwendete Farbe sein. Darum habe ich mir gedacht, ich zeige Euch heute, wie ich ein Motiv goldfarben coloriere.

You need:
YR-23, Y-17, Y-15, Y-13, Y-11, Y-00
golden and clear Spica At You Pen
your stamped image

***

Ihr braucht:
YR-23, Y-17, Y-15, Y-11, Y-00
goldfarbener und klarer Spica At You Glitzerstift
Euer gestempeltes Motiv.


As always I do my coloring from dark to light - it's just what I prefer. You can also start with the lightest color of course.

***

Wie immer mache ich meine Coloration von dunkel nach hell - das ist einfach meine persönliche Vorliebe. Natürlich könnt Ihr auch mit der hellsten Farbe starten.

I color all the areas that I want to be the darkest using the YR-23.

***

Ich coloriere alle die Bereiche, die am dunkelsten sein sollen, mit YR-23.


Next color is Y-17. I go over the YR-23 and color some of the white area too, making long strokes.

***

Die nächste Farbe ist Y-17. Ich gehe über die Stellen, die ich zuvor mit YR-23 coloriert habe, und etwas weiter in den weißen Bereich. Dabei arbeite ich in langen Strichen.


I am going on the same with Y-15...

***

Genauso mache ich weiter mit den Farben Y-15...


...Y-13...


...Y-11...


...and Y-00.

***

...und Y-00.


Once I have all areas covered with color I use the YR-23, the Y-17, Y-13 and Y-00 again to get a darker tone of coloring and to blend colors a bit more together.

***

Wenn alle Bereiche mit Farbe bedeckt sind, benutze ich YR-23, Y-17, Y-13 und Y-00 erneut um eine etwas dunklere Coloration zu erhalten und um die Farbübergänge etwas weicher zu gestalten.


For the special golden touch I used the Spica At You pens last. I add some golden Spica At You in the darkest areas and use the clear Spica to kind of "blend" it to the non glittered areas. I don't want to be covered all the image/dresses - just the darkest areas.
Since the golden Spica pen is darker than the YR-23 it also adds more depth to the image.

***

Für den speziellen Gold-Touch benutze ich abschließend die Spica At You Stifte. Ich coloriere die dunkelsten Bereiche des Motivs mit dem goldfarbenen Stift und benutze den klaren Glitzerstift, um die glitzernden Bereiche auslaufen zu lassen. Ich möchte nicht das komplette Motiv/Kleid beglittert haben sondern nur die dunkelsten Bereiche.
Da der goldfarbene Spica-Stift dunkler als YR-23 ist, bringe ich so auch noch mehr Tiefe ins Motiv.


On the next picture I tried to get a better photo of the glitter and shine the Spica pens add. It was a bit hard since the sun wasn't here the last days.LOL But if you click on the picture you can see it bigger and get a good look at the glittered areas.
I also did another trick on the little girl's dress: add some golden heat embossing to the image. I picked the tiniest star I was able to find and put it all over her dress. Since there are different tones of golden embossing powders you can get a different look with each tone. I picked a quite light one here, if you use a more intense one the look will be different again. Just try the ones you have and you'll know what I am talking about.

***

Auf dem nächsten Bild habe ich versucht, Euch einen besseren Eindruck vom Glitzer, den die Spica-Stifte hinzufügen, zu verschaffen. Leider ist das nicht ganz so toll gelungen da leider die Sonne sich nicht sehen lassen wollte... LOL Aber wenn Ihr auf das Bild klickt, könnt Ihr es größer sehen und den Glitzer dann ganz gut erkennen.
Auf dem Kleid des kleinen Mädchens habe ich noch einen anderen Trick angewandt: verwendet etwas goldfabenes Embossing-Pulver. Ich habe den kleinsten Stern-Stempel, den ich finden konnte, verwendet und den Stern überall auf das Kleid gestempelt. Anschließend habe ich sie gold embossed. Ich habe ein recht helles Gold verwendet, wenn Ihr ein intensiveres Goldpuder verwendet sieht das Ergebnis wieder ganz anders aus. Am besten probiert Ihr einfach das/die Puder aus, die Ihr habt und Ihr werdet wissen, was ich meine.


Now you only need to finish the coloring of your image and use it on a card. This is what my card ended up looking:

***

Nun müßt Ihr das Motiv nur noch fertig colorieren und eine Karte damit machen. Und so sieht meine fertige Karte aus:


I added a little bit of glimmer cardstock under the image and for the stars, but not too much to keep the image the eyecatcher.
Image is by "Star of Bethlehem" by Belle'n'Whistles, papers by Magnolia, saying by Whiff of Joy.

***

Ich habe ein wenig Glitter-Cardstock unter dem Motiv und für die Sterne verwendet, aber nicht zu viel um die Aufmerksamkeit beim Motiv zu belassen.
Das Motiv ist "Star of Bethlehem" by Belles'n'Whistles, Papiere von Magnolia und der Text von Whiff of Joy.

In addition to the yellows I used for the dresses I went with these Copics for coloring the image:

***

Zusätzlich zu den Gelbtönen für die Kleider habe ich folgende Farben zum Colorieren benutzt:


So, I hope this was useful and you're prepared for christmas now!

***

Ich hoffe, das war für Euch hilfreich und Ihr seid jetzt bereit für die Weihnachtszeit!

Have a great weekend,
habt ein tolles Wochenende,

Saturday, July 16, 2011

Mid-contrast coloring

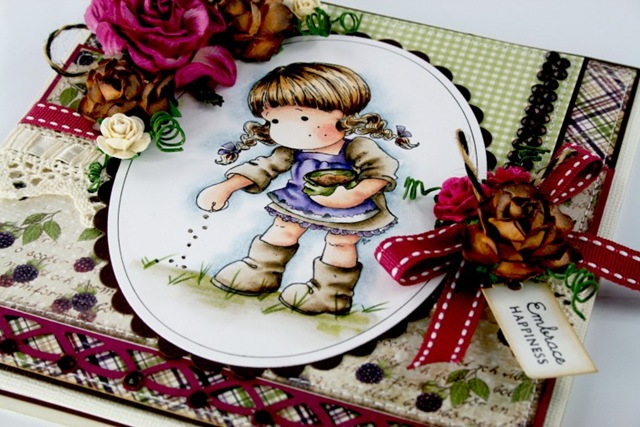
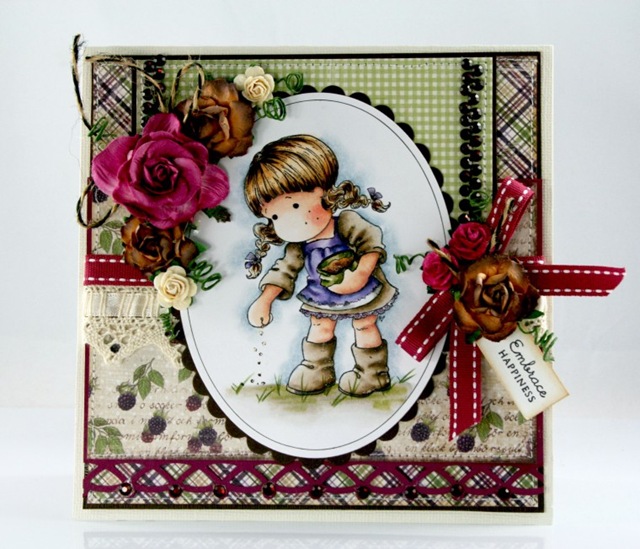
Hello, welcome to the Copic Europe blog, my name is Claudia and today iam able to post my very first contribution here to the blog. Most of you know already the basic idea of this new blog, so lets go straight to the card I have prepared and lets talk about the products used.
Hallo mein Name ist Claudia von Pretty Pressings und heute  darf ich das erste mal hier auf dem Copic Europa eine meiner Karten vorstellen. Ich gehe nicht komplett in die Einzelheiten ueber unseren neuen Blog, ich bin mir sicher ihr habt alle Information schon gelesen. Lasst uns doch gleich in die Details von dem heutigen Projekt gehen.

Claudia_Rosa_EmbraceHappiness_1

Iam calling this coloring: Mid contrast coloring – meaning the lighter areas in clothing and skin still has a good coverage with color
If you color high contrast, you would leave white areas or color with a really light color (triple colors) some areas in. There are several samples for this kind of coloring on my blog to see.
Ich nenne meine coloration in diesem Kartenbeispiel: Mittlere Kontrast Coloration. Was heissen soll, dass die hellen Bereiche immer noch gut mit einer Farbe ausgefuellt sind.
Bei einer “hohen Kontrast Coloration” wuerden die hellen Bereiche weiss oder nur mit einer ganz hellen Copic Farbe wie (0000) Farben ausgefuellt sein. Bei Interesse, koennt ihr auf meinem blog einige Beispiele fuer diese Art Colartion finden.

Skill level: Medium to intermediate – some understanding in how to achieve folds in clothing and blending several colors together is required 
Das Koennen dieser coloration wuerde ich Mittel oder leicht Fortgeschritten einstufen. Man braucht etwas Uebung um Falten vorzuarbeiten und im Motiv auszuarbeiten. Verschiedene Farben aus unterschiedlichen Farbgruppen sind verwendet worden und ausgeblendet ohne scharfe Linien zu hinterlassen.


Claudia_Rosa_EmbraceHappiness_2
Additional tip: I used my Copic Multi Liner 0.05 to add a frame to my shape. Simply leave the ring on your paper and trace along the line. This gives interest and saves some time if you are usually sewing on your cards like I do
Weiterer Tip: Copic Multi Stifte sind nicht nur gut um Motive nach dem stempeln auszubessern, in dieser Karte habe ich einen ganz duennen 0.05 verwendet um eine linie mit meinem Spellbinder die um das Motiv zu zeichnen.

Copic Glitter pens are nice to add some sparkle to your image without covering all the work you have done on your image.
I used some on clothing and on the seeds. You are maybe able to see that in the shot below.
Copic Glitter Stifte: sind ein wunderbares  Extra Medium um Glitter und einem Motiv  Interesse zu verleihen. Sie decken die muehevoll erarbeitete coloration nicht komplett ab, sondern geben nur Glitter auf dem Papier ab. Vielleicht kann man das auf meinem Foto ganz unten etwas genaure erkennen.

Colors used / verwendete Copic Stifte: E50-51-34-59-44-40-41-43-0000-000-13-00-55
R20, YG 91-95-97-W0-1-3, BV08,13,02,000, C9, 4-2-1-0-

Claudia_Rosa_EmbraceHappiness_3

Supplies used / Material:
Tilda with seeds through Sir Stampalot
Copic supplies can be purchased through Sir Stampalot
Sentiment: Papertrey Ink, Ribbon: Stampin up, gems: Recollection
Dies: Magnolia, circle Spellbinder, Martha Stewart punch, Cuttlebug Tiny Tags
Embellishments: Wild Orchid Crafts
Papers: Maja Design “Fika”