Followers

Showing posts with label Guest DT Sue Hastead. Show all posts

Tuesday, June 20, 2017

Party like a pirate!...

Hello everyone...

It's Sue here today with a card made with some Copic coloured die cuts.
This card was really good fun to make, I enjoyed colouring it and adding texture to the background with Colourless Blender.

Here's a tutorial to show you how I made the sky, sea and sand background - it was very straightforward so I hope you'll try it too!
Here are the ingredients I used for the first part of the background - the sunset.
The Copics I used here are Y35, Y38, YR04, YR09 and Colourless Blender refill.
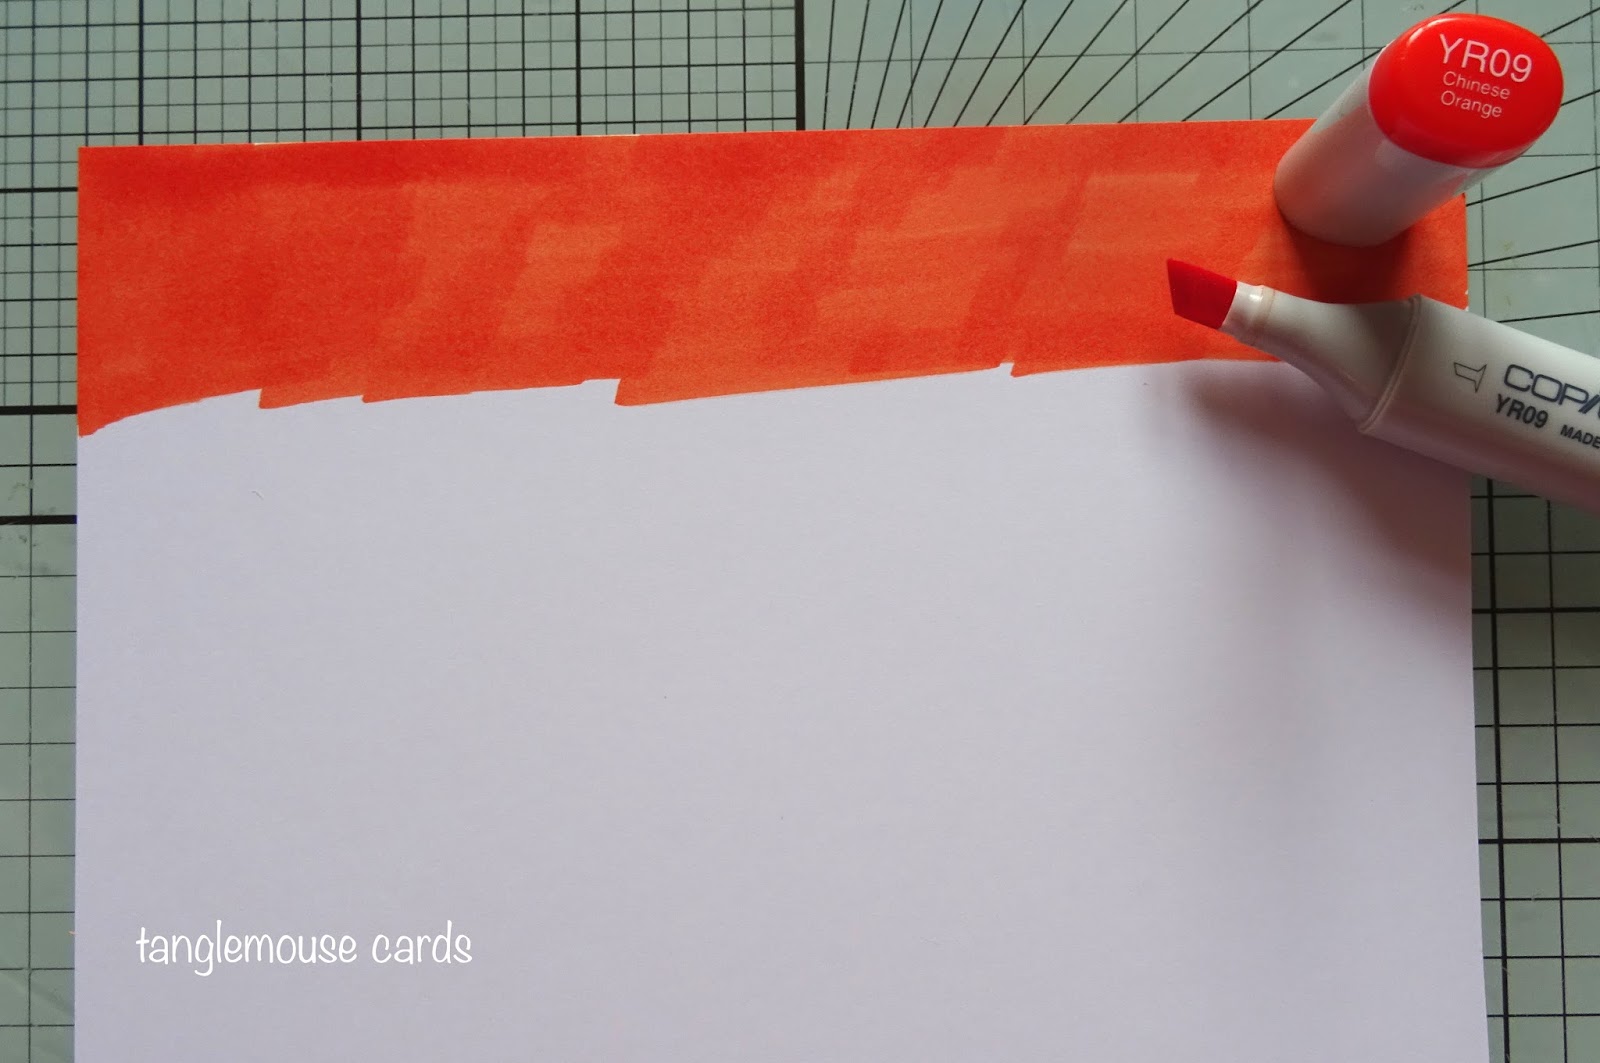
Take a piece of card measuring approximately 15cm x 12cm and colour across the top of the card with YR09. This doesn't need to be too precise and you can use the broad tip of the marker (I love using that - after all we don't get to do so very often)!
It doesn't matter if it looks a bit streaky as sunsets often look like that.
Repeat this with YR04...
then Y38...
and finally Y35.
Fix the Rays stencil on top of the Copic coloured sunset and stick it down with masking tape.  Pour a small amount of Colourless Blender into a spray bottle.
Spray the card and stencil with Colourless Blender - about four times should be fine.
Carefully remove the stencil and you will see that the Colourless Blender has lightened the colours leaving behind the stencil shape.
Set this aside.
These are the ingredients for the next part of the background - the sea.
The Copics used here are B18, B16, B02, B01 and Colourless Blender refill.
On another 15cm x 12cm piece of card colour horizontal bands of colour darkest to lightest, as shown. 
Pour a small amount of Colourless Blender into a small pot.
Dab the Colourless Blender over the Copic coloured card with a sponge, you will see the texture of the coloured background starting to change straightaway - I love this - it's like doing a magic trick!  The sponge gives the Copics a bubbly texture which is perfect for water!
With the Ocean Waves dies cut the card and set aside.
Here are the ingredients for the final part of the beach background - the sand.
The Copics I have used here are E33, E31 and E30.
Colour a piece of 15cm x 12cm card in exactly the same way as you did previously with the sunset and the sea...
Using a small piece of towelling or flannel dab Colourless Blender over the Copic background, tiny little dots will appear which are perfect for the texture of sand.
Using the Scenic Safari Dies cut the coloured card and start to assemble the beach scene.
Once the pieces are glued together and cut down to measure 14cm x 11cm the beach scene should look a something like this!
You can see the texture and patterns that the Colourless Blender has made in the Copic Colours, I think it looks really effective - I hope you do too!
It would be great if you could try this technique and show your cards to us at 
Copic Marker Europe on Facebook.
To find us just follow the link
To finish the scene I have added some images from the 
My Favourite Things stamp set - Party Like A Pirate along with an MFT die cut frame and a star charm.
Copic Markers Used -
Hair E19
Skin E04, R11, R00, E000, E0000
Clothes, Blues, B99, B97, B93, B91, 
Reds, R39, R37, R35, R32
Greys W9, W7, W5, W4, W2
Browns E27, E25, E23
Thank you for popping by, 
happy Copic colouring
from Sue...xxx

Saturday, April 15, 2017

You make me happy when skies are grey...

Good Morning everyone,

I hope you are enjoying the Easter break, 
it's Sue here today sharing a rainy day card with a great Copic technique.
I thought I would try a technique with Copic refills and stencils that I have used previously with Distress Ink pads and stencils!  I am really pleased to say that the technique works really well with Copics!

I have put together a tutorial to hopefully show you how you can also achieve such a fun background.
Here are the goodies you need.  You can see that the first thing I did was to colour and cut out the beautiful Stamping Bella Tiny Townie - Rachel loves the Rain.  Make sure you put her somewhere safe while you get inky with your background!
It is important to work swiftly with this technique because the ink dries quite quickly so open all of your refills before you start and tip some colourless blender into your spritzer bottle.
Randomly dab some rows of tiny dots of ink from the Copic refills onto your mat so that you have covered an area roughly the same size as your stencil.
Working quickly, give the ink one fine spray of colourless blender and press the stencil onto the inky mat.
Place the stencil 'ink side down' onto your piece of card
and gently tap the stencil all over with a piece of tissue paper.
Carefully lift the stencil away from the card, this is the effect you will see - isn't it pretty!
Finally, clean your work surface and stencil with some Copic Cleaner.

Here is my finished card.
I hope you have enjoyed my tutorial.  It would be great if you could try this technique and show your cards to us at Copic Marker Europe on Facebook.
To find us just follow the link

Copic Marker Colour Combinations
Skin V20, E00, E000, E0000
Hair E50, E31, E33, E25
Clothes RV95, RV93, RV91, BV29, BV13, BV02, BV31
Puddle W5, W3, W1
Grass YG67, YG63, G21

Copic Marker Refills for Background
B91, BV11, R81, 0 Colourless Blender

Other Ingredients
Stamping Bella Tiny Townie Rachel Loves The Rain Stamp and Die from Dies To Die For
MFT Paper 6 x 6 Pads - Roses All Over & Hearts and Stripes from Dies To Die For
Die Namics Stitched Rectangle Frames from Dies To Die For
Make It Colour Blending Card by Elaine Hughes (Marker Geek)
 Memento Ink pad in Black
White Posca 1mm Pen
Stix 2 Foam Pads
Thank you for popping by.
Happy Copic colouring!
love from
Sue...xxx


Friday, March 17, 2017

Glitter and magic...

Good Morning everyone,
It's Sue here today with something sparkly!

Last year I was asked to do a fun feature for the UK craft magazine, Making Cards.

I was asked to colour on glitter with my Copics!
This was such a fun technique I thought I would share it with you all.
Here is a photo of the ingredients I used to complete this super technique.
I stamped the image on to card with Tuxedo Black Memento Ink.
Then I used a piece of double sided adhesive sheet to completely cover the card.
I generously sprinkled glitter all over the card until it was completely covered and shook off the excess.
Then I rubbed my finger in small circles all over the card to firmly fix down the glitter.
This is the effect you will have.  (Isn't this gorgeous! Don't be tempted to stop here though!  It's time to get your Copics out)!
I then started to colour this sweet image using my Copics, starting with R83 to map out my darkest area.  I coloured on the glitter in exactly the same way as usual to blend the colours and create light and shade.
The only thing I was careful with was to make sure I stopped colouring just inside the outline of the image so that the ink did not bleed into the glitter outside the image.
You may see little bits of glitter sticking to the nib on your Copic marker.  Don't be worried by this, it is not a problem.
I simply swooshed my nib in a little pot of Copic Cleaner and dabbed it dry on a piece of paper towel.
I carried on colouring with markers R59, R85, R83, R81 until I had finished the first piece of my image, this sweet unicorn's mane.
I carried on colouring with Copics, I was really careful to stop colouring just inside the outline of the image to prevent the colour bleeding into the glitter outside.
I hope you have enjoyed my tutorial.  It would be great if you could try this technique and show your cards to us at Copic Marker Europe on Facebook.
To find us just follow the link

I coloured this pretty unicorn with some of my favourite Copic colour combinations
Mane and tail - R59, R85, R83, R81
Unicorn body - W5, W3, W1
Horn - B95, B93, B91
Ground - W3, W5, W1
Background - BG01, BG000, BG0000

Other Ingredients
Rainbow and Sentiment from - MFT Magical Dragons
Thank you for popping by.
Happy Copic colouring!
love from
Sue...xxx


Thursday, February 16, 2017

Hey there...

Hello everyone,
Sue here today with my first project for 

I am so happy to be here, it is a great honour to be part of such a wonderful and talented Design Team.

For my first project I chose one of my favourite digital images - Wryn - Watcha Doin? by Tiddly Inks.
I had such fun colouring this as I used a great Copic technique to create the pink background.
Before I coloured Wryn, the first thing I did was use my Copic marker R81 to colour the background all around her.  I used the brush tip for the detailed parts.
...and I used the chisel tip for the rest of the card.  (We don't get to use that nib very often but this is a good time to use it)!
Then I dipped a small piece of sponge into some colourless blender.  The sponge only needs a small amount of blender on it so it is a good idea to blot off the excess onto a separate piece of card.
I then dabbed the sponge all over the pink background. You can see the colourless blender bleaching out the pink colour.
It is fine to dab the sponge over the stamped image so that the effect goes right up to the edge of it.  The colourless blender will dry and you can carry on and colour with your Copics as normal.
This is what the background looks like when the colourless blender has dried.  Isn't this a lovely effect!

I hope you have enjoyed my tutorial.  It would be great if you could try this technique and show your cards to us at Copic Marker Europe on Facebook.
To find us just follow the link
I have coloured Wryn with some of my favourite Copic combinations. 
Skin - E71, E21, E00, E50
Hair - E70, E74, E77, E79, E29
Clothes - R32, R35, R37, R39, T5
Background - R81, Colourless Blender Refill, Sponge
Ground T1, T3, T5
Thank you for popping by.

Happy Copic colouring!

love from
Sue...xxx