Followers

Thursday, August 30, 2012

Summer breeze …


 and
this is my
Thursday Inspiration
for all the Copic enthusiasts …
Das ist meine Inspiration für den Donnerstag für alle Copic Enthusiasten …


I always love to create something that I can showcase
in my home entertainment either for dinner or lunch …
and also for a tea gathering.
Ich liebe es immer etwas zu erstellen, das ich dann zu Hause präsentieren kann.
Entweder für ein Mittag- oder Abendessen
oder einen Nachmittagstee.


I created the card using one of the favorite stamp collections
from Stampavie, Sarah Kay.
The card is just my prototype for an upcoming
ladies afternoon tea gathering.
I have finalized already with the front decoration
and I am working on the back decoration …
I can just add the menu or the invitation details.
Ich habe eine Karte mit meiner Lieblings-Stempelkollektion von Stampavie Sarah Kay gemacht.
Die Karte ist nur ein Protoyp für einen bevorstehenden Nachmittagtee mit einigen Damen.
Die Dekoration der Vorderseite habe ich bereits abgeschlossen und jetzt
bin ich dabei die Dekoration der Rückseite fertigzustellen.
Ich brauche nur noch das Menü und die Details der Einladung hinzufügen.


So do you create your own invitation menu card
for your intimate gatherings?
Erstellst Du auch Deine eigenen Einladungs- und Menükarten für Deine privaten Zusammenkünfte?


Juliet in the Fields, Sweet Wishes – Stampavie
Hair(Haare): W1,W5
Face/Legs(Gesicht/Beine): E000,E00,E01,E11,BV00
Hat (Hut): W00,W1,W5,W7,E99, Colored Pencil
Blouse(Bluse): BG000,BG13,BG49,BG15, Atyou Spica #11 Gold
Pants(Hose): Y000,Y00,Y02,Y08,YG95,YG97, Atyou Spica #06 Melon, Colored Pencil
Sandals(Sandalen): BG00, Atyou Spica #18 Baby Blue,#06 Melon,#05 Lemon
Leaves(Blätter): G00,G03,G05
Others(Anderes): Cheery Lynn Diecuts, Bo Bunny Country Garden Collection

Be iNspired and enjoy the weekend!
Lass' Dich inspirieren und genieße das Wochenende!


Tuesday, August 28, 2012

Hoi means hi in Dutch

Hi Copic fans!!
Hallo Copic-Fans!!

It's Mariska again and this time I have a cute card to show you using Maya watching a ladybug from Whiff of Joy. Now as you may know by now I always work in 3D (I did a tutorial on it HERE) so when I want to work on kraft paper this doesn't mean I have to color on it :). I just colored my image on my usual paper and then paper pieced it onto a base of craft cardstock.
***
Hier ist wieder Mariska und  dieses Mal hzeige ich euch eine niedliche Karte mit "Maya watching a ladybug" von Whiff of Joy. Wie viele von euch wissen, arbeite ich immer in 3D (ich habe darüber HIER ein Tutorial gemacht) und wenn ich auf Packpapier arbeiten möchte, heißt dass nicht, dass ich es kolorierne muss :). Ich habe mein Motiv auf meinem üblichen Papier koloriert und es dann auf einer Basis aus packpapierfarbenem Cardstock aufgebaut.

Isn't that cute? The cardshape is a double scalloped square doily die by Whimsy Stamps and those cute letter stamps are from a stamp set named Spell it out, also by Whimsy Stamps. I wrote hoi, which means hello in Dutch, thought that fitted the little image very well :).
***
Ist das nicht niedlich? Die Kartenform ist ein Double Scalloped Square Stanzer von Whimsy Stamps und diese niedlichen Buchstaben sind aus einem Set namens "Spell it out "von Whimsy Stamps, ich habe Hoi geschrieben, das heißt auf Holländisch hallo, ich dachte, das passt gut zu dem Motiv :).


Here is a close up of the cute little lady.
***
Hier ist eine Nahaufnahme von der niedlichen kleinen Dame.

Now I'd like to show you a little something:
***
 Jetzt möchte ich euch etwas zeigen:
This is the first picture of the little pieces I have colored, not cut out yet but still completely ready for the next step in my 3D paper piecing. The only thing is, I thought the bleu was still to bright. The solution:
***
 Das ist das erste Bild mit den kleinen Teilen, die ich koloriert habe, noch nicht ausgeschnitten, aber komplett fertig für den nächsten Schritt meiner 3D-Technik. Das einzige war, dass mir das Hellblau noch zu hell war.

I had to take my W-Copic markers out anyway to do the bottom layers (if you've seen my tutorial on 3D you know what I mean) so I colored the bleu parts again with a layer of W shades. Just directly over the already colored bleu. I do this pretty often but this time I thought, lets take a picture of the before and after. I know a lot of people first give their coloring a layer of W but as you can see, you can also do it afterwards. Don't you love the blending abbilities of our Copic Markers?
***
Ich musste meine W-Copics ohnehin herausholen um die unteren Schichten (wenn ihr mein Tutorial angesehen habt, wisst ihr, was ich meine) zu kolorieren, daher habe ich eine Schicht der W-Schattierungen auf das Hellblau aufgetragen. Einfach über das, was ich schon hellblau koloriert hatte. Ich mache das ziemlich oft, aber dieses Mal dachte ich, mach mal Vorher-Nachher-Fotos. Ich kenne viele Leute, die ihren Kolorationen   erst eine Schicht Grau verpassen, aber wie ihr sehr geht es auch andersherum. Liebt ihr diese vielfältigen Schattierungsmöglichkeiten der Copic Marker nicht auch?

Copic Markers used:
Verwendete Copic Marker:
Skin/Haut: E11, E00, E000, E0000
Cheeks/Wangen: R22, R20
Shirt and other pink accents/Shirt und andere pinke Akzente: RV69, RV66, RV63
Tulips/Tulpen: RV66, RV55, RV63, RV52
Ladybug/Marienkäfer: R59, R46, R43
Hair/Haar: E44, E42, E41, E40
Jeans: B95, B93, B91, B02, B00, B0000, W5, W3, W0, W00
Leaves/Blätter: G94, YG91, YG23, YG13

See you back in a while!!
Bis bald!!

Hugs,


Monday, August 27, 2012

I Love You card


Hello dear Copic friends!
***
Hallo liebe Copic-Freunde!


It's Keren here today with a new creation.
 ***
Hier ist heute Karen mit einer neuen Kreation.


Here is some love, for this Monday morning.
I choose a sweet vintagy couple stamp
I got it from a friend of mine.
I don't know the manufacture name
but I do know it was made down under.
***
Hier ist ist etwas Liebe für diesen Montagmorgen.
Ich habe den Stempel mit diesem süßen, etwas nostalgische Pärchen ausgesucht,
den ich von einem Freund bekommen habe,.
Ich weiß den Hersteller nicht,
aber ich weiß das er aus Australien kommt.


♥ ♥ ♥ ♥ ♥ ♥ ♥ ♥ ♥ ♥


♥ ♥ ♥ ♥ ♥ ♥ ♥ ♥ ♥ ♥

Girl Copic's:
Copics für das Mädchen:
Skin/Haut: E0000/000/00/01
Hair/Haare:E30/31/33/35
Clothes/Kleidung: R22/30/32


Boy Copic's:
Copics für den Jungen:
Skin/Haut: E0000/000/00/11/21
Hair/Haare:E50/51/53/55
Clothes/Kleidung: B91/93/97, E50/51/53


♥ ♥ ♥ ♥ ♥ ♥ ♥ ♥ ♥ ♥


♥ ♥ ♥ ♥ ♥ ♥ ♥ ♥ ♥ ♥

Thank you very much for your visit
wishing you a lovely day!
***
Vielen Dank für euren Besuch,
ich wünsche euch einen schönen Tag!


♥ ♥ ♥ ♥ ♥ ♥ ♥ ♥ ♥ ♥

Hugs,
Keren


Thursday, August 23, 2012

Wishing you sunshining days


The last few weeks we have a lot of sunshiny days.
Normaly I love this, the sun, the water, the beach.
But this year with the pregnancy (I have 7 weeks to go)
I stay in the house, here it's cool.
***
In den letzten Wochen hatten wir viele sonnige Tage.
Normalerweise liebe ich das, die Sonne, das Wasser, der Strand.
Aber dieses Jahr mit der Schwangerschaft (ich habe noch 7 Wochen vor mir)
bleibe ich im Haus, hier ist es kühl.

So, enough talk, let's go to my card.
***
So, genug geredet, lasst uns meine Karte ansehen.


I used Marcia from LaLaLand
this girl is so cute.
With papers from My Minds Eye, Miss Caroline line
"Dilly Dally"
The dies I used are Cheery Lynns and
Marianne Design
***
Ich habe Marcia von LaLaLand verwendet,
das Mädchen ist so niedlich!
Die Papiere sind von My Minds Eye,
"Dilly Dally" aus der Reihe Miss Caroline.
Die Stanzen, die ich verwendet habe, sind von Cheery Lynn und
Marianne Design.

I use these Copic markers
Ich habe diese Copic Marker verwendet:

Hair/Haare: E19 E18 E17 E15 E13
Sweater/Pullover: E40 E41 E42
Coat/Mantel: E44 E43 E42
Shawl/Schal: R08 R05 R02
Skin/Haut: E11 E21 E51
Shoes & Hat/Schuhe & Hut: W6 W4 W2

I hope that I have inspire you with this sweetie.
***
Ich hoffe, ich habe euch mit der Süßen inspiriert.

Thank you for leaving your comment.
We love to read them
***
Danke für die Kommentare, die ihr hinterlasst.
Wir lieben es, sie zu lesen.

Tuesday, August 21, 2012

The Princess of flowers


Hello dear Copic friends,
Hallo liebe Copic-Freunde,

it’s Cinzia here  to share with you all another card I made  for the kaleidoscopic Copic Marker space in the blog land.
The enchanting  image I used is called “Peony Princess”,  a new digi stamp drawn by Sara Burrier for Crafts and Me, she is so  mysterious and fascinating, just it seems to rise from a whirlwind  of flowers.
For this reason I choose a  different shape for my card, a pocket which hide a sort of tag with a message. The papers  are Prima, "Annalee" collection, the sentiment on tag is Stempelglede, the stamped corners on tag are Magnolia.
***
hier ist wieder Cinzia und ich möchte euch eine Karte zeigen, die ich für den kaleidoskopischen Copic Marker Bereich in Blogland gemacht habe.
Das bezaubernde Motiv, das ich verwendet habe, heißt "Peony Princess", ein neues digitales Motiv, das Sara Burrier für Crafts and Me gezeichnet hat. Sie ist so mysteriös und faszinierend, es sieht aus, als ob sie aus einem Wirbelwind von Blumen aufsteigt.
Daher habe ich für meine Karte eine andere Form gewählt, eine Tasche, die eine Art Tag mit einer Mitteilung beinhaltet. Die Papiere sind aus der "Annalee"-Kollektion von Proma, der Textstempel auf dem Text ist von Stempelglede, die gestempelten Ecken auf dem Tag sind von Magnolia.


Here is a close up of the colored image: 
***
Hier ist eine Nahaufnahme des kolorierten Motivs:


The card and the tag:
***
Die Karte und das Tag:


The back side of the card also decorated:
***
Die Rückseite der Karte ist auch dekoriert:


Copic  Markers:
Skin/Haut: E0000, R000, E21, E13, R20
Hair/Haare: E 50, E31, E25, E57
Dress/Kleid:  RV0000, BV000, BV00, V12
Dress (Skirt)/Kleid (Rock): BG000, BG10, YG93

Thanks for stopping by on our blog today!
Until next time, enjoy the rest of the week
***
Danke, dass ihr heute auf unserem Blog vorbeigeschaut habt!
Bis zum nächsten Mal, genießt den Rest der Woche.

Hugs,

Monday, August 20, 2012

A Thank You Card


Hello dear copic friends!
Hallo Liebe Copic Freunde!

It's me again, Diana!
I am happy to share another Copic marker inspiration again. This time I made a "Thank you-Card". And following my style of crafting of course I used another one of the cute Tildas by Magnolia. The stamp's name is Sleeping Baby Tilda.
***
Ich bin es wieder, Diana! 
Ich freue mich euch heute wieder eine Inspiration mit meinen Copic Markern zu zeigen. Es ist dieses Mal eine sommerliche Karte geworden. Und natürlich, wie es mein Stil ist, auch hier wieder mit einer süßen Tilda von Magnolia. Sie heißt Sleeping Baby Tilda

♥ ♥ ♥ ♥ ♥ ♥ ♥ ♥ ♥ ♥


♥ ♥ ♥ ♥ ♥ ♥ ♥ ♥ ♥ ♥


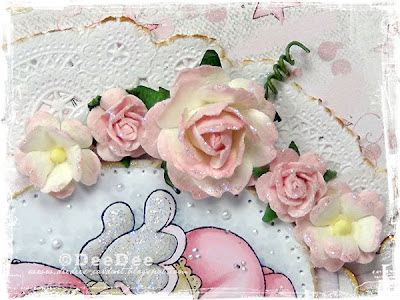
On the edges of the flowers I added some Star Dust Stickles to them. The flowers can be found at Wild Orchid Crafts.
***
Die Ränder der Blumen habe ich mit Stickles Star Dust beglittert. Die Blumen bekommt ihr bei Wild Orchid Crafts.

♥ ♥ ♥ ♥ ♥ ♥ ♥ ♥ ♥ ♥


♥ ♥ ♥ ♥ ♥ ♥ ♥ ♥ ♥ ♥


The Sentiment means in english "Tank You". I have print it out.
***
Den Text habe ich mit dem Coputer ausgedruck.

♥ ♥ ♥ ♥ ♥ ♥ ♥ ♥ ♥ ♥


♥ ♥ ♥ ♥ ♥ ♥ ♥ ♥ ♥ ♥


The edges of the design paper have been covered with Picket Fence Distress Crackle Paint. I love this crackling effect.
***
An den Rändern vom Designpapier habe ich Distress Crackle Paint in der Farbe Picket Fence aufgetragen. Ich liebe den Effekt, wenn es "zerbricht".

♥ ♥ ♥ ♥ ♥ ♥ ♥ ♥ ♥ ♥


I like to put little pearls around the image using Liquid Pearls.
***
Rund um mein Motiv setzte ich gerne kleine Perlen mit Liquid Pearls.

♥ ♥ ♥ ♥ ♥ ♥ ♥ ♥ ♥ ♥

These are the Copic markers used.
***
Verwendete Copic Marker:


♥ ♥ ♥ ♥ ♥ ♥ ♥ ♥ ♥ ♥

Liebe Grüße

Sunday, August 19, 2012

Let's Spray Some Fun

Hi Copic Fans!
Hallo Copic-Fans!


I participated last week in Ania Dąbrowska Mix Media workshops.
If you familiar with her grungy messy style, she uses a lot of mists in her work.
The workshops were very inspiring
And I went back home, wondering whether I can mist with my Copics.
 
I found out it is a simple and fun way to use various Ink.
So today I'm gonna show you how you can do it too.


Ich habe letzte Woche an einem Mix Media Workshop bei  Ania Dąbrowska teilgenommen.
Wenn ihr ihren "schmuddeligen, matschigen" Stil kennt, sie verwendet viel Nebel bei ihren Arbeiten.
Der Workshop war sehr inspirierend.
Als ich wieder daheim war, habe ich überlegt, wie ich mit meinen Copics "nebeln" kann.

Ich habe einen enfachen und amüsanten Weg gefunden, Various Ink dafür zu verwenden.
Heute zeige ich euch, wie ihr das auch machen könnt.


HERE IT GOES
UND SO GEHT DAS


Choose a stamp, and a Copic suitable paper
***
Wählt einen Stempel aus und ein Papier, das Copics verträgt.


 Stamp the image with pigment ink
***
Stempelt das Motiv mit Pigment Stempelfarbe.


Disperse on the stamping, some embossing powder
***
Streut Embossing-Pulver auf den Abdruck.


 Heat with a heat gun
***
Erhitzt es mit einem Heißluftgerät.


Stamp the image again to create a mask
It's important to use dye-based ink (such as memento)
So it will not smear
***
Stempelt das Motiv nochmal ab um eine Maske zu machen.
Es ist wichtig, dass ihr wasserfeste Stempelfarbe, z.B. Memento verwendet,
damit es nicht verschmiert


Grab 
Empty mist sprayer
A blender various ink 
And your choose of colors that will use you for background
***
Schnappt euch 
eine leere Sprühflasche, 
den Nachfüller mit der Blenderlösung (0) 
und wählt die Farben aus, die ihr für denHintergrund verwenden möchtet


Drip some ink to the sprayer 
***
Tröpfelt etwas Farbe in die Sprühflasche.


Add some blender too
 According to how much you want the color to be light
***
Fügt etwas Blender hinzu, umso mehr, 
umso heller die Farbe werden soll.


Now spray!
***
Jetzt sprüht!

And than some more
Add darker tones to the mister to create different shades
***
Und noch etwas mehr.
Fügt dunklere Farbtöne in die Sprühflasche um verschiedene Schattierungen zu erreichen.


And a little more.
When you're done, let it dry a bit
***
Und noch etwas mehr
Wenn ihr fertig seid, lasst es etwas trocknen


Stamp your image again and color it
Cut it out, and paste it on top of the sprayed background
Copic's: Y15/19, YR02/04/23
  ***
Stempelt euer Motiv nocheinmal und koloriert es.
Schneidet es aus und klebt es auf euren besprühten Hintergrund.
Copic's: Y15/19, YR02/04/23
 

Now, make a card. 
***
Jetzt könnt ihr eine Karte machen.


  Hope I have inspired you as well.
***
Ich hoffe, ich habe euch auch inspirien können.


Hugs

Keren


Saturday, August 18, 2012

adventures and holidays

Hello everyone!
This is Kathrin today sharing a new card with all of you.
***
Hallo an alle!
Hier ist Kathrin mit einer neuen Karte, die ich Euch gerne zeigen möchte.

My girls are off from school for 2 weeks now - and this inspired me to make a vacation themed card. Not only because we are on holidays at the moment - also because august and vacation just belong to each other.
***
Meine Mädels haben nun seit 2 Wochen Sommerferien - und darum habe ich eine Urlaubskarte gemacht. Und das nicht nur, weil wir momentan in Urlaub sind, sondern auch, weil August und Urlaub für mich einfach zusammen gehören.


I used one of the cute Henry the Mouse stamps by Whiff Of Joy here. Its name is Adventures With A Friend.
Since I had colored the Mouse in browns and used a browny green for the backpack I needed some other color to not make the image look lame and so I went with black for the hat and camera. This also brings the image together since I went with greys for the stone the little froggy is sitting on.
***
Ich habe hier einen der süßen Henry-Stempel von Whiff Of Joy verwendet. Der Name ist "Abenteuer mit einem Freund".
Da ich die Maus braun und den Rucksack grün-braun coloriert habe, brauchte ich eine Kontrastfarbe, damit das Motiv nicht langweilig aussieht. Darum habe ich mich beim Hut und der Kamera für schwarz entschieden. Und damit bringe ich auch das ganze Motiv zu einer Einheit, denn für den Fels, auf dem der Frosch sitzt, habe ich mich für grau entschieden.

Matching the photo theme I picked my embellishments: a photo strip, the saying and I also stamped a tiny camera on a tiny metallic plate. The oval brad underneath the bow says "smile".
***
Passend zum Foto-Thema habe ich auch meine Verzierung ausgwählt: etwas Filmstreifen, den Text und auf ein kleines Metallschild habe ich eine winzige Kamera gestempelt. Auf dem ovalen Brad unter der Schleife steht "smile".

And these are the Copics used for the coloring:
Und hiermit habe ich coloriert:


Thanks for stopping by - and enjoy the summer!
***
Danke fürs Vorbeischauen - und genießt den Sommer!


Friday, August 17, 2012

Wiiners Make It Crafty challenges

Hallo,
excuses this message is only in English

Entschuldigung diese Post ist nur in English.

 I can now announce the winners of the Make It Crafty candy from some weeks ago. 

we had two candies , a rubber stamp and chipboards for both winners. 

Zoe, from Australia,  will send the goodies to the winners. 


The winners are:


and 


Gratulations to the two ladeis.

Please send your adresses to copiceurope@gmail.com

Zoe, thank you for your contibution to our party

Greetings team CME.


WE ONLY NEED 6 ETRA FOLLOWERS TO REACH 1100 

Tuesday, August 14, 2012

Het Canary Blog NEW


Hello,
Hallo,
first I want to announce the opening of a new blog on the 26 of August, dedicated to the stamps and digi's of a designer who draws images perfectly suitable to color with Copic Markers. This designer is Krista Smith, her images are called Saturated Canaries. Therefore the announcment here, these images do need Copics to color, she herself also does color with Copics.
 The new blog will start in Dutch , we will see if their is a demand for an other language. The name will be: "Het Canary Blog"
For real stamp lovers her images are now also in rubber. 
Here are her freebies if you want to try to color them.
***
als Erstes möchte ich die Eröffnung eines neuen Blogs am 26.08.2012 ankündigen. Es geht dort um die Stempel und Digis einer Designerin, die Motive zeichnet, die perfekt dafür sind, mit Copic Markern koloriert zu werden. Diese Designerin ist Krista Smith und ihre Motive heißen "Saturated Canaries". Ich kündige das deshalb hier an, weil diese Motive dafür geschaffen sind, mit Copics koloriert zu werden, sie selber koloriert auch mit Copics. Der neue Blog wird zunächst auf Holländisch geführt werden, wir werden sehen, ob es Nachfrage nach weiteren Sprachen gibt. Der Name ist  "Het Canary Blog"
Für die Liebhaber echter Stempel gibt es ihre Motive jetzt auch als Gummi.
Hier sind ihre Freebies, wenn ihr versuchen möchtet, sie zu kolorieren.

My card for today is.............a Saturated Canary called Grey Tie, but I made a blue tie out of it.
***
Meine heutige Karte ist......ein Saturated Canary namens Grey Tie, also grauer Schlips, aber ich habe einen blauen Schlips daraus gemacht. 


If you want to color big hair, here is your image! It costed me a lot of hard  time to color it. I know that my stripes could be thinner, I will practice on it. Our Wenda showed me a lot of her tricks in hair coloring she is so good at this.
***
Wenn ihr aufwändige Haare kolorieren möchtet, hier ist euer Motiv! Es hat mich eine Menge harte Arbeit gekostet, es zu kolorieren. Ich weiß, dass meine Striche dünner sein könnten, ich werde es üben. Unsere Wenda hat mir viele ihrer Tricks für Haarkoloration gezeigt, sie ist so gut darin.


Around the images I made a background shadow with a new product PanPastels, a pastel in cake form, I applied it with a special tool. It is easy to use for shadowing, no special techniques needed.
***
Um das Motiv herum habe ich einen Hintergrundschatten mit einem neuen Produkt gemacht, PanPastels, ein Pastell in Kuchenform. Ich habe es mit einem speziellen Werkzeug aufgetragen. Es ist einfach, es für Schattierungen anzuwenden, man braucht keine spezielle Technik.


Behind the image is a hidden envelope with a label in it, I stamped a Dutch text on it.
***
Hinter dem Motiv ist ein Umschlag mit einem Label versteckt, auf das ich einen holländischen Text gestempelt habe.


It says :"In a year there are special moments.....today is one of them"
***
Er bedeutet: "In jedem Jahr gibt es besondere Momente...heute ist einer davon"


For the decoration I used dies from Memorybox, Marianne Design and Cheery Lynn. The design paper is Vintage Summer from Maja Design.
***
Für die Dekoration habe ich Stanzen von Memorybox, Marianne Design und Cheery Lynn verwendet. Das Designpapier ist Vintage Summer von Maja Design.

For the coloring I used:
Für die Koloration habe ich verwendet:
Skin/Haut: E000-00-11-13
Lips/Lippen E04
Hair/Haare: Y26-Y15-Y21-E50/E37-E59 (used in this order/in dieser Reihenfolge verwendet)
Tie/Schlips B0000-91-95

Thank you for coming by,
Danke für's Vorbeikommen,
greeting Diny