Followers

Tuesday, May 8, 2012

Henry - Candy!!!

Hallo, liebe Copic-Fans!
Hello, dear Copic fans!
Auf der Stemplemesse Süd habe ich mich mit Katharina Frei, der Inhaberin von Whiff of Joy, darüber unterhalten, dass ich ein Tutorial darüber plante, wie man Henry, die Maus, mit Copics koloriert.
At the Stempelmesse Süd I talked to Katharina Frei, the owner of Whiff of Joy Stamps and told her about my plan to make a tutorial about how to colour Henry, the Mouse, with Copic Markers. 
Gemeinsam mit Diny Sprakel haben wir dann die Idee für meinen heutigen Post entwickelt, es ist nämlich etwas Besonderes, ein Tutorial mit einem Candy.
Diese Stempel hat Katharina mir mitgegeben und diese Stempel (natürlich unbenutze!) könnt ihr gewinnen, wenn ihr mitmacht. Wie das geht, erkläre ich euch am Ende desTutorials.
***
Together with Diny Sparkel we developped the idea for this post, which is special, because it is tutorial combined with a Candy. She gave me these stamps and you can win them (unused ones of course!) when you join us. How it works, I'll explain at the end of this tutorial.

Schon bevor ich Henry abstempele überlege ich mir, welche Papiere ich verwenden möchte. Davon hängt es nämlich ab, welche Stempelfarbe und welches Papier ich verwende. Ich habe mir einige Papiere aus dem Block "Nana's Nursery Baby Girl" von DCWV ausgesucht. Da die Grundfarbe dieser Papiere cremefarben ist, habe ich Henry mit Memento Rich Cocoa auf dem Cardstock  "Vanille Pur" von Stampin' Up abgedrückt. Dieser Cardstock hat auch eine sehr glatte Oberfläche, aber er ist nicht ganz so gut zu kolorieren wie das Perfect Colouring Paper der Holtz GmbH. Da es das aber leider (bisher, ich arbeite daran) noch nicht cremefarben gibt, bleibt mir keine Wahl.
***
Even before I stamp Henry, I have to decide, which papers I want to use. It depends on my choice of papers which ink and which cardstock I have to use. I have chosen some papers from the stack  "Nana's Nursery Baby Girl" by DCW. It's basic colour is not white, but kind of vanilla, therefore I stamped Henry with Memento Rich Cocoa onto "Pure Vanilla" from Stampin' Up. It has a rather hard surface, but it is not so good for colouring as the Perfect Blending Paper offered by the Holtz GmbH. But because they don't offer it in vanilla (up to now, I'm working on it!) I have no choice.


Zuerst koloriere ich das Mäusebaby, das da so süß schlapp über Papas Schulter hängt.
First I colour the baby mouse that is hanging so sweetly over daddy's shoulder.

Ich beginne mit E50.
I start with E50

Dann schaffe ich mit E51 etwas Kontur:
Then I add E51

Mit E93 gebe ich etwas Farbe auf die Bäckchen und das Ohr, in das man reinschauen kann:
I apply E93 onto the cheeks and the ear, that you can look into:

Jetzt geht es mit dem Papa weiter. Zuerst auch hier E50 als Grundierung:
Now it is daddy's turn. I start with E50 again

Dann mit E51 die Farbe intensiver machen:
I use E51 to intesify the colour:

Damit sich der helle Kleine besser abebt, bekommt Henry noch eine Portion E53:
To make the little one pop out a bit more, Henry gets a share of E53:

Dann auch bei ihm einen Hauch E93 auf die Wangen:
A touch of E93 onto the cheeks:

Das Ohr grundiere ich auch zuerst mit E50, dann trage ich von unten nach oben E93 auf:
The ear gets a basic layer of E50, then I apply E93 from bottom to top:

Die Strefen vom E93 verwische ich mit  E50. Das mache ich natürlich an beiden Ohren. Am unteren Rand des Ohrs, dort wo die Striche im Motiv sind, kommt noch ein wenig E95 hin für mehr Tiefe:
I blend the strokes of E93 with E50. I do this with both ears. At the lower rim of the ears (there are a few lines in the image) I apply E95 for a bit more depth.
Nach der gleichen Methode koloriere ich den Rest des Körpers. Zum Schluss setze ich mit W1 und W3 noch ein paar kleine Schatten und einen Boden zum hinsetzen.
The same way I colour the rest of the body. In the end, I place some smal shadows with W1 and W3 and some ground to sit on.

Fertig!
Done!
Und hier ist meine Karte:
Here is my card:


Natürlich könnt ihr Henry auch in ganz vielen anderen Farbvarianten kolorieren. Ich habe euch hier noch drei andere zusammengestellt:
Of course you can colour Henry in a lot of different colour combinations. I made three more of them for you:
1. Auch mit Memento Rich Cocoa auf Pur Vanille gestempelt, koloriert mit E70, E71, E74 (Henry), E50, E53 (Baby) und E93 (Ohren). Boden: W1, W3
1. Stamped with Memento Rich Cocoa onto  Pure Vanilla, too, coloured with  E70, E71, E74 (Henry), E50, E53 (Baby) and E93 (ears, baby's tail). Ground: W1, W3

2. Mit Memento Tuxedo Black auf Perfect Colouring Paper gestempelt, koloriert mit W0, W1, W3, W5 und E93:
2. Stamped with  Memento Tuxedo Black onto Perfect Colouring Paper, coloured with  W0, W1, W3, W5 and E93:
3. Mit Memento Tuxedo Black auf Perfect Colouring Paper gestempelt, koloriert mit C0, C1, C3, C5 und RV0000, RV000 und RV00 für die Ohren und den Schwanz des Kleinen:
3. Stamped with  Memento Tuxedo Black onto Perfect Colouring Paper,  coloured with C0, C1, C3, C5 and RV0000, RV000 and RV00 for ears and tails:

Nun zu unserem Candy. Was müsst ihr machen, um die Chance zu bekommen, diese süßen Stempel von Whiff of Joy,  zu gewinnen?
Werdet unser Verfolger werden (falls ihr es noch  nicht seid), verlinkt unser Blog-Logo in eurer Side-Bar  und tragt euch hier bei Mr. Linky ein, das ist alles! In zwei Wochen verlose ich dann unter allen Teilnehmer, die alle Bedingungen erfüllen, die beiden Stempel von Whiff of Joy,.

Now back to the candy. What do you have to do to get the chance to win the sweet stamps from Whiff of Joy?
Become our follower (if you are not already), link our blog-logo to your sidebar and put your name into Mr. Linky here, that's it! In two weeks I'll randomly choose the winner of the two Whiff of Joy stamps.


1.steph 14.karin 27.Jill
2.Suzi 15.Sylvia 28.Doro
3.Ines 16.Andrea 29.Elvira
4.Zetti 17.Betsy 30.Daniela
5.Герцогиня 18.Gerrittina 31.Zimtschnecke
6.Nela 19.Jani 32.Kerstin G.
7.Lemon Bella 20.Bernd Hellmund 33.Isha
8.Moni 21.angelique 34.Petsy
9.Uta 22.Aartje 35.Mary B
10.Kate T 23.Dawn Bennett 36.Paola ♥
11.Tina S. 24.Andrea (Pulsatilla) 37.Domka
12.minidoe 25.Margaret M
13.Karen 26. Anja♥

Collection is finished

Sunday, May 6, 2012

One Fine Day …


Let's welcome the beautiful Sunday morning with a smile …
It is a lovely day … nice weather …
blue skies and breezy …
perfect for a lazy  and relaxing day!
Smile …
So how do you want your Sunday morning to pass?

  
let's get "crafty" later this afternoon …
nothing complicated … 
simply fun and easy!
Lasst uns den schönen Sonntag mit einem Lächeln begrüssen…
Es ist ein schoner Tag…tolles Wetter…
ein blauer Himmel und eine leichte Brise…
Ein perfekter Tag  zum Faulenzen!
Smile …
Was möchtest Du an diesem Sonntagmorgen machen?
Lasst uns heute nachmittag die Zeit zum Basteln nutzen
…nichts schwieriges – einfach nur Spaß haben!

 My Sunday Inspiration 
I will not have a step by step on how I made the card.
It is quite simple.
But I want to inspire you about the project and think beyond it.
That's it!
Meine Inspiration für diesen Sonntag!
Dieses Mal habe ich keine Schritt-für-Schritt-Anleitung, denn…
…es ist ganz einfach
Aber ich möchte Euch mit diesem Projekt inspirieren und es dann weiterführen
Das ist alles!

Stampavie: Vintage Chic Collection (Sarah Kay)
Marguerite taking Ruben for a walk
Hair: E49,E59,E25,E53,E50
Face/Legs: E00,E01,E11,BV00
Pants:BG000,BG13,BG49,BG15,BG70,BG99, Atyou Spica #08 Turquoise
Blouse: Y0000,Y000,Y21,Y23,Y26,W3, Metal Flakes
Dog/Chain: E000,W0,E41,E43,E44/E25,Atyou Spica #20 Chocolate,#00 Clear
Headband: BG000,BG49, Atyou Spica #08 Turquoise
Shoes: W0,Atyou Spica #00 Clear
Antoinette and Bessa go for a stroll
Hair: E29,E25,E31,E30
Face/Legs: E00,E01,E11,BV00
Skirt: Y0000,Y000,Y21,Y23,Y26
Blouse: R89,W9,W3
Dog: E41,E43,E49,E29
Rhonna Designs – Starburst Brushes Kit


"Vintage Chic Collection"  from Stampavie
"Alla Prima Collection" from Prima


Atyou Spica and Metal Leaf

 
Be inspired 
relax …
just have fun!
Findet Inspiration
entspannt euch...
habt einfach Spaß!


Saturday, May 5, 2012

Magical wedding box

Hello Copic fans,
hallo Copics-Freunde.

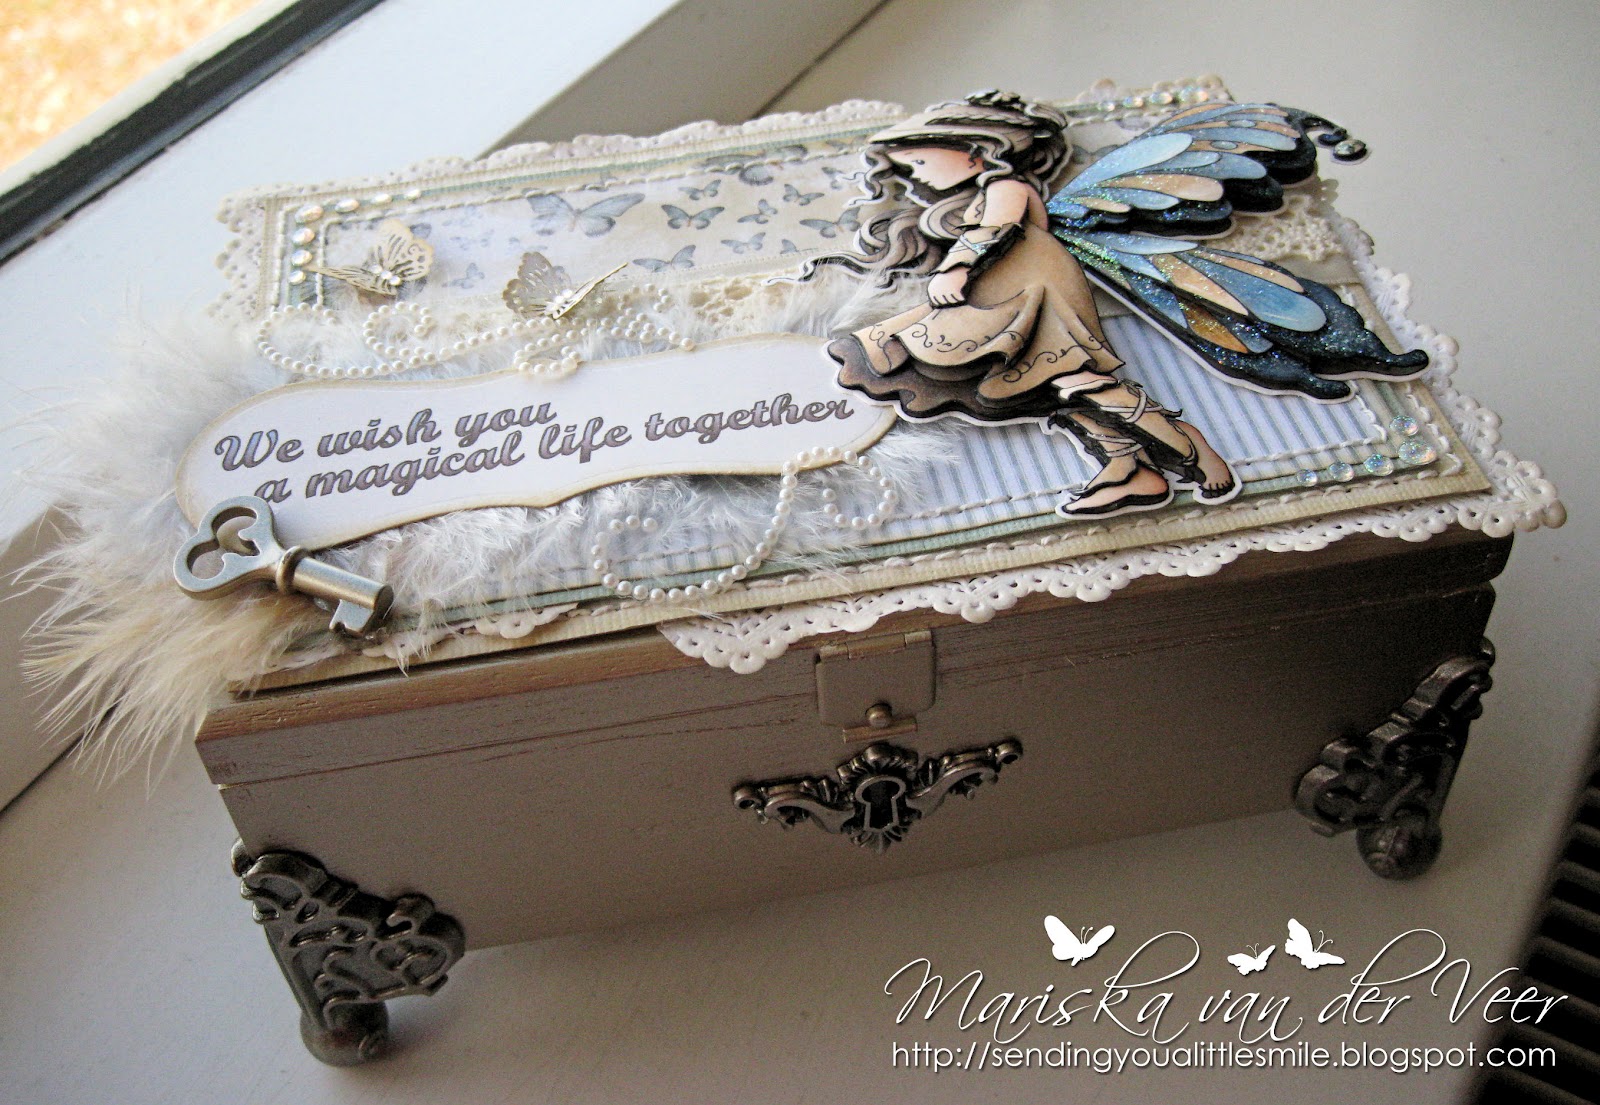
Today I'd like to show you a giftbox I created with the gorgeous Silver Fairy by Wee Stamps. I created this box for a special friend who wanted to give a personal gift to friends that were getting married.
***
Heute möchte ich Euch eine Geschenkschachtel zeigen, die ich mit der süßen Silver Fairy von  Wee Stamps dekoriert habe. Ich habe diese Box für eine spezielle Freundin gemacht, die ihren bald heiratenden Freunden ein persönliches Geschenk machen wollte.

Together with my friend I picked the papers by Inkido and then I picked my Copic Markers to color the Silver fairy to match the colors of the paper. The paper doesn't have very bright colors so I gave a lot of the colors a base of W coloring. The sentiment was computer generated.
***
Zusammen mit meiner Freundin habe ich die Papiere von Inkido ausgesucht und dann farblich passend meine Copics verwendet um Silver Fairy zu colorieren. Das Papier hat keine leuchtenden Farben, darum habe ich unter vielen Farben eine Basis mit W-Tönen gelegt. Der Text ist mit dem Computer geschrieben.
 
The pretty sparkly wings were created with Stickles. A little tip I'd like to give you is to adjust the sort of Stickles you work with to the Copic colors you are using. My personal favorite Stickles to use in colored images are Diamond, for brown and golden colors, Crystal, for green and turquoise colors and Star Dust for other colors. Different Stickles will enhance or diminish the color of your Copic colored project in different ways, just experiment and see what combinations you like best.
***
Die wunderbar glitzernden Flügel habe ich mit Stickles gemacht. Ein kleiner Tip, den ich Euch geben möchte, ist, Eure Stickles den Farben der Copics anzupassen, mit denen ihr gerade arbeitet. Meine persönlichen Favoriten auf colorierten Motiven sind Diamon für Braun- und Goldtöne, Crystal für Grün- und Türkistöne und Star Dust für die anderen Farbtöne. Verschiedene Stickles werden die Copic-Farben darunter  auf verschiedene Weise verstärken oder vermindern, experimentiert einfach ein wenig damit um herauszufinden, welche Kombinationen Euch am besten gefallen.

As always the image was paper pieced, below you'll find a picture of the little pieces that this image was built with.
***
Wie immer habe ich das Motiv mit Paper Piecing aufgebaut, unten seht Ihr ein Bild der kleinen Teile, aus denen das Motiv zusammengesetzt ist.

And finally a picture of the outside of the box. The base is an ordinary cigar box but it was spray painted in a pretty golden/platinum color. The hardware on the box is all Tim Holtz. I have pictures of the inside too as well as a wallet I created for my friend to put a gift in but I'll leave those pictures for my personal blog tomorrow.
***
Und hier ist endlich ein Bild von der Box. Grundlage war eine normale Zigarrenkiste, die ich in einem schönen Gold-/Platinton angesprüht habe. Die Metallteile auf der Box sind alle von Tim Holtz. Ich habe auch Bilder vom Inneren der Box sowie von einem Geldbeutel, den ich gemacht habe, damit meine Freundin ein Geschenk hineinstecken kann, aber die werde ich morgen auf meinem privaten Blog zeigen.

I hope you like my box. The Copic Markers used to color the Silver Fairy are:
***
Ich hoffe, Euch gefällt die Box. Die Copics, mit denen ich die Fee coloriert habe, sind:
 
Skin/Haut: E11, E00, E000, E0000
Hair/Haar: E47, E44, E42, E41, E40
Brown in clothes, flowers and wings/Brauntöne in Kleidung, Blumen und Flügeln: W5, W3, W1, W0, W00, E59, E57, E55, E53, E51, E50
Blue in clothes, flowers and wings/Blautöne in Kleidung, Blumen und Flügeln: W5, W3, W1, W0, W00, B99, B97, B95, B93, B91, B00, B0000
Bell/Glocke: E87, E84, E81
Center of flowers/Mitte der Blume: R22, R20
Underlying layers (3D paper piecing)/untere Lagen beim Paper Piecing: W5

Hugs,

Friday, May 4, 2012

Coloring Fur Tutorial

Hello Copic lovers,
hallo Copic-Freunde.

It's my (Kathrin) turn to share a tutorial with you and I have decided to make a tutorial on how to color fur for you. We already had a tutorial about coloring fur using the Activator Spray and a cloth, but of course there are different ways to do it and so I am sharing how to color fur using the dots technique.
***
Ich (Kathrin) bin an der Reihe, ein Tutorial mit Euch zu teilen und ich habe beschlossen Euch zu zeigen, wie Ihr Fell colorieren könnt. Wir hatten schon ein Tutorial über das Colorieren von Fell mit dem Activator Spray und ein Mikrofasertuch, aber natürlich gibt es verschiedene Wege und ich zeige Euch das Colorieren von Fell mit der Punkte-Technik.

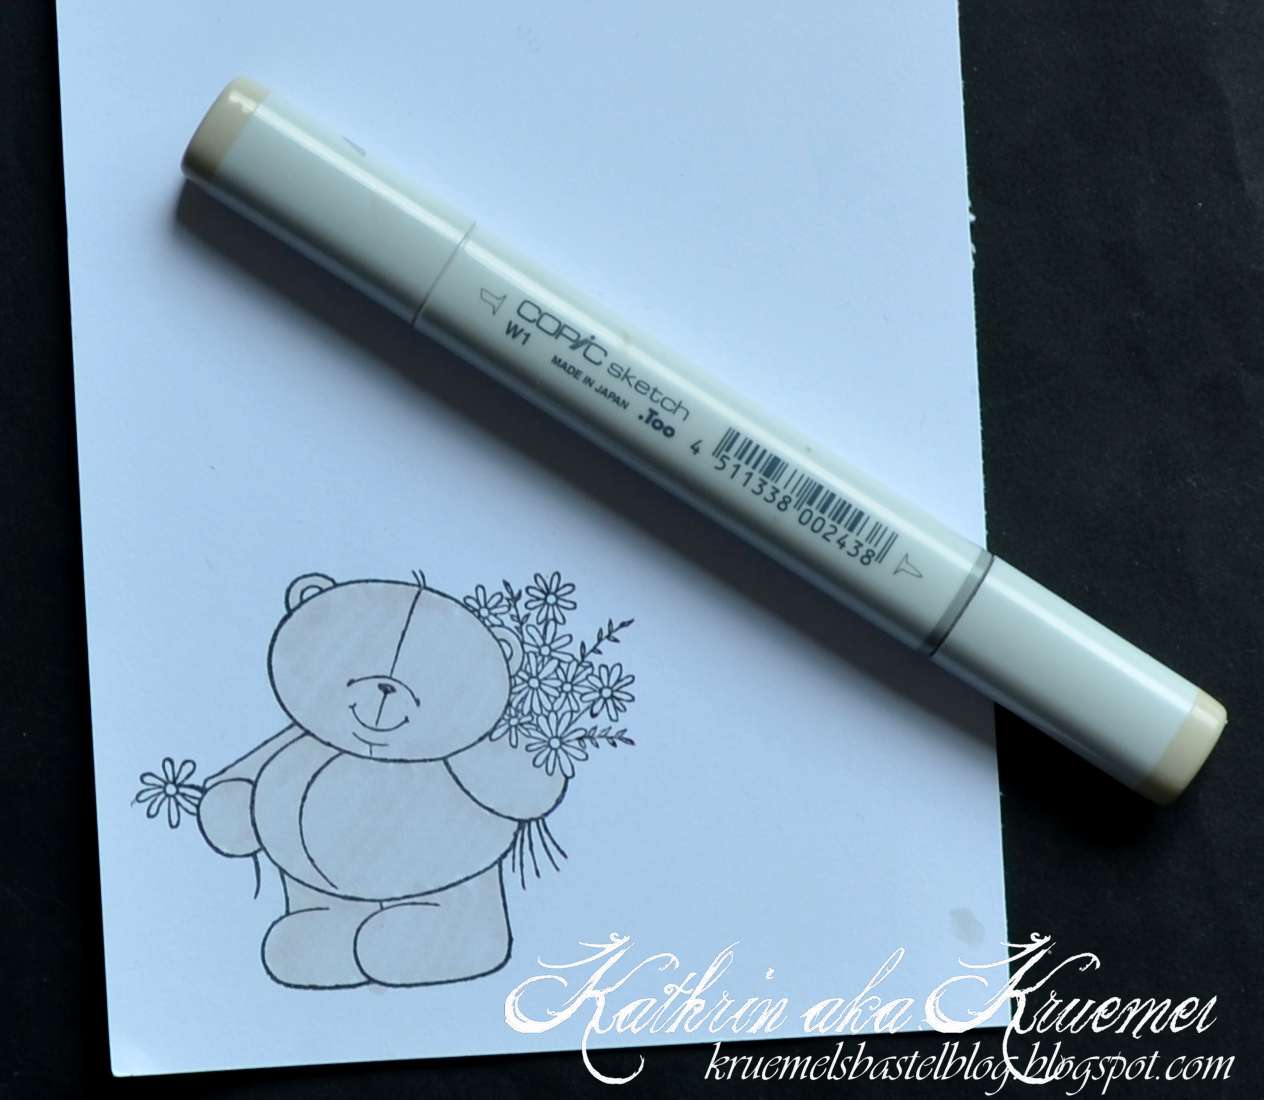
First stamp your image on a piece of coloring cardstock. I used this cute little bear by Forever Friends. 
***
Als erstes stempelt Ihr Euer Motiv auf ein Stück Cardstock. Ich habe mich für diesen kleinen Bären von Forever Friends entschieden.


Next I cover the whole image with one layer of W1. You will see later why I do this. If you decide to go with another group of grey tones just use a light shade of this group, like C1 or N1.
***
Als nächstes gebe ich eine Lage W1 über das komplette Motiv. Ihr werdet später noch sehen, warum. Falls Ihr lieber mit einer anderen Gruppe von Grautönen arbeiten möchtet, dann verwendet eine hellen Ton aus der Gruppe Eurer Wahl, z. B. C1 oder N1.


For the dots I start with E44. This isn't the darkest tone I will use but it's easiest to start with a middle tone and add the darkest shade last.
I apply little dots to the areas that I want to have the darkest in the end. I make more dots in the darkest area and then add a few ones to the areas that will be lighter later to have  a good color transition.
***
Für die Punkte beginne ich mit E44. Dies ist nicht der dunkelste Farbton, den ich verwenden werde, aber es ist einfacher, mit einem mittleren Ton zu beginnen und den dunkelsten zum Schluss nur dort hinzuzufügen, wo der meiste Schatten liegt.
Ich lege kleine Punkte in die Bereiche, die später am dunkelsten werden sollen. An den dunkelsten Stellen mache ich die meisten Punkte und mache ein paar zusätzliche, weiter auseinander liegende Punkte im nächst helleren Bereich um einen guten Farbübergang zu bekommen. 


The next color I use is E43. I use this tone to fill up the light spots between the E44 dots and add more to the next lighter area as seen on the picture.
***
Ich mache mit E43 weiter. Mit diesem Farbton fülle ich die hellen Stellen zwischen den E44-Punkten auf und mache im nächst helleren Bereich mehr Punkte, wie Ihr auf dem Foto sehen könnt.


Then I repeat these steps with E41, the lightest color I am going to use. Still leave the lightest areas without dots.
***
Dann wiederhole ich diese Schritte mit E41, der hellsten Farbe, die ich verwende. Laßt noch einen Bereich ohne Punkte.


For those light areas I use the Colorless Blender to add some dots in the W1 color. This will add a little texture to the lightest areas. 
***
In den hellsten Bereichen benutze ich den Colorless Blender und setze kleine Punkte in die Schicht aus W1. Somit bekommt Ihr auch in diese Bereiche etwas Struktur.


At the end I use E49 and just add a very few tiny dots to the areas with the most shadow. If you want to you can use the E43 to soften the color difference a bit.
***
Zum Schluss verwende ich E49 und füge ein paar sehr kleine Punkte in die Bereiche ein, die den meisten Schatten haben. Wenn Ihr mögt, könnt Ihr anschließend E43 verwenden, um die Übergänge etwas sanfter zu gestalten.


All that is left to do now is coloring the left over areas of your image....
***
Alles was jetzt noch zu tun ist, ist die übrigen Bereiche Eures Motivs zu colorieren....


....and put it on a card.
I used my image on a tag:
***
...und das Motiv auf einer Karte zu setzen.
Ich habe einen Tag damit gemacht:


And these are all the Copics I used:
***
Und das sind alle Copics, die zum Einsatz kamen:


I hope you give this a try and have fun coloring your bears or dogs.
***
Ich hoffe, Ihr versucht die Technik einmal und habt viel Spaß dabei, Eure Bären und Hunde zu colorieren.

Thursday, May 3, 2012

Tilda With Heart Balloons

Hello!!
Hallo!
 
Today it's my turn to give you some inspiration again. I've made a shabby chic card for a girl.
***
Heute bin ich an der Reihe, Euch etwas Inspiration zu geben. Ich habe eine Shabby Chic Karte für ein Mädchen gemacht.

 A few days ago I bought some new papers from Maja Design. They are called Vintage Summer Basics, and they're really beautiful. I just had to use them on this card.
***
 Vor ein paar Tagen habe ich ein paar neue Papiere von Maja Design gekauft. Sie heißten Vintage Summer Basics und sie sind wunderschön. Ich mußte sie einfach auf dieser Karte verwenden.

It is a very long time ago since I have coloured an Magnolia image with my Copics. So I decided to use this cute, little Tilda for my card. She is from the Sweet Crazy Love collection and is called Tilda With Heart Balloons.
***
Es ist sehr lange her, dass ich ein Magnolia Motiv mit meinen Copics coloriert habe. Also habe ich beschlossen, diese süße, kleine Tilda für meine Karte zu benutzen. Sie ist ausder Sweet Crazy Love Kollektion und heißt "Tilda with Heart Balloons".

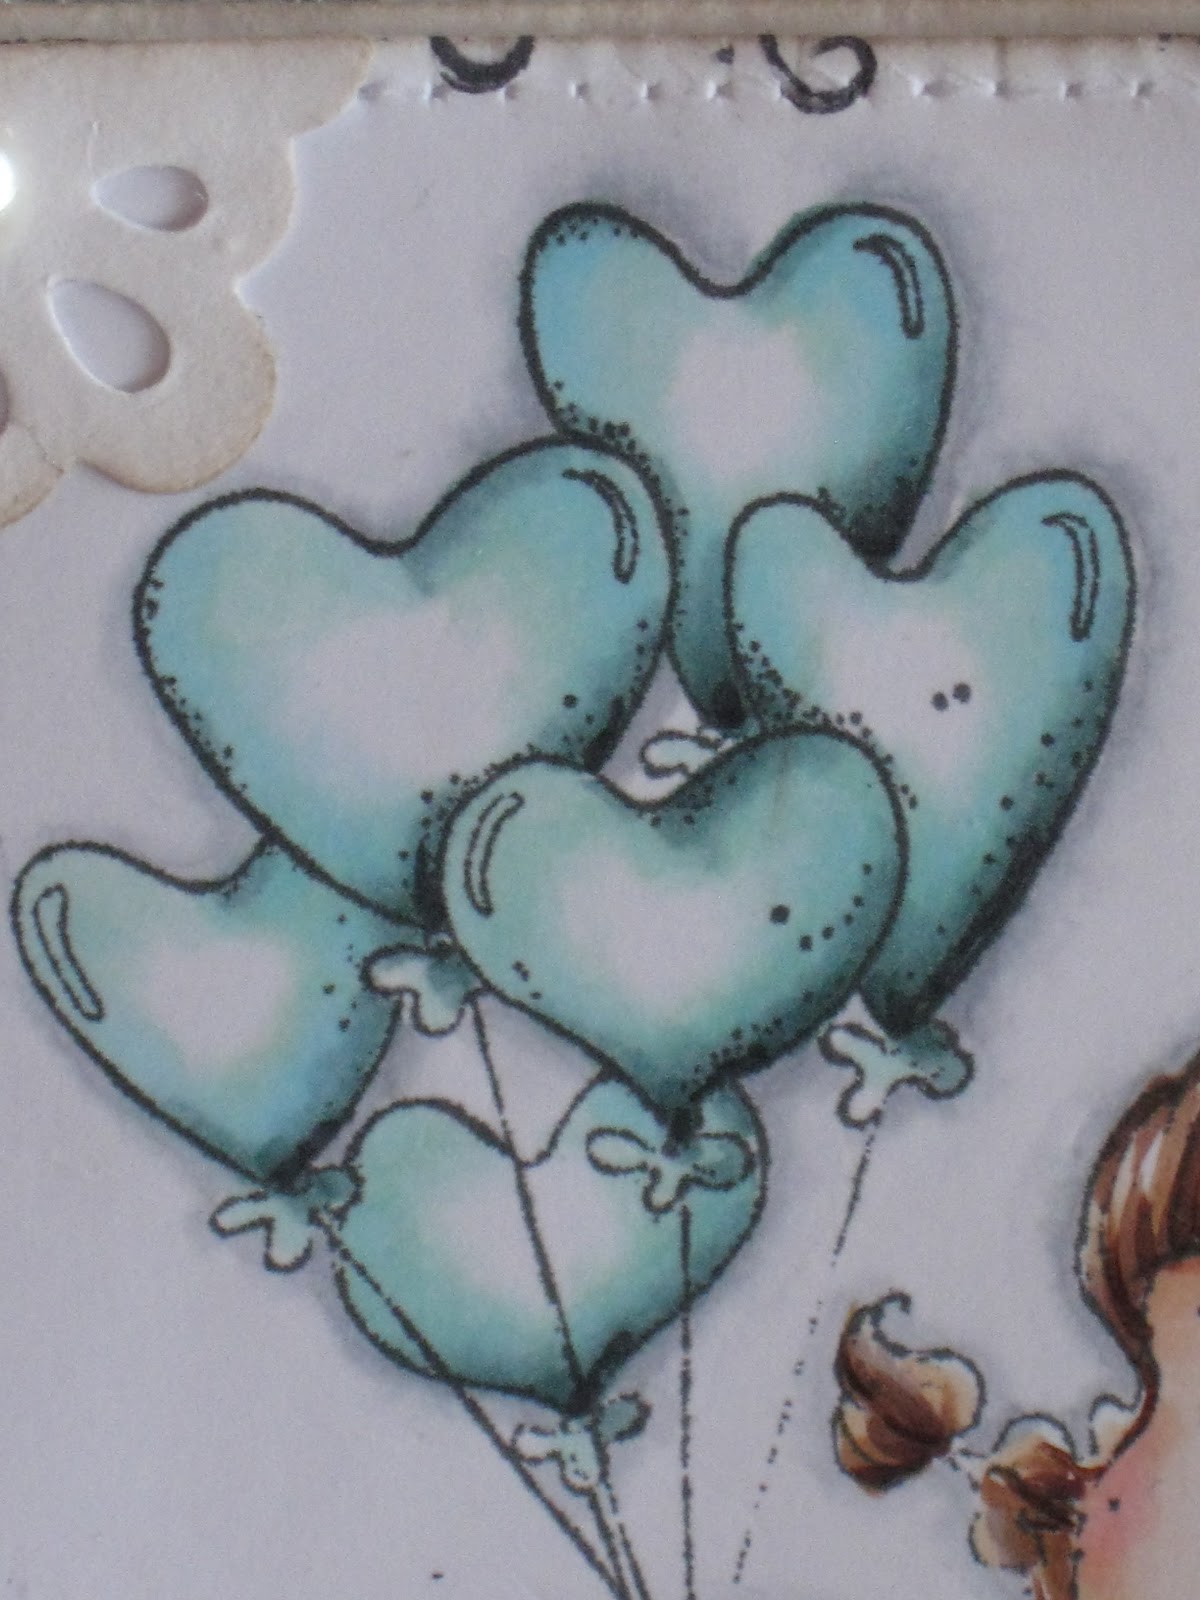
 I think I always end up colouring pink. I challenged myself to use another colour this time. And I really like the result!
***
Ich glaube, ich verwende immer die Farbe pink. Darum habe ich mich selbst herausgefordert und diesmal eine andere Farbe verwendet. Und ich mag das Resultat wirklich!
 

 In the middle of the balloons I've used a little colorless Blender. I wanted this area to be very light.
***
In der Mitte der Ballons habe ich etwas Colorless Blender verwendet. Ich wollte diesen Bereich sehr hell haben.

Inside the card you can see the beautiful papers from Maja Design. And there is also a Norwegian text. It means: You are unique.
***
Im Inneren der Karte könnt Ihr die wunderbaren Papiere von Maja Design sehen. Und dort ist auch ein norwegischer Text; er bedeutet: Du bist einmalig.

Copics used for this image:
Zum Colorieren verwendete Copics:
Skin/Haut: E0000-E000-E11-E21-R11-R20
Hair/Haare: E51-E25-E29-E35-E71
Dress/Kleid: B0000-BG000-BG10-BG72 and some selfmade BG71
Balloons/Ballons:B0000-BG000-BG10-BG72-BG75 -colorless Blender and selfmade BG71
Lace and socks/Borte und Socken: W00-W1-W3-W4
Shoes/Schuhe:W00-E40-E42-E43-E44

Hope you like my card:)
Ich hoffe, Euch gefällt meine Karte :)
 
Hugs,
liebe Grüße
Hanne

Tuesday, May 1, 2012

Coloring Background


For this post today I have made a video about coloring a background with Copic Markers.
It isn't necessary to have an Airbrush machine to make beautiful backgrounds.
-----------------------------------
Für diesen Beitrag habe ich ein Video darüber gemacht, wie man einen Hintergrund mit Copic Markern koloriert.
Man muss kein Airbrushgerät haben, um schöne Hintergründe herzustellen.


You can color backgrounds directly with your markers.
Be aware you use light colors.
-------------------------------------
Ihr könnt Hintergründe direkt mit euren Markern kolorieren. Achtet darauf, dass ihr helle Farben verwendet.


I hope you have learned something from my video
----------------------------
Ich hoffe, ihr habt estwas aus meinem Video gelernt.


Here a close up from the background.
When you look very good at the image, you can see
the lighter and darker places also in the blue sky
isn't the same color everywhere. 
It is my intention not to color equal because nature isn't also equal.
-----------------------------------
Hier ist eine Nahaufnahmne des Hintergrunds.
Wenn ihr euch das Bild ganz genau anseht, könnt ihr hellere und dunklere Stellen sehen, denn auch ein blauer Himmel hat nicht überall diegleiche Farbe.
Es war meine Absicht, nicht gleichmäßig zu kolorieren, denn die Farben der Natur sind nicht gleichmäßig.  


With the image from Vilda stamps and papers form Kaiserkraft I made this card.
With a border punch from Martha Steward I have made the border.
The flowers are from the scrapbookshop.
-----------------------------------
Ich habe ein Motiv von Vilda Stamps, Papier von Kaiserkraft und eine Randstanze von Martha Stewart für diese Karte verwendet.
Die Blumen sind aus dem scrapbookstore.

Used Copic Markers
-----------
Verwendete Copic Marker

For the bottle/Flasche: BG90 BG93 BG96 BG99
Label from bottle/Etikett: YR24 Y23 E21
Black elements on the bottle/Schwarze Teile der Flasche: T5 T7 T9
Mushrooms/Pilze: R37 R35 R32 E44 E43 E41
Wooden elements/Holzelemente: E49 E47 E29 E23 E25
Gras G20 G24


As usual I design the inside of the card
Wie immer habe ich auch die Innenseite der Karte dekoriert.


A close up from all the markers.
Hier noch eine Nahaufnahme der verwendeten Marker.

I really hope you have learned something from this post
Thank you for leaving your comment
Ich hoffe wirklich, dass ihr etwas aus diesem Beitrag lernen konntet.
Danke für eure Kommentare.