Followers

Showing posts with label UK. Show all posts

Saturday, July 8, 2017

Mermaid Madness

Good Morning everyone...
It's Sue here today to show you a few ideas for creating a mermaid card.

Sandie did a beautiful tutorial on Wednesday which showed how to colour an underwater scene with Copic Markers.

Today I am going to show you how to use a Copic Airbrush System to create the sea, and how to use Copic Refills, mirror card and die cuts to create bubbles.

I enjoyed this so much and I hope you do too!


Here are the ingredients I used to make my card.  The Copics for the sea are Copic Markers BG13, B24, RV17, B29 and the Copic Refills for the bubbles are BV08, YG95, Y17 and Colourless Blender.
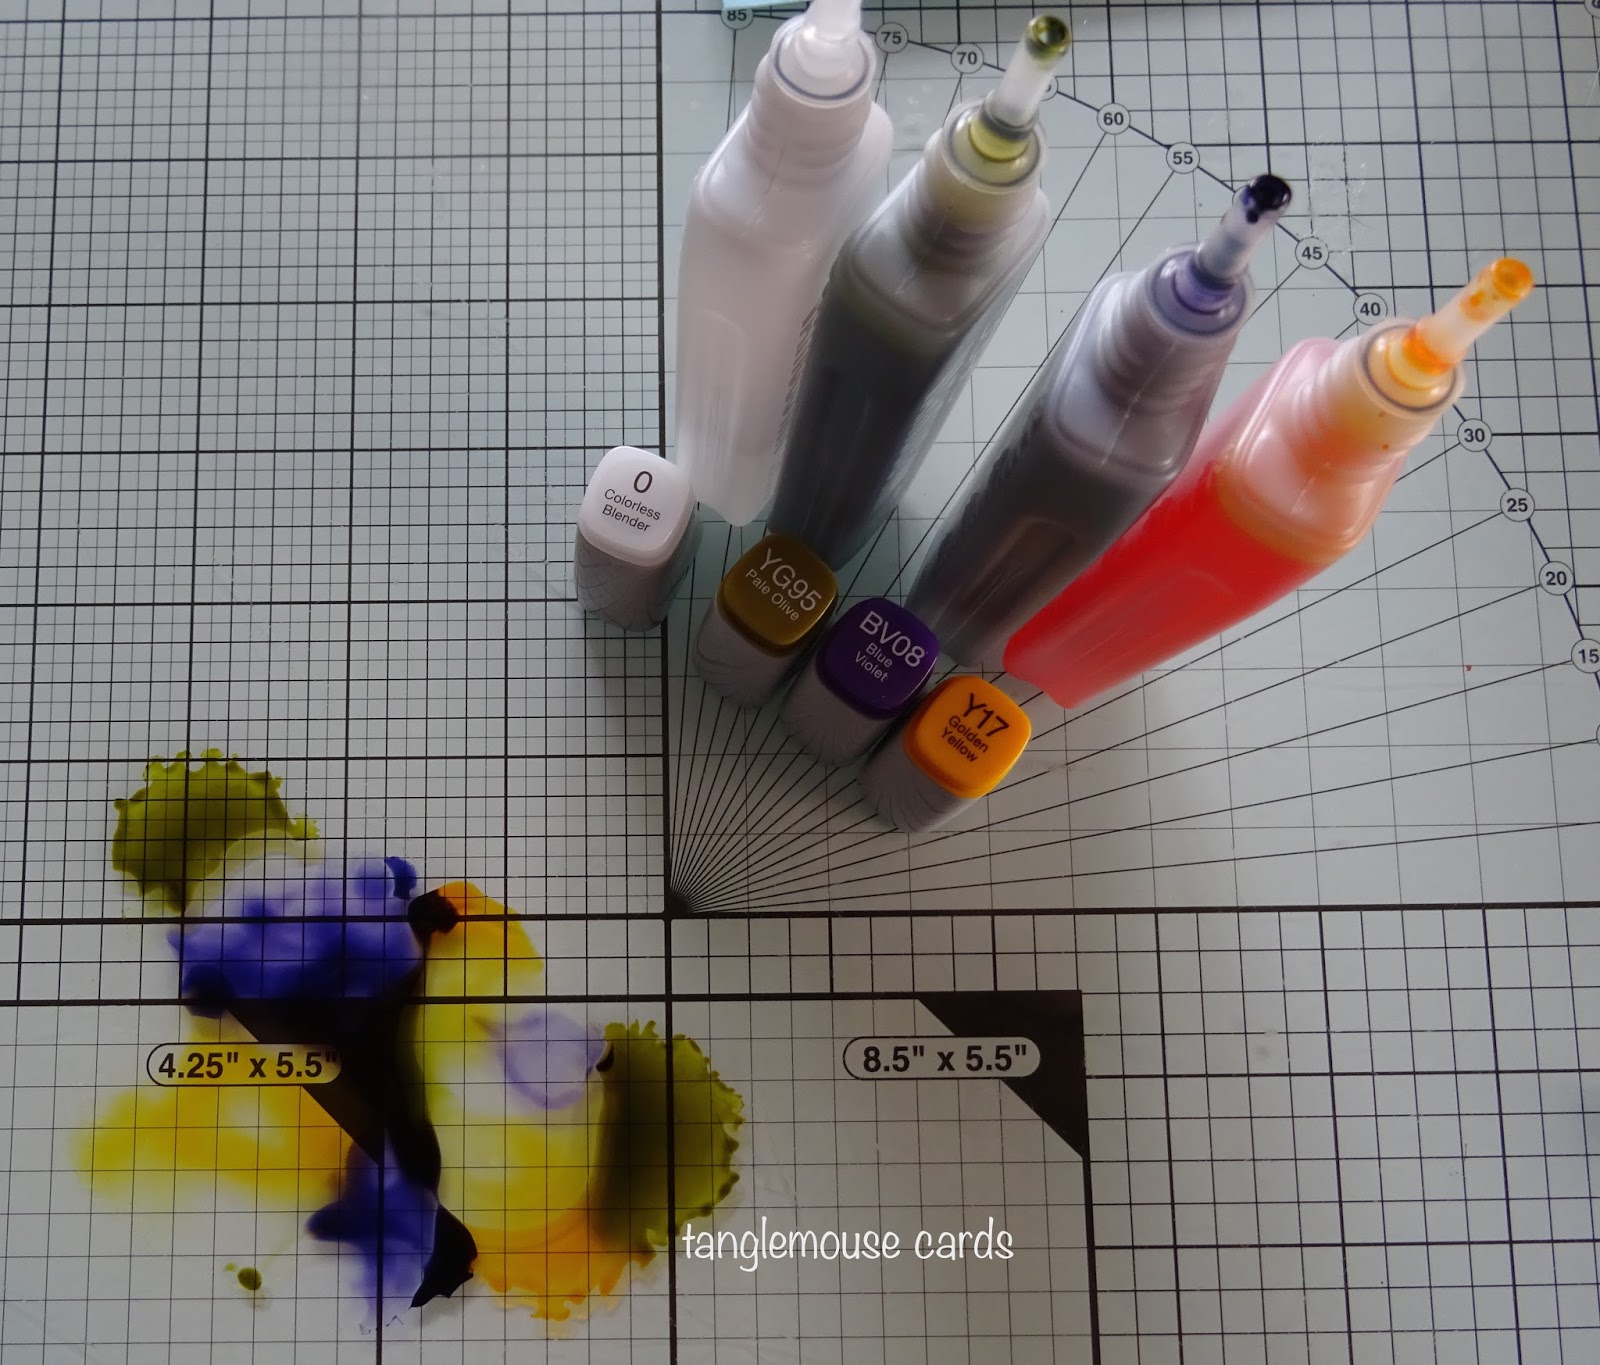

First, I dropped a few spots of Copic Refills BV08, YG95, Y17 and Colourless Blender close together on a glass mat. 


Then I pressed a piece of silver Mirrored card onto the ink - you need to work swiftly here as the Refills dry quite quickly, also, don't move the card around, just press it onto the inks and lift it off.


The effect of the refills on the mirror card will look something like this.  (I love this so much I am already thinking that this effect will look great for snow and snowflakes)!


Using Memory Box Small Ringlets and Circle Dies I die cut cut the mirrored card.


I love how you can see the purple and gold marbling on the die cuts. 


 Next, to make the sea, I used the Airbrush to colour a piece of card.
I used the chisel nib of the Copic Markers and sprayed the colours in the order B24, B29 and RV19.  Copic Airbrushing is very straightforward if you remember to spray slowly and steadily.  (....and remember to cover your work surface with paper - this is especially important because the ink goes a long way)!


Finally, I sprayed the card with B29 using the brush nib of the Copic Marker.  When you use the brush nib in an airbrush the effect is like a fine ink splatter.


Next, to create a watery effect in the sea I first tipped some Colourless Blender into a pot.


Then, I completely dipped my fingers into the colourless blender,


...and flicked the blender onto the card, I did this a few times until the blue sea was covered in lots of different sized droplets.


I thought these two techniques were really good fun! 
It would be great if you could try this and show your cards to us at 
Copic Marker Europe on Facebook.
To find us just follow the link


I finished my card by colouring a mermaid from the gorgeous MFT set - Mermazing, and adding a sentiment from the MFT set - You're A-maze-ing.

Copic Markers Used
Skin - E04, E01, YR000, YR0000
Hair, YR24, YR23, E99
Mermaid Tail - BV08, V17, V15, 
Gold Star - Y19, Y15, Y11
Clown Fish - YR09, YR04, YR02


Thank you for popping by.
happy Copic Colouring...
from Sue ...xxx

Saturday, May 13, 2017

Sparkle and Shine with Copic Glitter Pens

Hello everyone!

Sue here today, to tell you something about Copic Glitter Pens and show you an image that they help to colour beautifully!

If you love sparkly, shiny things, then these gorgeous pens are just for you!


Copic Glitter Pens are available in 24 colours which are sold in two sets of 12 pens. 

The pigment-based archival ink is transparent and can be used over other pens and the beautiful subtle glittery effect is produced by micro glass flakes which really reflect the light. 

The important thing to remember about Copic Glitter Pens is that they must be stored lying down otherwise the teeny tiny glass flakes will sink to one end of the pen and clog the nib. This is different of course to Copic Markers which can be stored anyway up.

I absolutely love Copic Glitter Pens. The nib is really fine which makes them perfect for colouring the tiny details some images have.

I have put together a tutorial where I have used Copic Glitter Pens to colour a lovely image by Stamping Bella - Giftabella.


I stamped the image on Make it Colour Blending Card with black Memento Ink and selected my Copic colours.  You can see that Giftabella has an armful of presents with some fine details which are perfect for colouring with Copic Glitter Pens.


I coloured the image with Copics and left the tiny details until the end to colour with Copic Glitter Pens. I chose five Glitter Pens to go with the Copics I have used - Lipstick, Turquoise, Orange, Pink and Clear.  (The clear pen is my favourite because you can use it over the top of any colour).


I carefully coloured the fine details of the image with a Copic Glitter Pen.


...and I coloured over some of the Copic colours with the clear Glitter Pen.


This is the image when I had finished colouring it and adding the lovely glittery details with the Glitter Pens.

I had great fun making this card and here is the finished design.


This picture shows how sparkly the Copic Glitter Pens are and just how they can make an image shimmer and shine!


I hope you have enjoyed my tutorial.  It would be great if you could try this technique and show your cards to us at Copic Marker Europe on Facebook.
To find us just follow the link

Copic Markers 
Skin V20, E00, E000, E0000
Skirt & Shoes BV08, B69, B66, BV13, B63, B60
Gifts BG09, BG49, BG45, BG15, R59, R56, R45, R14, RV66, RV17, RV55, YR09, YR07, YR04, YR14, Y38, Y35, Y32
Ground W5, W3, W1
Copic Glitter Pens -
Lipstick, Turquoise, Pink, Orange, Clear

Other Ingredients
Giftabella by Stamping Bella
Make it Colour Blending Card by Elaine Hughes (Marker Geek)
Memento Ink Pad in Black
MFT 6x6 Paper Pad Dots and Stripes Brights 
Lawn Fawn Stitched Oval Stackables
Whimsy Hand Stitched Rectangle
MFT Stitched Labels
(all from Dies To Die For)


Thank you for popping by.
Happy Copic colouring!
love from
Sue...xxx