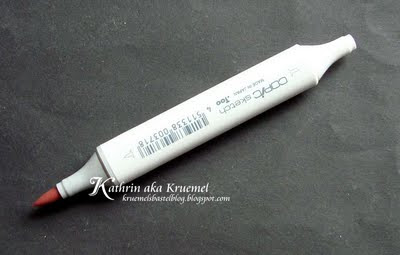
Hello Copic friends!
This is my first tutorial here on this blog and I hope it will be helpful to you.
***
Hallo Copic-Freunde!
Dies ist mein erstes Tutorial auf diesem Blog und ich hoffe, es wird nützlich für Euch sein.
I love to make light coloring but sometimes I am missing a very light shade of a color. So today I am going to show you how to make your own Copic colors. All you need is a refill of your choice, a colorless blender refill and an empty marker. I went with E04 here.
***
Ich mache gerne sehr helle Colorationen aber manchmal fehlt mir einfach ein heller Ton einer gewissen Farbe. Darum zeige ich Euch heute, wie Ihr Euch den selbst machen könnt. Alles was Ihr braucht ist ein Refill Eurer Wahl, einen Colorless Blender Refill und einen leeren Marker. Ich habe hier E04 verwendet.

Pull out the Chisel Nib from the empty marker. You can do this with your fingers but if you have the tweezers I really recommend using these - the more if you refill a marker that had already color in it since the tweezers avoid your fingers from getting inky.
***
Zieht die breite Spitze des leeren Markers heraus. Ihr könnt das entweder mit den Fingern tun oder besser die spezielle Pinzette dafür verwenden. Vor allem wenn Ihr einen Marker wiederbefüllen wollt ist die Pinzette die bessere Wahl denn sonst bekommt Ihr farbige Finger.

Also remove the cap from the other end of the marker. This will help the ink flow easily.
***
Zieht auch die Kappe am anderen Ende des Markers ab. Dadurch verteilt sich die Farbe gut im Marker.
***
Zieht auch die Kappe am anderen Ende des Markers ab. Dadurch verteilt sich die Farbe gut im Marker.

Next you have to fill your marker with ink. Drop in 3 drops of the color, then add 3 drops of the colorless blender ink. Repeat this until you see the brush nib getting inky and nicely saturated from ink. This is the sign that your marker is full.
***
Als nächstes könnt Ihr den Marker befüllen. Träufelt 2 Tropfen Eurer Farbe hinein, fügt dann 3 Tropfen Colorless Blender Flüssigkeit hinzu. Wiederholt das so lange, bis die Pinselspitze gut mit Farbe vollgesogen ist. Das ist das Zeichen, dass Euer Marker fertig befüllt ist.
***
Als nächstes könnt Ihr den Marker befüllen. Träufelt 2 Tropfen Eurer Farbe hinein, fügt dann 3 Tropfen Colorless Blender Flüssigkeit hinzu. Wiederholt das so lange, bis die Pinselspitze gut mit Farbe vollgesogen ist. Das ist das Zeichen, dass Euer Marker fertig befüllt ist.

And here I am showing you the difference between the E04 that I used the ink from and the light color I created myself:
***
Und hier könnt Ihr den Unterschied zwischen dem normalen E04 Marker, von dem ich die Tinte benutzt habe, und der selbstgemachten Farbe sehen:
***
Und hier könnt Ihr den Unterschied zwischen dem normalen E04 Marker, von dem ich die Tinte benutzt habe, und der selbstgemachten Farbe sehen:

With this technique you can not only make light colors but also your own colors by mixing different inks together. So if you have a combination of two colors that you always put on top of each other just make yourself a marker from it!
***
Auf diese Weise könnt Ihr nicht nur hellere Farben herstellen sondern auch Eure eigenen Farben indem Ihr zwei Tinten zusammenmischt. Falls es also zwei Farben gibt, die Ihr immer aufeinander legt um einen bestimmten Farbton zu erhalten - mixt Euch doch einfach Euren eigenen Marker!
***
Auf diese Weise könnt Ihr nicht nur hellere Farben herstellen sondern auch Eure eigenen Farben indem Ihr zwei Tinten zusammenmischt. Falls es also zwei Farben gibt, die Ihr immer aufeinander legt um einen bestimmten Farbton zu erhalten - mixt Euch doch einfach Euren eigenen Marker!


8 comments:
Toll, das muss ich unbedingt ausprobieren!
suuper Idee.. danke..
LG, Katrin
Kathrin ... great detailed tutorial.
hoy-hoy
wat een geweldig idee om zo je eigen kleuren te kunnen maken,helemaal TOP!
groetjes van corry
Hi Kathrin,
Great Tutorial, it's a very good idea.
Hugs Lydia
Cooooooooooool thank you!
Thanks for the tut!
Hi Kathrin, great explanation, clear for everybody. I just made a E04 pale.
diny
Post a Comment