Followers

Sunday, January 26, 2020

Art Supplies Make You Thin.....

I have made an art journal page.
Because there is a lot of reds and pinks in the background I decide to use blue as a contrasting colour. 


I always start with E50.  


Then add BV00 , my favorite colour for shading. 


Add E00 on top of the  BV00 to create a warm skin tone. 


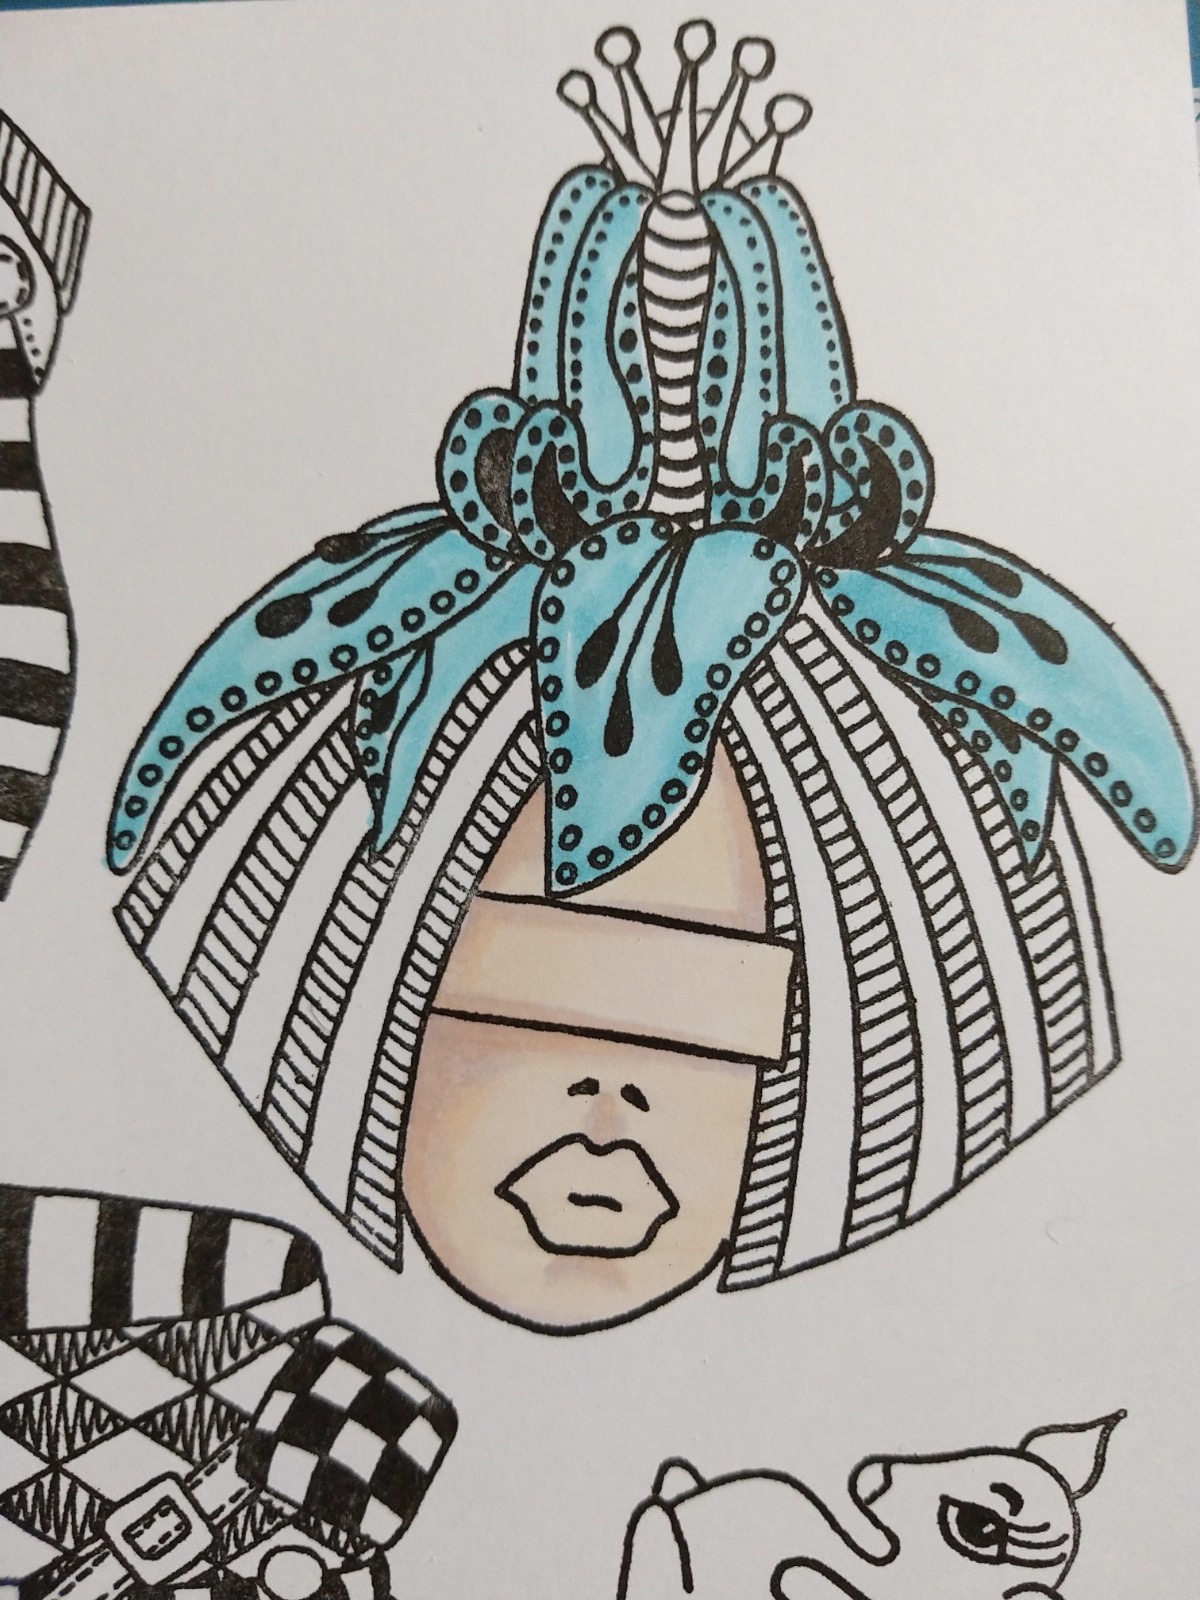
Blend all layers together with the E000. 
First layer of the flowers is  FBG02.


Add B06 for shading.


Blend B06 with the B05. 


And then blend the B05 with the B00. I also added a thin layer of FBG2. 


For her hair I use RV21.


Then add RV23. 


And finally the RV25. Use the RV23 and RV21 for blending. 


I used all the previous colours for her coat, the RV21, RV23, B05 and the B06. 


Use RV21 as a first layer


then I added the RV29.


Next the RV25.


Blend all layers together with RV21.


Looking at my background my images are going to be to pink. So I decided to add a thin layer of R14 to make it a more redish pink . 


So I added some R14 on some pink parts of the images.  It now looks much better with my background. 


I started colouring the legs too, but after I decided not to use them I stopped adding more layers. 


Use R12 for the tiny flowers..


Use R14 and R17 as well . 
Use the same pinks and reds for the eyes. 


First layer the R12.


Add the R14 and the R17.  


Blend the layers together wih R12. 

I use a nice blue, the FBG2 for the large flower.


And this is how my page turned out. 

See you next time
Miranda

Wednesday, January 22, 2020

Cicci Coloring Tulips

Hi Copic lovers
Cicci here today posting from Sweden;0)

This is my first post for the lovely 2020!! 
Its tulips time and of course I want to show how I color this one

The Copic Combo that I have used is
Red: R30 R35 R37  R39 R89 Y02
Other tulips
R00 R30 R35 R37 R39 R05 R21 R20 Y02
BV000 BV0000 BV02 V22
RV00 RV23 E07 E99 Y02 Y00  E08 E29
and a little of RV99 for some details
Leaves: G20 21 24 G40 G43 G29
Background: Some dots with
BV0000 and Y02 RV02 B000
I have also added some white dots with a Posca pen

Step 1
First I draw some tulips and leaves

Step 2
Start with R30 with light strokes and leave some  white area for the highlight

Step 3
Add R89 over R30 

Step 4
Add R39 


Step 5
Add R35 and R37 and blend with R30 

Step 6
Add more of R89 in the area that you want more dept and blend with R37

Step 7
I go over the tulips again with R35 R37 R39 and blend with R35 and R30 again
I have no photos for this step

Step 8
Add some dark RV99 in the corners at leaves

I have also add some  Y02 at the end 

DONE!!


I hope you try this and have a lot of fun with your markers
Have a lovely day and see you next month 

HUGS and SMILES

Saturday, January 18, 2020

Portrait of a Lady


Hello everyone! It's Delphine here today to share something a bit different, with Paperbabe Stamps products, and a style of image I particularly love. To create my portrait, I stamped the hairstyle from the Flourishing Hair set in Memento Tuxedo Black Ink, combined it to the matching template to mask it, then stamped my face, which comes from the Female Face 3/4 View. And the fun begins with the Copic colouring!


I coloured the skin using YR0000, 000, 00, E11 with a bit of RV00, 02 for on the cheeks and I added shadows using V22 - just dare to be bold with your shadows, your face will really look different ;)
I then coloured the lips in RV00, 02 to match the pink of my cheeks.


I then did the eyes using B02, 26 and again added shadows using B63, 66.


For the hair I drew the lines of the hair in my lightest colour RV000 to see how to limit the hair area and then went up to my darkest colour, then to my lightest. I used RV000, 00, V000, 01. I then added a touch of blue in B000.


I added colour to the left of the face to suggest darker hair with RV02 and V22. Then I suggested skin below the chin with E11 and YR000 and a sweater or top in B000, B0000, V01,000.
To avoid a brutal stop for my image, I added colour around my character to smoothen the lines with V01, V000 and RV000. As a final touch, I created strands of hair in the "background" in RV000.


Thank you very much for your visit, have a great weekend! Hugs,
Delphine xx

Sunday, January 12, 2020

Love Bugs...


Hi all,

A New Year has started ...
so I thought why don't we start 2020 with a little love?

I have coloured up some of the the brand  new stamps from Kraftin Kimmie,
I love this " Love bugs " set as it has many different images and some fun sentiments too..

To use several images together I have  masked some stamps to create various layers,
just a little reminder  when you are masking stamps  the first stamped image will actually be the one in the front at the end.


So that means that these ladybirds and the big flower (my first stamped images) will be in the front of all the later stamped images in the end.

You will need :
 Perfect Colouring paper, masking tape and stamps...


this is during the masking...


This is during the colouring of the flowers

Below you can watch my video from the start until the finished card,
step by step.


Thanks for watching! 


Copic :
Flower Combo 1: R81, R83, R85, R89
Flower Combo 2 : R81, R24, R29, R59
Heart Flowers : E42, E44, E47, E49
Ladybirds :R14, R17, R12, R27
YR23, YR21
T5, T7, T10
Greenery : G14, G94, G99, G24, G21
Copic multiliner SP0.3 BLACK

Stamp: Love Bugs by Kraftin Kimmie
Ink : Krafty Kolours hybrid: Crisp Crimson by Kraftin Kimmie
Die: MFT
Cardstock: avec

Thanks for your visit !

PS Next Sunday in Rome ECCP 1 and ECCP 2 colouring classes!!

Hugs Blankina 

Monday, January 6, 2020

"Maybe in Distance..."

Hi Everyone,

First of all I wish everyone a healthy, happy and creative 2020.
I made a CAS card with a stamp from Concord & 9th, Vintage Artichoke stamp set.


I stamped the image with Memento London Fog on Perfect Coloring Paper.
I used the grey color for the no line effect.

I used the following colors:
BV25 - YG95 - YG93 - V12 and R11


I glued it on black cardstock and stamped a text from the set on it.
The very last step to make the artichoke pop from the page, I used a BV20 for some shade underneath.


Hope to see you next time!