Followers

Sunday, January 29, 2017

My heart belongs to you!


Hi Copic friends!!!

Deborah here with some inspiration for you.
Today I've got some valentine inspiration. Yes, I made a valentine's card! 
I love to make them but mostly I don't sent them to anyone, maybe it's time for a change... 😉


I choose to work with this cutie by C.C. Designs and she's called "Tiny Heart". I think she's so adorable! I always colour the skin first and after that I do the hair. 
Here you can see a picture when I did that and here I mapped out where the shadows are going to be. I always do that with a light colour first, and if I'm happy with that, I do the same with the darkest colour.  I guess it's just how you like to work.


Here are the Copic colours I've used: 
skin: E04, E11, E21, E00, E000, E93
hair: E59, E25, E23, E41
turqoise: BG18, BG13, BG11, BG10
pink: RV69, RV17, RV55, RV52
white: C5, C3, C1
red: R59, R46, R24


 After I coloured this little girl, I did the background with some Distress Inks, drawed some hearts with a white gelpen and I stamped some hearts with a fushia ink to give it some more life.


I added some sequins for a finishing touch.

Thank you for stopping by, 

Deborah

Friday, January 27, 2017

Believe in Magic

Hello everyone.
This is my first post at Copic Marker Europe and I am making a card that lights up.


Most of my cards are gifted to my kids’ friends, so I end up designing towards children. This one, though, I may keep it to myself 😁

To build the circuit I mapped the card on an extra piece of cardstock exactly the same size as the final card (stamps placed exactly on the same spots to ensure the wand led would be exactly beneath the star).  I used it as a base for my card and assembled the led circuit using Chibitronics leds and copper tape. This is how the circuit looks like when finished:


I then placed a frame around it using strips of 2 sheets of foam that I had glued together with double sided tape. This frame will help me position the card front exactly on top of its base.


Then, I coloured the card itself.  I started with the skin using E000/00/11/21 and E93 for blush.
I coloured the tutu dress with BG000/01/45/07.  Because the drawing is so tiny, I coloured dark to light, but first I mapped the shadows on the pleats using the lightest marker.


And after a few strokes the tutu dress was coloured:


When it was time to colour the leggings, I noticed that I had mistakenly coloured her right one. Lucky for me, Copics are very forgiving when it comes to light colours. A few light strokes of Colourless Blender and the legging was ready to go RVs. I used RV10/11/13:


I coloured her en pointe shoes with the same BGs combo I used on the tutu dress.


Then, couloured her hair with YR31/24 and E35.


To finish, I  used RV0000/000/00 on her wings and Y11/15 on her wand's star.
I lined her wand flourishes with atyou spika pens and finished the image.


When I glued the card to the the base I had assembled before, I was in for bad surprise: the glue showed through the card and I had a dirty spot. So, as any crafter would do, I creatively hid these malfunctioning parts: I die cut pink stars, coloured them with clear wink of Stella for some shimmer, and placed them 
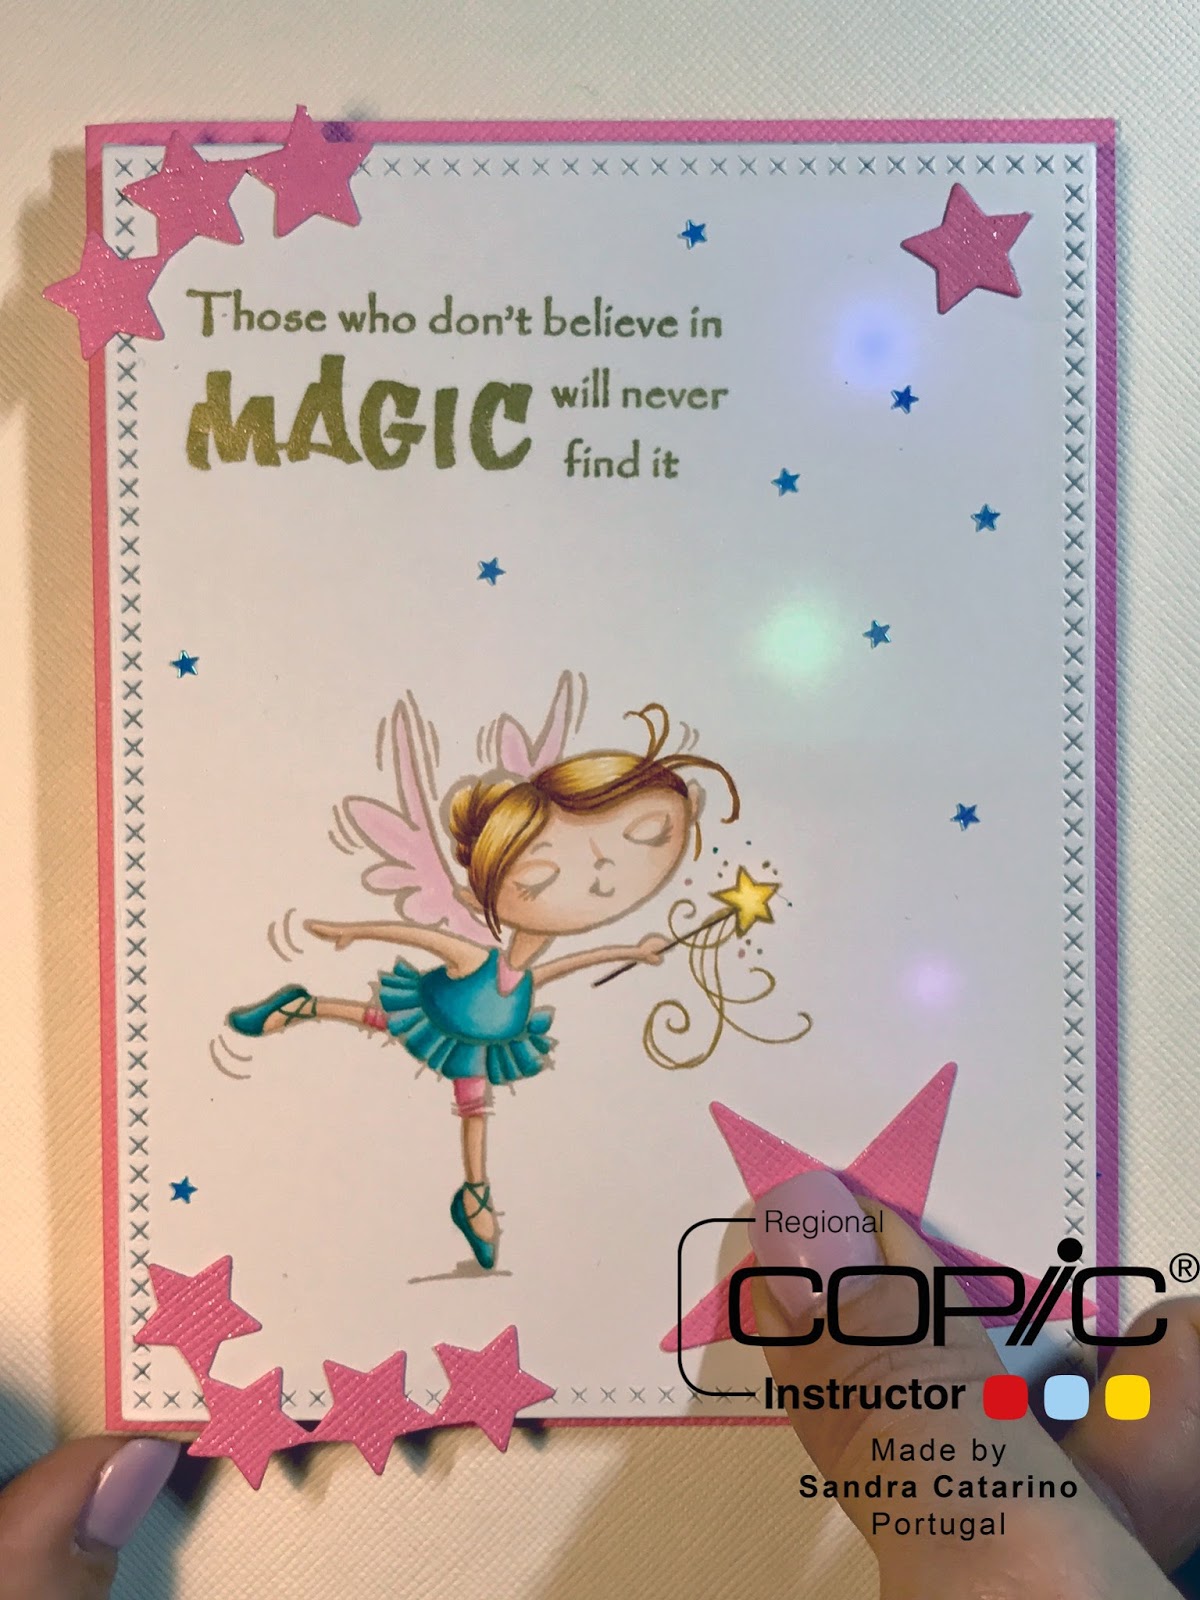
around the card frame. I needed a big star to mark the “Press here” spot, so I chose one with a tail to hid the dirty mark.
Finally, I randomly glued some blue Martha Stewart’s iridescent stars sequins.
The final result:


And when we press it:


The lights are so much nicer when it's a bit darker, but then the photo will not be quite as good.

Again, I am not gifting this one 😉

I hope you like it!

A list of all the markers I used:

Skin: E000/00/11/21 and E93
Tutu dress and pointe shoes: BG000/01/45/07
Leggings: RV10/11/13
Hair: YR31/24 and E35
Wings: RV0000/000/00
Star: Y11/15

Be sure to check my blog for a list of all the used materials, and to see how I assembled the circuit : www.thismomlovestocraft.com
Thanks for stopping by.
Hugs Sandra x

Monday, January 23, 2017

Love you!


Hello everyone! It's Delphine here today to share some love, because February is just around the corner, so Valentine's Day coming :)


The image I used is one of the new Valentine images being released this week at Make it Crafty. I coloured my image first, using purple and pink tones to make a girly card. I coloured the skin first, then the hair to avoid dragging dark colour onto the skin. For her outfit I did the same, the pale "apron" first, then the purple dress. I finished by the balloons.


Skin: E000, 01, 11, 13, R20
Hair: 100, BV04, W7, 9 
Eyes: B00
Dress: C00, 1, 2, V000, 01, 09, 15, 17
Balloons: RV000, 00, 02, V12, 15, 17
Ground: C2


(sorry, I forgot the skin tones on the photo! - see list above)

I then added several Make it Crafty chipboard to my card - the word LOVE (in 1.75 inches size), 3 letters from the 5mm Alphabet Cap Set and a little heart from the Mini Hearts Chipboard Tinklings. I coloured them with my black Copic marker and the pink is acrylic paint. 


And to finish off my card, I used some pink heart DP by Toga to match the theme of my card.


Thank you very much for your visit, have a great day! Hugs,
Delphine xx

Friday, January 20, 2017

aquaholic

Hi my lovely Copic friends, 
hope you all had a wonderful holiday and you've started 2017 healthy and colourful.

My post for today is all about aquaholics. I came across this word on the internet and I really liked it, it sounds so funny and it suits the image I used for today's project very well. 

My projects is an art journal page. I used one of my Gelli-plate backgrounds from my stash. The background is made with acrylic paints and art foamies. 

The image is by Line Artsy by a wonderful artist called Gloria.

I have coloured this pretty mermaid and fish with Copic Markers and coloured pencils.


I started colouring with the Copic Markers. Coloured pencils are usually oil or waxed based. If you use your coloured pencils first you might end up with clogged Copic nibs. So to avoid any clogging use your Copic Markers first. 

I started with adding green shadows using the BG70. Then I build up the skin using the E50, 00 and 000. The mermaids hair I've coloured with BG07,70,72,75 and 78. Start with using your darkest colour first and use this on the shadow parts of her hair. After I used all my colours from dark to light I go back to the darkest colour. With all the blending the darkest colour might have faded a little, so you need to add a little of the darkest colour again to create more depth. In the end I thought the hair looked dull, so I added some YG13 to get it a bit more sparkly. 

For the fish I used BG02, 05, 09, 11, YG03, 11, 17 and Y17. 
For the orange parts of the fish, the veil and the mermaid's lips I used the YR01, 02, 14,15,16 and 18.

When I finished my Copic colouring I got out my coloured pencils and added some more depth to the colouring. 


I have found this funny word on the internet and wrote it down on my page using a Copic Multiliner. I coloured the letters with Copic Markers (YG13) and some coloured pencils. 


 And this is the finished page. Hope you like it. 

Have a wonderful day

Miranda

Saturday, January 14, 2017

Bookmark with Feathers...


Good Morning! I'm Cristina Valenzuela.
First of all, happy new year!!!
I wish you a year full of good things and a lot of colours.

I have a project a little different than usual for me.
I tell you a little ... I have decided to work with greys because I have an eye problem, my perception of colour is a bit different these days.

So I have chosen this beautiful drawing for colouring, it has lots of grey tones, but it also uses blue, brown and pink. I do not know if you can really see it, because they are colours tinted with grey, forming a set where nothing stands out too much.


One of my personal challenges of this new year is to make one bookmark per week, an easy way to use many of the drawings that we colour for the pleasure of colouring. I hope you like my idea, and encourage yourselves to do the same.


For colouring I have used the following Copic:
Lots of Greys: T1, T0, T3, T5, C0, C1, C3, W3, W5, W1, N1, C5, C7.
And other colours: 
E04, E00, E11, E70, E71, E81, BG10, R27, E31, E33, E47, E44, E43, E41.


For today, nothing more, I hope to have something full of colours next month.
Thanks for your visits and comments.

Thursday, January 5, 2017

Necklace with Copic

Hi everyone,

Lately I find myself playing with copic and drawing jewelry. (never learned Jewelry design, one of my dreams)
For the most coloring I used  grays for the silver and Y family for the gold,
adding colours just for the stone and gems.
It feels different then colouring a digi stamp
Today I want to share a necklace I draw


Its free hand drawing , tracing the pencil sketch with gray multi-liner with a little black multi-liner to emphasizes the dark areas.

Here are the copic I used:


Pearl: N0,N1,N2,N3,N5, RV00, B91, White colour pencil
Stones: B21, B24, B26, B29, White colour pencil, White gel pen
T3, T5, T6,
Shadow: N8, N7, N5, N3, N1, Blender
Gray & Black 0.1, 0.5 Multi-Liner

Wishing you a wonderful day


Wednesday, January 4, 2017

Hope


Hi Everyone, it's Saskia here.

A few months ago someone asked me to make something special for a very special occasion. So I coloured this lovely Fairy from The Paper Shelter for her.


 I created the background using the Airbrush with these Copic Markers : YG03-YG25-G14 and B01-B04-14.

I have used these Copic Markers:
Skin: E000 - 00 - 11 -21
Eyes: YG03 - G14 - G07
Hair: BV00 - 02 - 04 - 08
Stars and stones : BV20-23-25
Orange Shades: Y32 - 35 - Y38 - YR04 - 07 - 09
Green shades: YG03 - 11 - 17 - 23 - G07

The lines around the outside of the fairy, I made black again whit Copic Multiliner BS 
I hope you have read this post with pleasure.
Until next time.


Sunday, January 1, 2017

Happy New Copic Year!


Hello all!

Happy New Copic Year!
It is such an honour to start the new year with my first post on the Copic Europe blog, 
my name is Blankina and will be posting my doodle orientated designs on a monthly base.

Hope you all had a terrific good start in 2017.

I have prepared a doodle design for you..
Do you like to doodle too? It is a perfect anti-stress,
just get some Copic Multiliners and let your fantasy flow.


To start with I have drawn a design with a pencil , 
all by hand ( using just a ruler and some other help instruments now and then ) .

I have written the text happy new Copic year first, 
and later I have added some circles and lines around the text .

As next step I have copied the pencil drawing onto Perfect Colouring Paper , 
after I have started to emphasize the lines with a black Copic Multiliner.

I personally love to use the SP multiliners, 
these are the refillable version and come in different line widths, 
for this drawing I have used the line width of 0.1 and 0.3.


You can get caried away,  adding bits and pieces , detail after detail.
It is fun to do...it has become a mix of doodeling and handlettering in the end.
Just add some stripes, dots , circles and zig zag movements wherever you like.
Some lines were accentuated with a black sketch  ( 100 ) too .


To give the design a touch of colour I have chosen 
some "golden" colours from the Yellow family. 
I hope it might inspire you to doodle too!


I have used the following Copic products:

Copic Multiliner SP 0.1
Copic Multiliner SP 0.3
100 , Y 21, Y 23, Y 28

Again the best wishes for a colourfull and healthy 2017,
thanks for visiting!

Hugs Blankina