Followers

Monday, December 30, 2019

You Are What You Eat....


Good morning Copic friends, today is my turn to make a blogpost. I have made an art journal page and used a funny image by Bloobels. 


I always start with the skin colours first, the E50, BV00, E00 and E000.


Add a layer of E50. 


Add shadow with the BV00.


Add the E00 on the layer of BV00  to create a warm skin tone.


Blend all layers together with the E000.


The clothes and her eyes will be blue, I start with using the B04. 


Add the B06 as a shadow colour. . 


USe the B18 as your darkest shadow colour. 


Blend all layers together with B04. 


The R21 is a nice colour for her mouth. 


I used the E04 as a shadow in her mouth. 


Blend the layers together with R21. 


I use the Copic nr. 100 to colour the pupils black and add BV00 as a shadow in her eyes/ 


The rest of her cloths will be orange. Orange is a great colour to use next to blue, they make each other pop. I start with YR04.


Add shadows with YR09. 


Blend the YR09 with YR07.


Blend all layers together with YR04. 


Oranges have a rough skin so I use the blender to get this effect. I make little dots in the previously added layers. 


The pears will be green and I start with YG11. 


As a shadow I use the YG17. 


Blend with YG13. 


I use the YG21, G20 and G24 to change the colour of the pears, because I thought they were too green. 


Use the E47 for the stems.


The bananas are coloured with Y13, Y23,Y26 and YR21. 


For the cherries I am using  R35, R37 and R39. 


The red of the plums will be a deeper and darker red using the  R37, R89 and RV99 .


The pineapple has a lot of colours: 
YG17, Y15, Y13, E79, E77 and E74. 


And her hairs will be blue using the B04, B06, B18 and B39. 


I add some washi tape on the background and add a nice quote too and now my page is finished. 

I wish you all a healthy, happy and creative 2020.

Hugs
Miranda

Sunday, December 22, 2019

Cicci Coloring a Bauble in Green

Hi Everyone!!
Today it's Cicci posting from Sweden.
I hope you all have a good time and
I wish you all a Happy Christmas and a Happy New Year!!
I think 2020 going to be the best year ever:)

I'm going to show you a tutorial of an image from Mo Manning

Originally, I did this one in red colours, two years ago.
Last year in did one in blue
 If you want to check the lodisen
 you can click on the link below:

This year Im going to show you how I did this
image in green colors.

-Happy coloring!!

Copic Combo
Green bauble
YG03 YG17 G29 YG00
Clothes
FYG91 93 E81 E84 E87 Y28 Y26
YG03 YG00 G29
Skin: E51 53 YR24 YR21
R11 R24 R20


The tutorial in red colors 


The new tutorial for 2019 in green colors

Step 1
Start with YG03 

 Step 2
Add some G29
This is a dark color so be careful so you don't add to much at this early time of the coloring

Step 3
Add YG17 

Step 4 
Blend with YG03 

Step 5
Add more of G29 

Step 6
Blend with YG17

Step 7
Add more of G29 for more depth and blend again with YG03 

Step 8
Add YG17 again

Step 9
Blend with YG03 

Step 10
Add more of G29

 Step 11
Blend with YG17

Step 12
Blend With YG00

 Step 13
Do all the steps one more time add G29 YG17 and blend with YG00 and YG03 if you like

 DONE!! 


Have a Wonderful Christmas outhere and see you in 
 2020 again
Lots of HUGS and SMILES 
from us here at the Copic Europa blog


Thursday, December 19, 2019

Winter Fun


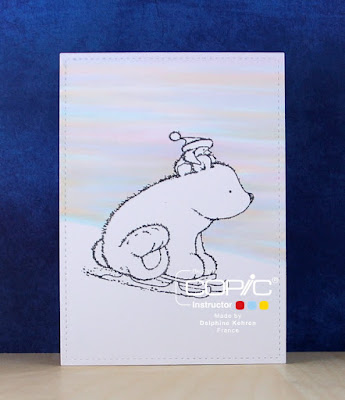
Hello everyone! It's Delphine here today to share some Christmas inspiration, with a simple winter scene. For my scene, I used a Penny Black stamp from the Festive Frolic set. I stamped it in Memento Tuxedo Black then die cut it with a Lawn Fawn die to be able to frame my image and visualize my scene.


I started with the sky, drawing the limit / hill in BG000. For a change, I went for a pastel orangy sky inspired by sky colours at sunset. I coloured from left to right and right to left making horizontal lines in BG000, V000 and YR000. 


For a bit of interest, I added trees behind my hill line. I coloured from dark to light, "drawing" pine needles in G29, then blending a bit using YG17 and a bit of YG03. For the trees further in the distance, I skipped the G29. At last, I also used BV000 to add a "horizon" in the distance. 


I then coloured the bear in Warm Greys - W0, 1, 3, 5 - and R20. I "drew" the hair from the fur going from dark to light.


Next I coloured the little penguin and sleigh (see colours below).


I then focussed on the details, you know the details that make a difference ;), adding marks in the snow, a shadow under the bear, and colouring some of the white of the hill using B000 and V20.
As a final step, I added snow in the trees and snowflakes using a Molotow acrylic paint marker. 


Here is the final image, with a sentiment.

Copics used:
Sky: BG000, V000, YR000
Trees: G29, YG03, 17
Bear: R20, W0, 1, 3, 5
Penguin: BV25, 29, Y38 - C2, 4, R35, 39 (hat)
Sleigh: C2, 4, E31, 34, 37
Snow: B000, V20


Thank you very much for your visit, have a lovely holiday season everyone! Hugs,
Delphine xx