Followers

Thursday, April 18, 2019

Dream...


Hello everyone! It's Delphine here today to share a Copic card featuring a beautiful Make it Crafty image called Ashlyn.


I cropped my image to keep only the upper part of Ashlyn and then quickly coloured the background using B69, making quick circular movements since the idea here was not to have a smooth background.


Next I coloured the skin using YR000, 00, 01 and RV02, as shown by Zoe from Make it Crafty in her Basic Techniques when Colouring Faces Ebook. For the eyes, I used B00, 02, 60, 63. I also added a bit of B63 to the skin.


I then did her clothing, keeping the same tones as my background - so I used B63, 66, 69.


I then coloured the hair strand by strand starting on the left of my image, in E49, 57, 59 and YR23.


To make the background a bit smoother, I added Blueprint Sketch and Chipped Sapphire Distress Inks on the edges. With a Kraftin' Kimmie Starbust Stencil, I drew stars in a gold gel pen. I also wrote a little sentiment on a strip of paper that I put on foam. Here is the recap of all the Copics I used:

Skin: YR000, 00, 01, B63
Eyes: B000, 02, 60, 63
Hair: E49, 57, 59, YR23
Clothes: B63, 66, 69
Background: B69


Thank you very much for your visit, have a great day! Hugs,
Delphine xx


Friday, April 12, 2019

Tulip

Hi everyone.

Welcome back to Copic Marker Europe.
This time I will show you how I coloured this beautiful Tulip from Power Poppy Stamps

I printed my Tulip in a grey tone, this gives you have a No Lines Effect.
I started with the BV13 for shadow, my next colour is YG17.
I went over the BV13 with my YG17 and a little bit further, so they can blend together.
My next colour is YR03, so the whole leaf is coloured.


I used these 3 colours for all the leaves.


For the flower I use first BV000 for my shadow.
My next colour is Y35, it's going over the top of the BV000 and a little bit further 
so the colours can blend. The next colour for the flower is Y15, it also goes over BV000 and Y35, so they can blend. And the last colour for my flower is Y13.
I used these 4 colours to colour all the flowers.


And this is the end result of my tulip.


Copics used:

Leaves : BV13 - YR17 and YR03
Flowers : BV000 - Y35 - Y15 and Y13

Thanks for coming over!
Hugs
Cordine

Monday, April 8, 2019

so long, farewell, auf wiedersehen, adieu!

Hello everyone, it's Sue here today!

Today's post is one of mixed emotions for me.

It is my last post at Copic Marker Europe which feels a little sad but when I look back over my two years designing here I feel very proud and happy about how far I have come with my Copic colouring! 

I thought I would show you three cards I have made during my time here which according to the viewing figures you all liked the most, followed by the three I enjoyed making the most! 
I wonder if they will be the same? (-;

I will add a link to the original posts just in case you want to look at the tutorial again!

This was such a fun technique involving Copic Various Refills, washing up liquid and a straw! I thought the background was perfect for a mermaid!

This technique used Copic Various Ink Refills with a stencil and some paper towels!

...and the final card that you all really liked is a surprise as this was my first tutorial back in February 2017!
This Copic blended background technique remains one of my favourites and is so easy to achieve!

Here are the three cards I like the most and really enjoyed making during my time on this lovely team.

This card was a real challenge but I think that is why I love it so much.  The fur took ages and was quite difficult but I so enjoyed photographing every stage and making the tutorial for you!  

This technique is my absolute favourite and I loved how the background looked when I had finished! That polar bear is cute too!


I agree with you all about this card!  It is one of my favourites too!  

Thank you to Diny, Faye and the lovely Copic Marker Europe team for the fun and friendship during my time here!

You can still catch up with me anytime at my blog

Thank you for popping by!

Happy Copic colouring
love from
Sue...xxx


Wednesday, April 3, 2019

My little snuggle bunny rosette card and box

Hi Copic friends.

As we are getting closer to Easter 
I have decided to colour up this cute digital stamp designed by Cheryl Grant,
it is called "my little snuggle bunny".

Such a sweet image and not only for Easter!
Love her designs.

Of course I have prepared you a step by step video of the colouring.


Here is a sneak preview,
please find the colouring process on the video below.


Did you like my video?

 I have decided to use the rosette card as cover for the open circle in the box. 
This box will contain lovely yummy Easter chocolate eggs.


I have used my brand new die set from Studiolight to make the top and bottom of the box.
Inside I have added a box base made with my Crafters Companion Multi-Pro,
this was glued onto the lower piece I have cut with my die. 

Now this box will open as a book .


Here you can see the box from the top.


Mmmmm chocolate eggs..


You can take of the rosette card to get some eggs or you can completely open the box.
Please get yourself a chocolate egg. Thanks for your visit and lots of bunny hugs.

Have a nice chocotastic Easter!

Buona Pasqua, Happy Easter, Vrolijk Pasen

Copic :

fur bunny : E 30, E 33, E 35, E 39
skin : E 04, E 21, E 51, E 11
cheeks : E 93, E 95
hair : T 9, T 3
hat : E 30, E 33, E 35, E 39
dress : RV 21, RV 23, RV 25
shirt / socks: YG 21, YG 23, YG 25
flower : Y 15, Y 18, YG 16
ladybird : R 46
shoes : T 3, T 5, T 9

other :

die Studiolight ( STENCILSL165 )
die Nellie Snellen ( rosette )
die ( MFT ) stitched circle
die ( Lawn Fawn ) scalloped circle
ribbon
enamel dots Kraftin Kimmie

Hugs, Blankina

Monday, April 1, 2019

Blending to White

Hi Everyone, it's Faye here today :)

This month I thought I'd talk to you about blending a colour out to white. You can use any colour, the trick is to bring the number right down to something ending with at least one 0, so you can blend that out with Colourless Blender.

I am using Whimsy Stamps Smiling Flowers.

Ready? Let's go...


I'm colouring from dark to light, so I'm starting with RV13. As each petal is fairly small, I don't have much space to bring this colour down to a low number, I'm only laying a little RV13.


Blend out with RV21. Again, see how much space I have left for myself.


Pull the colour a little further into the petal with RV10.


We're starting to get nice and pale now... RV000.


The last colour I am using is RV0000.


As you can see where the RV0000 ends, blend the edge of this line with Colourless Blender to create a smooth transition between the colour and white space.


I wanted to add a little colour to the petals where they meet the flower centre, but I didn't want to go as dark as I did for the outer edges of the petals, or come in as far. Using the same process, I added RV10, RV000, RV0000.


That's all the petals done! Let's finish the stamp...


Y00, Y11 and Y04.


YG61, G21, G24 and E70.


E41, E42, E43, E44.


R43, R35, R37, R39.


To complete the image I added small, randomly placed dots on the petals with RV10 and RV21.

That's it!

Copics Used...
Petals; Colourless Blender, RV0000, RV000, RV10, RV21, RV13
Flower centers; Y00, Y11, Y04
Stems; YG61, G21, G24, E70
Flower Wrapper; E41, E42, E43, E44
Bow; R43, R35, R37, R39

Thanks so much for stopping by... Have a great day.

Thursday, March 28, 2019

Scarecrow

Hi everyone! It's Virginia here with a new tutorial. I know it's just Spring but, I'm thinking of holiday and summer so, I've decided to colour a wheat field ready to harvest as my background.

Additionally, many of you know how I do love tales. It is the reason way I've done another bookmark related to a book, 'The Wizard of Oz'. I've used a Saturated Canary Stamp, a really sweet scarecrow.


As usual, here you have the step by step video tutorial. I hope you like it.


The Copic Marker colours I've used are: 

Skin: E13-E22-E00-R30
Hair: E35-E47-E49
Hat and heaters: E39-E37-E35-E33
Trousers and shoes: E44-E43-E42-E41
Shirt: E89-E95-E93-E91
Sky: B0000-B91-C01-C00-Blender
Bushes: BG91-BG95-BG97
Wheat field: Y000-Y23-Y28-E99 

That's all!! I'd be delighted if you leave me a comment.

See you next month!

Tuesday, March 26, 2019

Copics and coloured pencils

Hello fabulous Copic fans, I love my Copic markers but I also love my coloured pencils. So what could be better than combining your 2 favourite colouring tools.

For today's post I chose a colouring sheet by Christine Karron. 


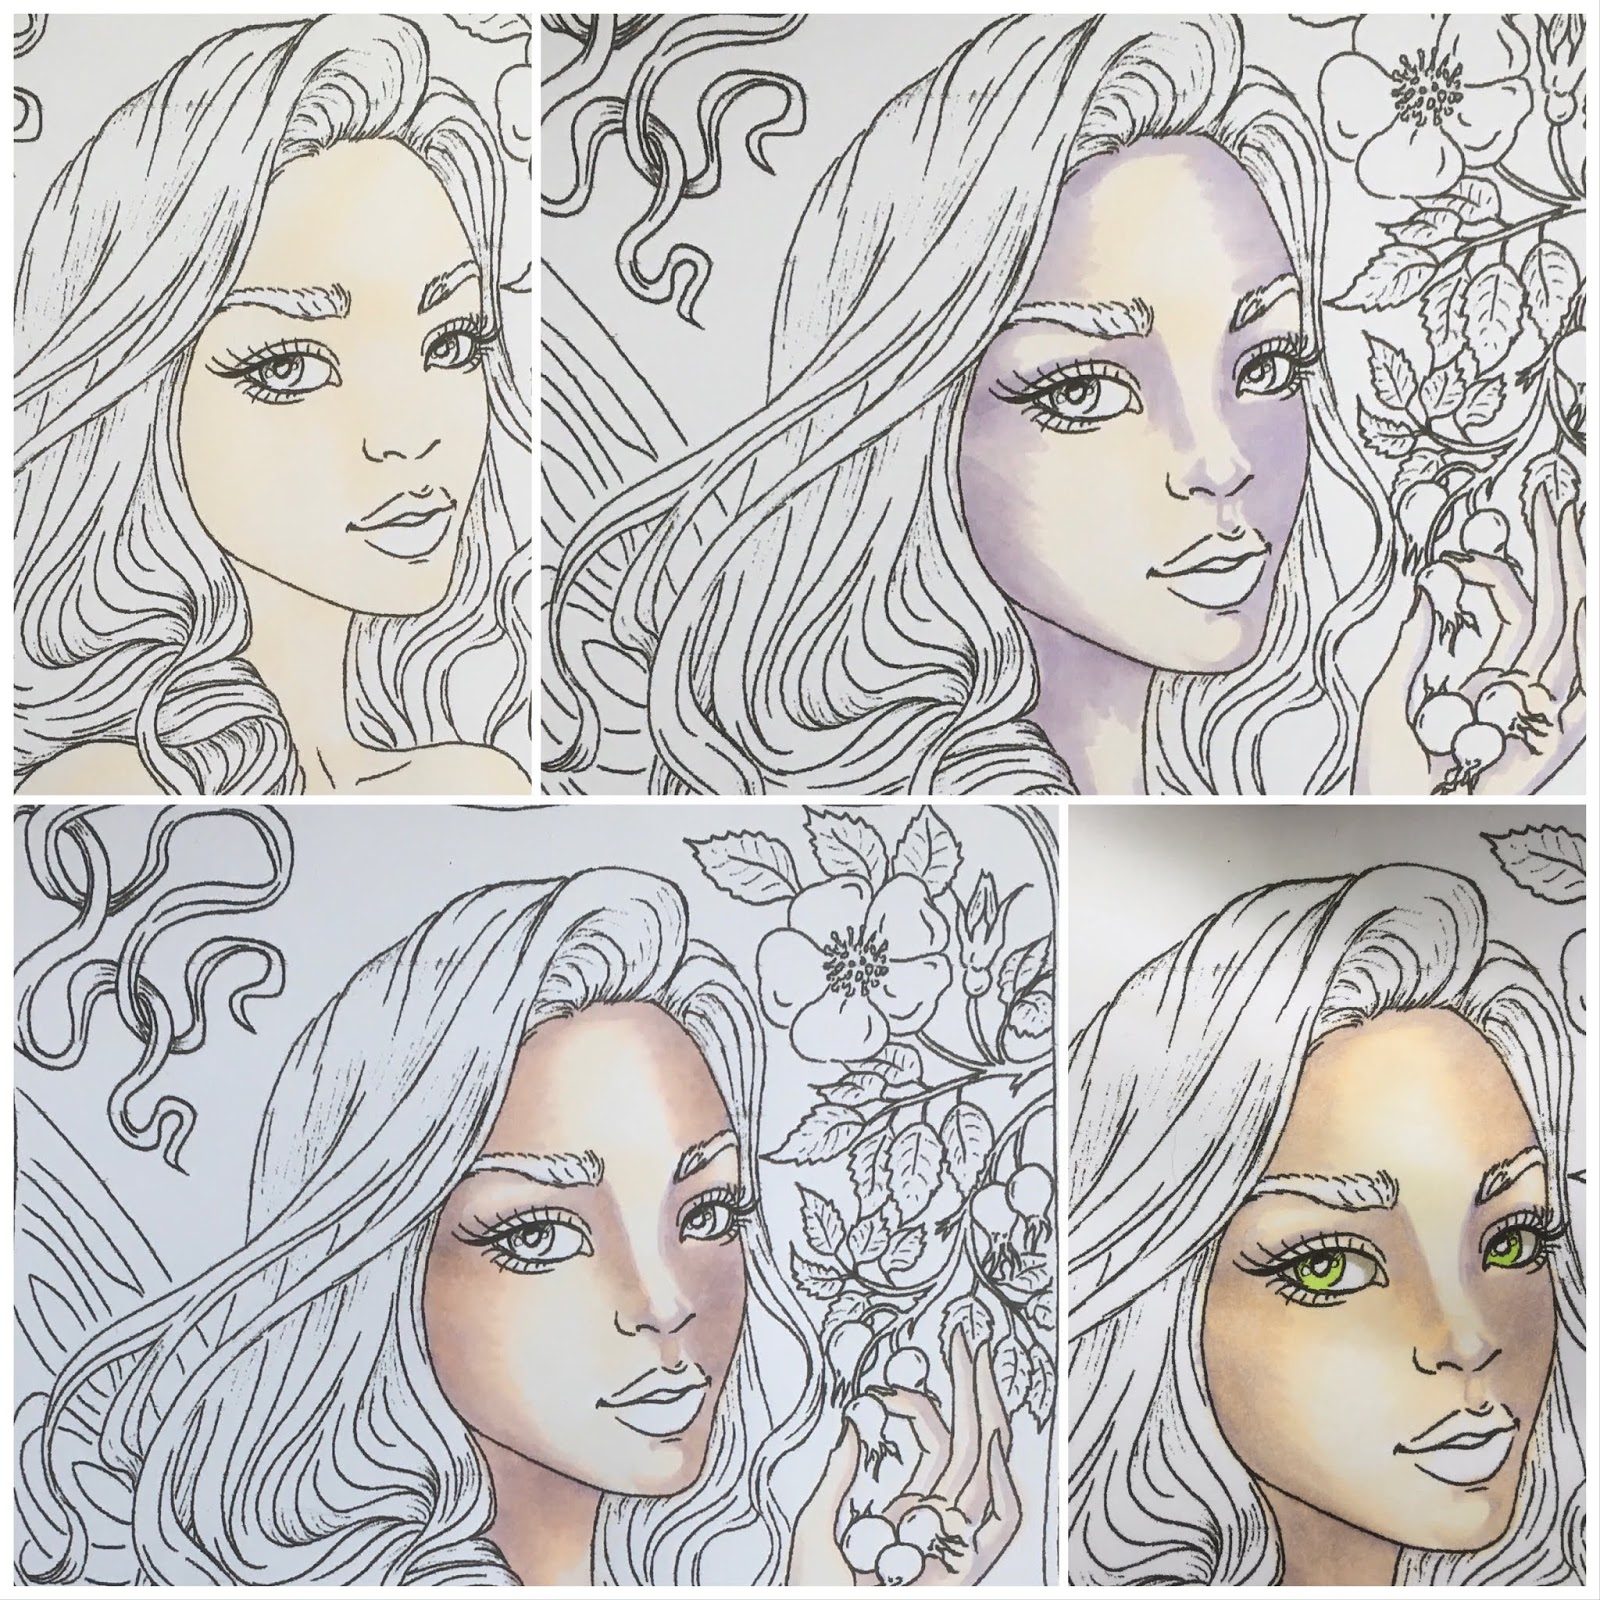
Start colouring the skin with the E50. Add a thin layer with the broad nib of the Copic marker to get an even coverage of colour. Then add BV00 for shadow.  Cover the BV00 with E00 to get a warmer skin tone. Blend all layers together with the E000 and E0000. 


When colouring the eyes I start with the lightest colour first, the YG13. Then add YG17. For the darkest part of the eye I use YG67. Blend all layers together with the YG13. For some shadow in the eyes I use the W3. Use RV10 for her lips. 


For the leaves I use the same colours as for her eyes, YG13, YG17 and YG67. For some highlights I use the FY1. 


I started colouring the rosebuds with the R02, R05, R08 and R29. After I coloured her hair, I thought the rosebuds were too orange so I decided to add another layer of colour, a more rosy red. I chose RV25. 


Her little basket will be brown. Start with E35, then add the E37 and the E39. For the darkest parts I use E49 to give the basket more depth. 


I love roses like this, rosa rubiginosa or eglantine. 
Start with the lightest colour, RV21. Add more depth with RV23 and RV25. 


Use the RV29 for the darkest parts of the rose. Blend all layers together with the RV23 and RV21.
When I started colouring this image I didn't have any clue what colour hair this pretty fairy should have. After I coloured the roses I knew her hair should be pink. When colouring hair I always start with the darkest colour first, the RV29.


After the RV29 I use the RV25, then the RV23 and blend all the layers together with RV21. Sometimes you might want to add some RV29 again, to enhance the colour a bit after blending it with RV21.


For the wings I use YG13, YG17, RV23, RV25, B000, B02 and B04. 

For the background I use YG11, YG13, B000 and B00. 

After all the Copic colouring is done I will add some coloured pencils in similar colours and some gel pen white for highlights. 


I hope you like the end result.


 have a fabulous day and see you all next month,

Miranda