Followers

Showing posts with label Copic UK. Show all posts

Saturday, December 18, 2021

Snowmen & Bunnies video

 Hi everyone, it's Faye here today :)

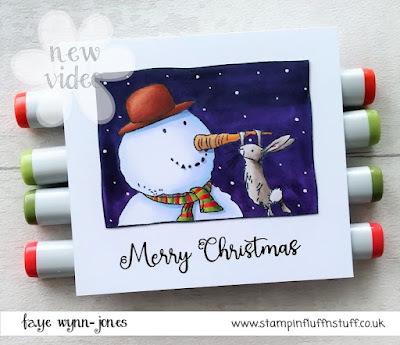
Well, with a week to go, I thought it only fair to keep things festive for my post this month. I've chosen an image from the Colorado Craft Company Snowmen & Bunnies stamp set. I love the interactions between the snowman and bunny in both stamps.

You can watch me colour this image by clicking the You Tube logo...

 Copics Used...

Snow; 0, B60, BV20
Bunny; W1, W3, W5
Bunny Tail; W0, W1, W3
Carrot; YR21, YR12, YR1, B60, BV20
Hat; E15, E39, E27
Sky; V09, BV08, BV29
Scarf; YG03, YG63, G94/ R05, R08, E07
I list all my markers from light to dark, although I don't necessarily lay them down that way.

Thank you for stopping by. Wishing you all a Merry Christmas...


Thursday, November 18, 2021

Best Sledding

 Hi Everyone, it's Faye here today :)

With Christmas not far away, I feel it's time to start making some cards for it. I actually bought Colorado Craft Company Best Sledding last year and it's been waiting since then for me to colour it up. I decided to go with the no lines technique for an extra little push.

You can watch me colour this lovely image by clicking on the You Tube logo...

Copics Used... 

Sky; BG0000, BG000 

Snow; 0, BG0000, B60, BV20 

Mice; C0, C1, C3/ R00, R30 

Ladder; E84, E87, E89 

Carrot; YR21, YR12, YR15 

Hat; C3, C5, C7, C9/ R43, R35, R37 

Polychromo Pencil; Burnt Umber 

I list all my markers from light to dark, although I don't necessarily lay them down that way.

Thanks so much for stopping by, have a great day...

Monday, October 18, 2021

Rainbow Dandy Lion Video

 Hi Everyone, it's Faye here today :)

I absolutely adore the Dandy Lion range of stamps from Stamping Bella, so decided I would play with Rainbow Dandy Lion today. He's such a cute little chap. I've been colouring a lot of Halloween and autumnal projects recently, so it was nice to step away from the rich reds, ornages, purples and greens and work with something a little softer.

You can watch me colour this image by clicking on the You Tube Logo...


Copics Used...
Lion; YR30, E50, E30, W1
Mane; E50, E30, E53, W3
Nose; E25, E47, E49
White; W00, T0, T1
Yellow; Y21, Y32, YR31
Peach; YR000, YR00, YR01

Thanks so much for stopping by, have a great day...

Saturday, September 18, 2021

Too Cute to Spook

 Hi Everyone, it's Faye here today :)

The season has started to change from summer to autumn over in the UK, which has made me reach for more 'cozy' images! With October fast approaching, I thought I would colour Tiddly Inks Too Cute to Spook.

You can watch me colour this image by clicking on the You Tube logo...


Copics Used...
Skin; YR0000, YR000, YR00, E70 
 Hair; E50, E30, Y32, YR31, E70 
Broom; E33, E57, E59, E79 
Frog; YG93, YG95, YG97/ Y32/ R30 
Cat; YR12, YR16, YR04 
Purple, V15, V17, BV08 
Black; T3, T5, T7, T9 
I list all my markers from light to dark, although I don't necessarily lay them down that way.

Thanks so much for stopping by, have a great day...


Wednesday, August 18, 2021

Millie Just For You

 Hi There, it's Faye here today :)

This month I thought I'd colour Millie Just For You from Lili of the Valley. I really wanted to team her up with this pretty paper from the Honey Bee Stamps Summer Stems Paper Pad, which encouraged me to reach for blue and pink. These are not colours I put together very often. 

You can watch me colour this gnome by clicking on the You Tube logo...

Copics Used... 

Skin; E0000, E000, R00, E70 

Hair; C3, C5, C7, C9 

Butterfly; B000, RV10, R81, R81/ E35, E59 

Green; YG03, YG63, YG67 

Pink; R82, R83, R85 

Blue; B34, B37, B39 

I list all my markers from light to dark, although I don't necessarily lay them down that way.

Thanks so much for stopping by. Have a great day...

Sunday, April 18, 2021

Happy Day

 Hi Everyone, it's Faye here today :)

I decided I would like to colour this bear from the Colorado Craft Company Happy Day set on kraft card. I love the effect of copics on kraft card, they look much 'dirtier' and more grungey than when you use white card.

Aside from this, there are a couple of things to note...

Firstly, when you use copics on a cardstock with a loose weave such as kraft card, the card is thirsty! You will literally feel the card 'suck' the ink from your marker. Take this into account when laying the ink if you are normally quite heavy handed when you colour.

Secondly, wait for the ink to dry before you decide if you need to add more layers of shading. The ink really changes colour when it has dried on kraft card. When it's wet, it will look darker than you would normally expect. But you also can't see the graduation of shading as much as you would be able to notice on a lighter card. Wait. Let it dry. Then adjust. If you go for it while the ink is still wet, you won't be getting an accurate judgement and you may find you keep adding and adding shading that you don't need, which you will then need to correct when it has dried and you see what you've been left with.

You can watch me colour this bear on my You Tube Channel by clicking the logo below...


Copics Used...
Bear; E41, E42, E43, W3, W5
Bear Nose; E44
Grass; G02, YG45, G07, W5
Flower; YR23, YR27

Thanks so much for stopping by... Have a great day,

Friday, November 1, 2019

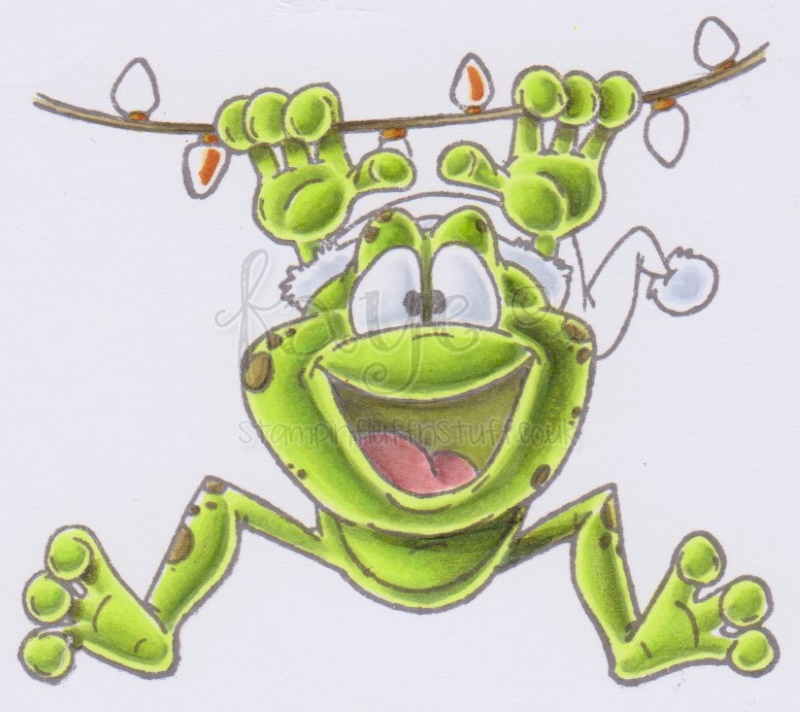
Mistletoads!

Hi Everyone, it's Faye here :)

I thought I'd drop by and show a card I made using some rather mischievous toads from Whimsy Stamps. The set is called Mistletoads and each toad is getting up to something fun. Anyway. I thought you might like to see my colouring process for this image. So here goes. My light source is coming from the top left and I am mostly colouring from dark to light...

YG03
I like to lay down some of my medium colour first. I do this for a couple of reasons. First, if I change my mind about where I am going to lay the shading, I can disguise this by going over the top with a darker colour. I also find some of my darker colours can be a little tricky. They play a lot better if they have a bit of ink to sit on.

YG63

YG03

YG01

Fill the remaining white spaces with YG01 once the ink is dry. You don't want these colours to blend.

W3 and W5 for cast shadows (under his chin, for example).

Add E84 and E87 to the spots on the toad, this makes him look a bit more dirty ;)

Also use E84 and E87 for the rope.

W5

W3

YG03

C1

B60 and blend out with 0

B60

C1

E04

R30

YR27

Y26

YR27

Y26

YR31

B37

B34

B21

R27

R14

R22

And that's the toad done!

Here's the complete list of Copics...
Green; YG01, YG03, YG63, W3, W5
Brown; E84, E87
White; B60, C1
Pink; R30, E04
Gold; YR31, Y26, YR27
Blue; B21, B34, B37
Red; R22, R14, R27

And this is the card I made for him...


That's all from me today, thanks so much for stopping by.

Have a great day...

Wednesday, May 1, 2019

Avatar!

Hi Everyone, it's Faye here today :)

This month I thought I'd challenge you to think a little differently about the way you colour skin. Skin doesn't always need to be skin coloured! Of course, you can use your markers to show a newborn babies skin (think peachy), an elderly person's skin (very pale with a tinge of grey to it), or to show someone is ill.

Taking it a bit further, look at the lovely blue skin that's featured in the film Avatar. If that's a little bit far out there for you, take a baby jump and colour a bear pink, blue or purple. Go on, you know you want to!

To help encourage you, I thought I'd colour this lovely fairy (Giselle the Fairy) from Whimsy Stamps. Previously, I have coloured fairies with a very pale pink skin, (E0000, E000, R00, R11) but this time I thought I'd go for green. This is actually my second attempt. On the first sample, the skin was darker and she was starting to look a little Shrek-like, it didn't suit the delicate image. Don't be afraid to start again if things aren't going the way you want.

If this is your first time, stick with it. The image looks terrible when only the skin is coloured. As you start to colour the other areas, the things that look loud and unusual will tone down.

Ok, ready? I'm colouring dark to light and my light source is at the top left...

YG00

Add cast shadow to the areas the light can't get to with E70 and soften with YG00

Blend out with YG0000

Close the remaining white spaces with Y0000

And there she is. I went back and added a little more shading with YG00 and carefully blended it out with YG0000.

Shall we colour the rest of her?

I coloured the hair light to dark, with BG10, BG11, BG53, BG57

I'm switching back to colouring dark to light...
Dress shoes and flowers next with RV91, RV11, RV32 and RV34
Have you noticed the dress underneath her wings is lighter? This is because the wing is over the top of the dress, so the pink won't be showing as boldly
I've used RV000 and RV91 here

Let's deal with the wings... Y0000, YG0000, YG00
Carefully give a wash of Y0000 over the top of the dress to give the pale pink a wash of yellow. This shows the wing is sitting on top of the dress. It's a little detail, but it looks great

Colour the leaves, bell and hair twine with YG01, YG03 and YG63

Next up are the flowers and the spot on the wing... BG10, BG11, BG53

Finish up with YG00, YG01 and RV32 on the flower centers and the final spot on the wing

I've used a white gel pen to add spots to her dress

And I couldn't resist some glitter for her wings

Sorted!

Copics Used...
Skin/ Wings; Y0000, YG0000, YG00, E70
Hair/ Petals; BG10, BG11, BG53, BG57
Leaves; YG01, YG03, YG63
Dress/ Shoes/ Flowers; RV000, RV91, RV11, RV32, RV34

Thanks so much for stopping by... Have a great day.