Followers

Showing posts with label Whimsy Stamps. Show all posts

Tuesday, February 28, 2023

Snowman with Bird

Hi there.
Hope you all are fine today!

Helen here, and today I will show an image from CC Design, Snowman and Bird.
I got it as a rubberstamp, but you can get it as a digital stamp from Whimsy Stamps today.

As always I stamped the image on to Perfect Coloring Paper with ink from Memento.
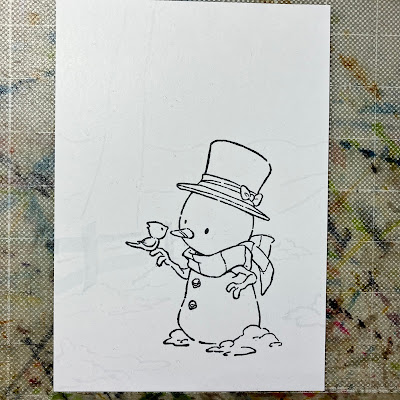

Started off by sketching in the background using C0.


The snow got B70 - B0000 - B000 - B45


The sky got Y000 - Y11 - Y00
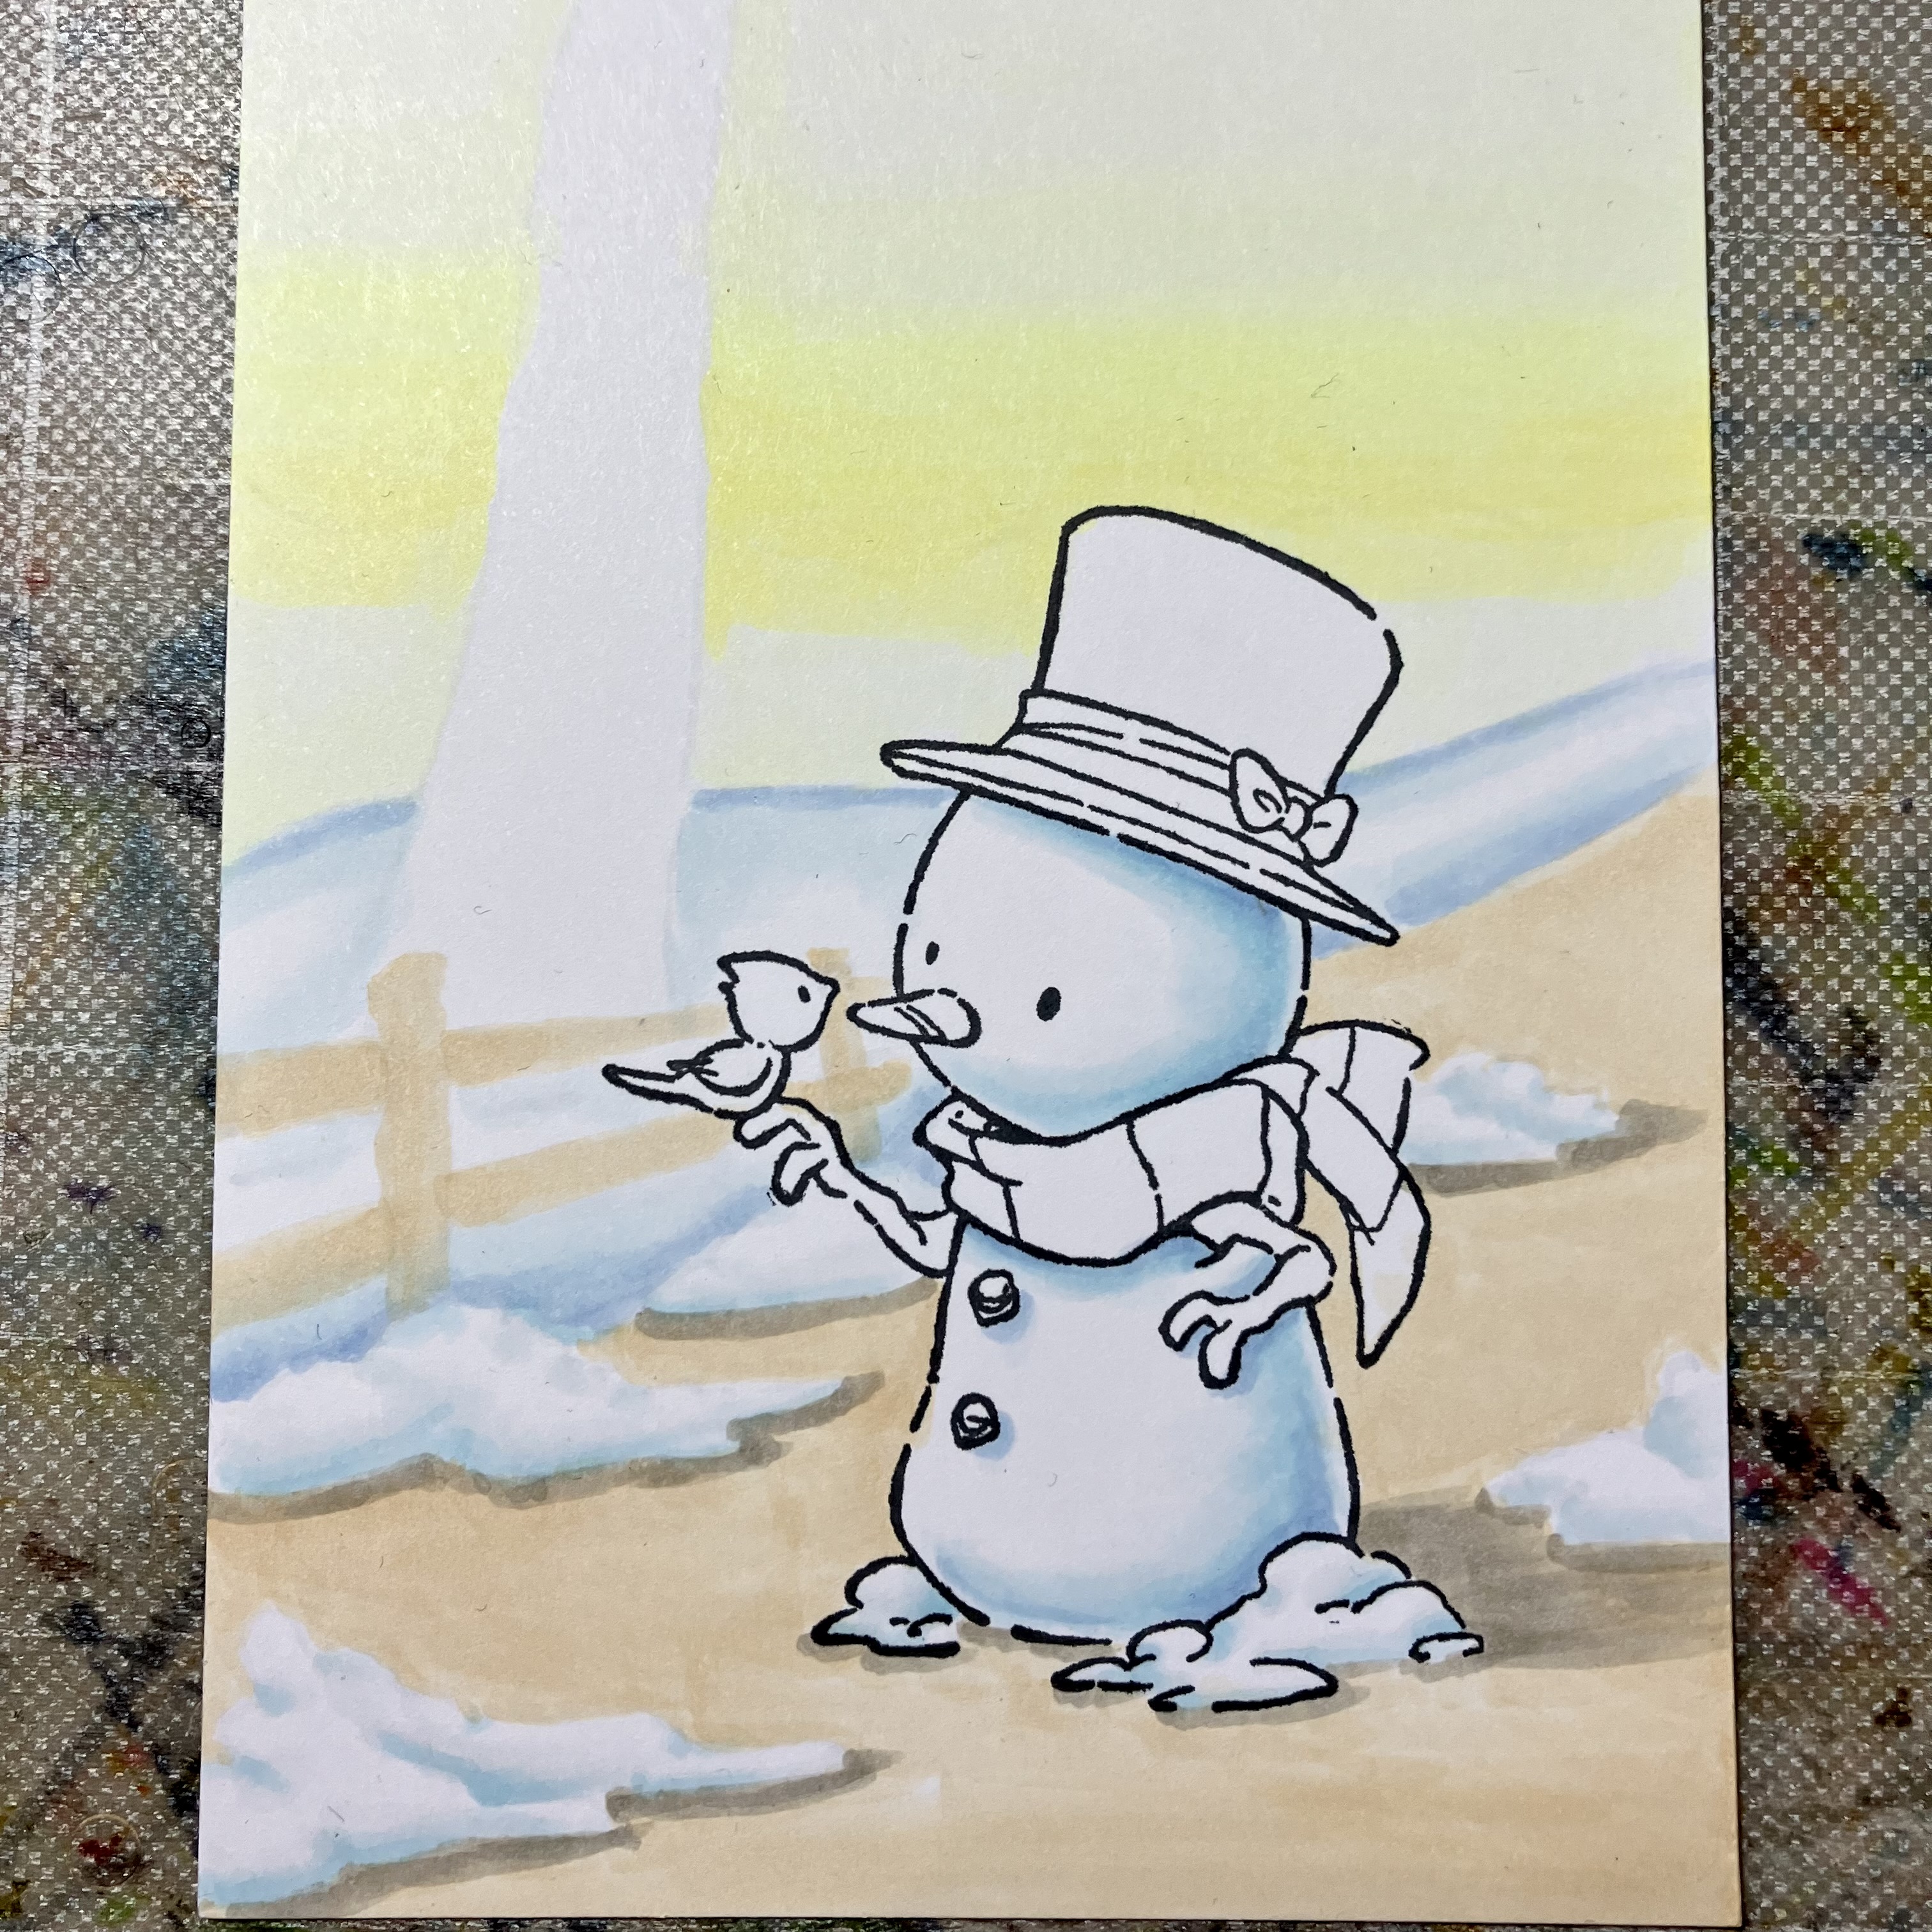

The first layer off the ground got E30, and shadows W3.


I outlined the piles of snow with a multi liner.
The ground got E31 - E33 - E35 - E37


The first layer of the tree was E42.
The first layer of the fence was E30.
Sketched a line of trees in the background with C1.
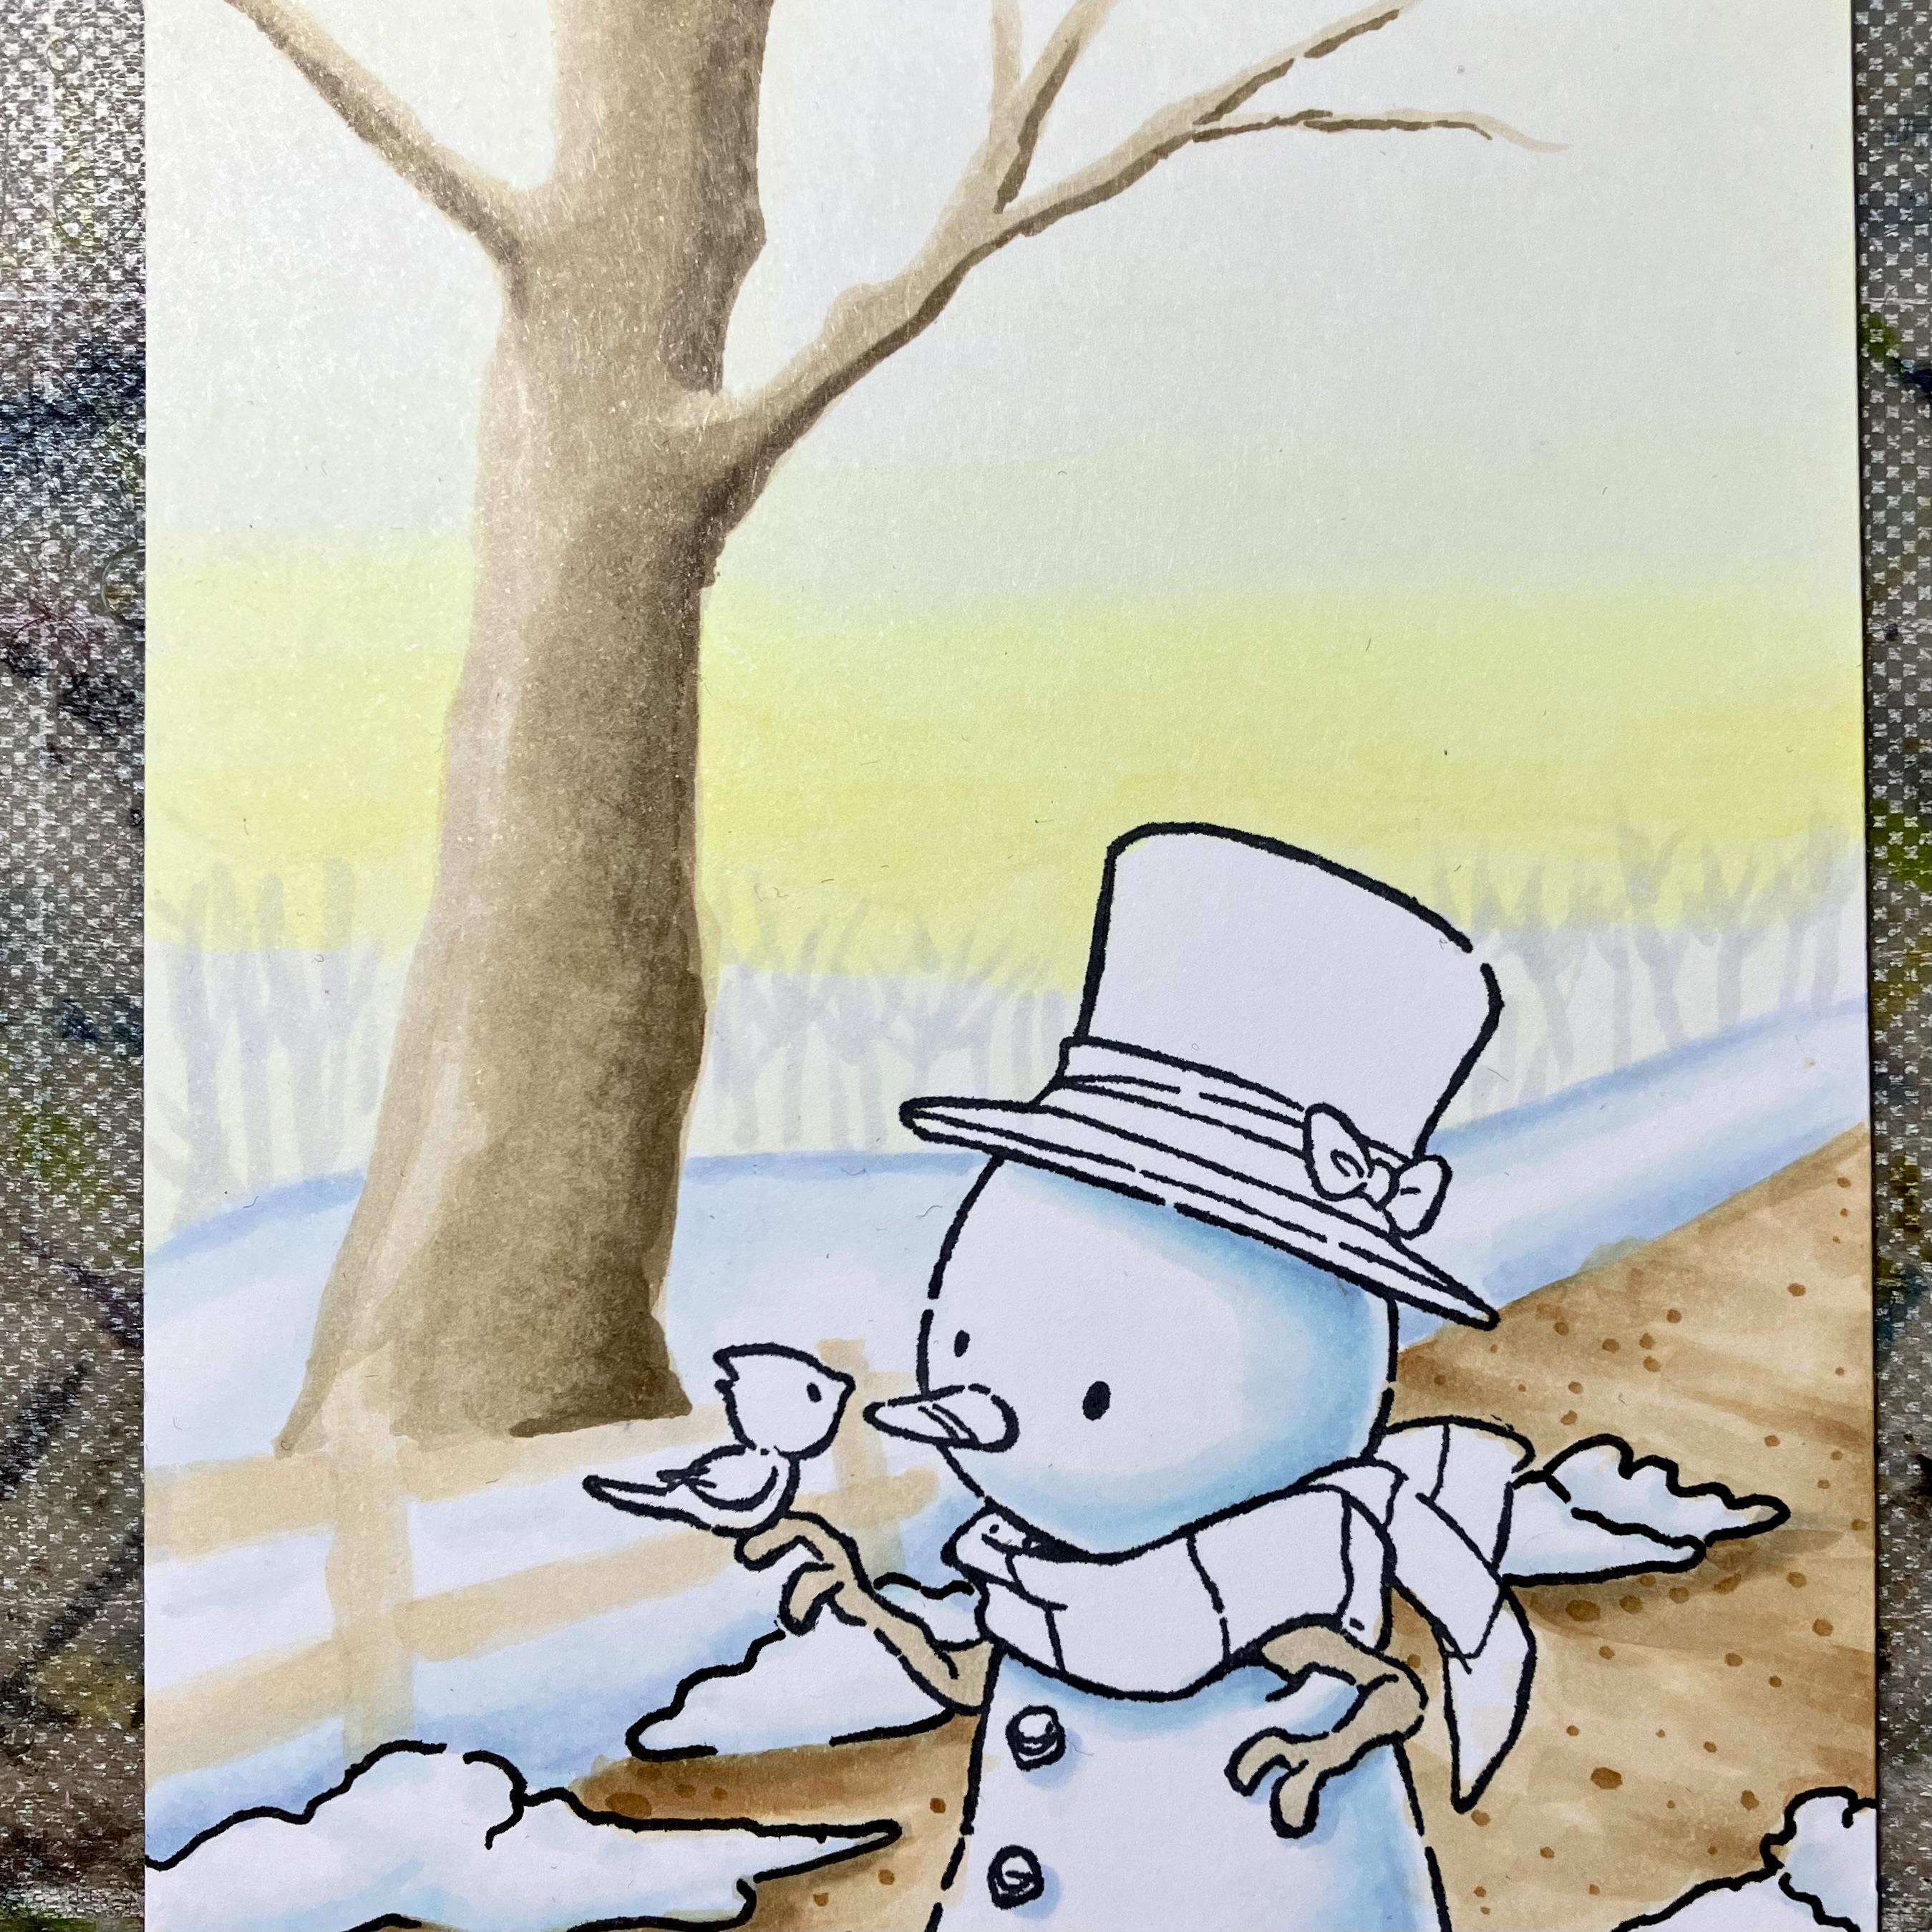

The darkest area of the tree is E47 and the mid-tone is E44.


Scribbled in the bark of the stem with E47 and W3.
I used the very tip of the nip with light pressure, and randomly I got heavier pressure to get the pattern for the bark. The fence got layers of E33 - E35 - E37 - W5


Smoothed the bark pattern out by going over it with E44 - E42.
The shadow on the tree is E47.


The hat and buttons got C3 - C5 - C7
The carrot got YR14 - YR07
The snowman's arms has the same color as the tree.
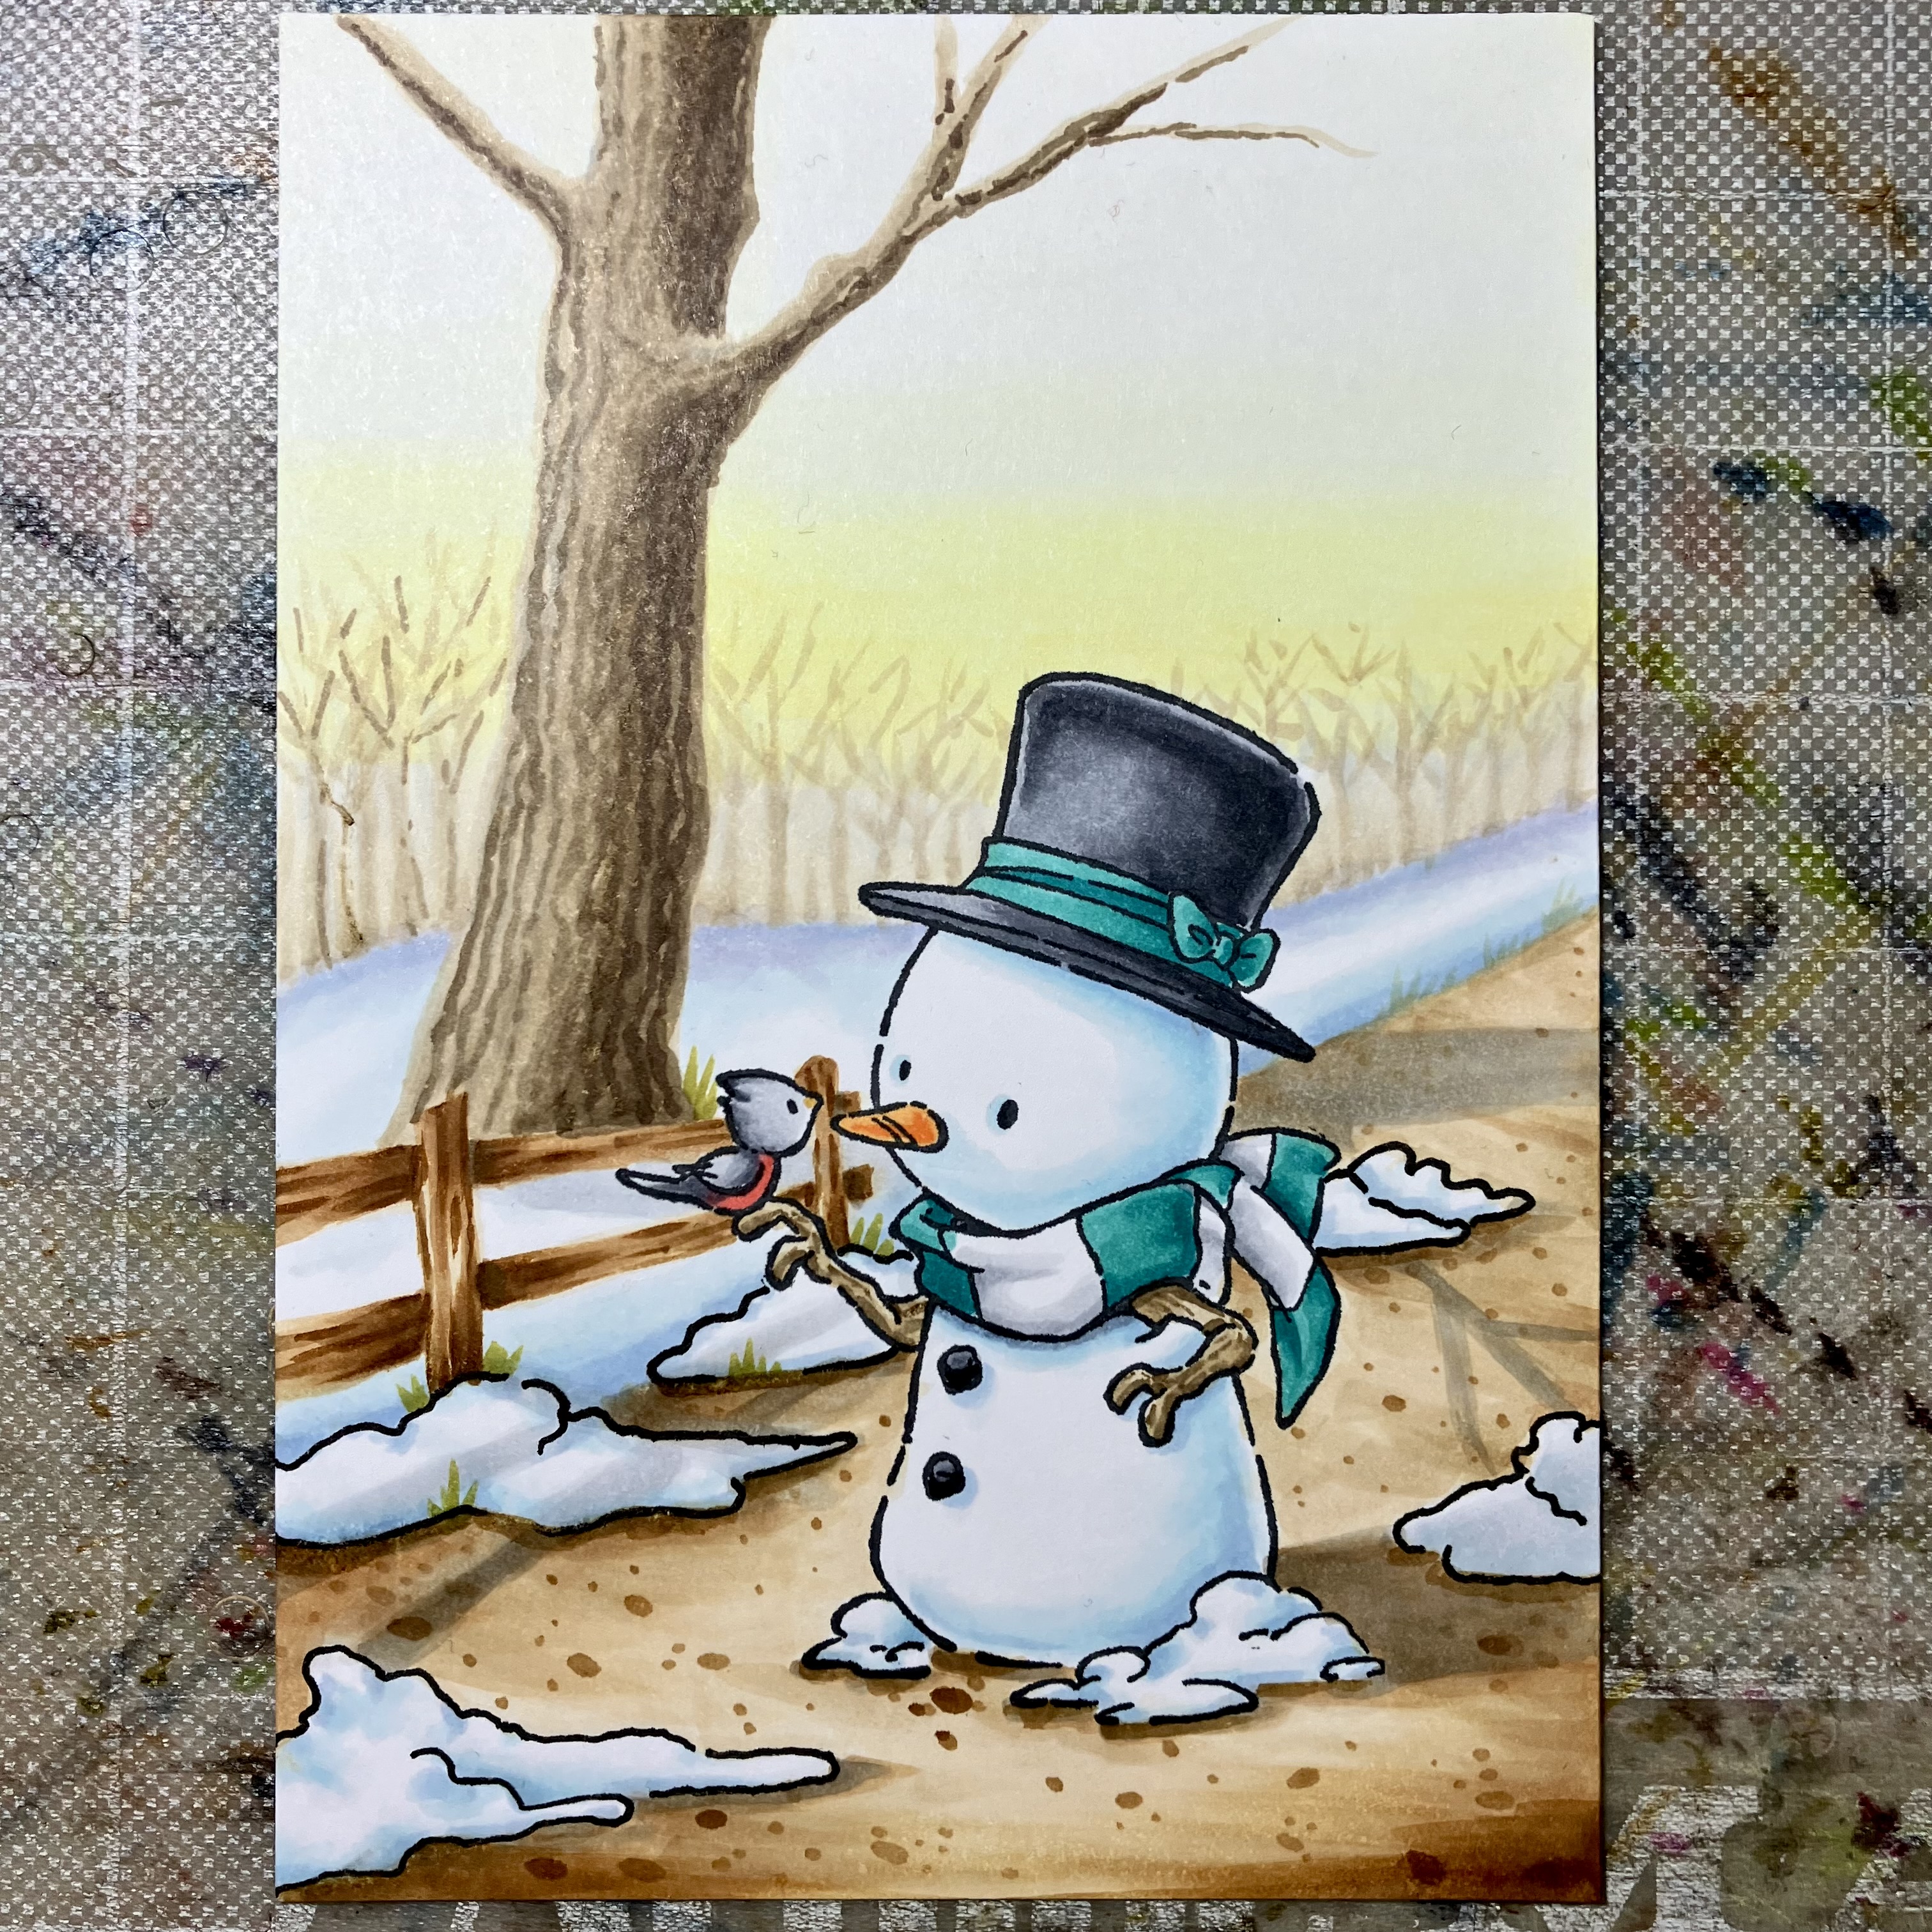

 The bird got C1 - C3 - C5 - R24
The scarf and the ribbon got BG13 - BG49 -  C1 - C3
And the ground and snow got some shadows from the tree and fence with W3 - C1.

I made an inventory among my stamps and I got a lot of different snowmen and I just want to color them all. Maybe there will be a snowman next time as well...

Have a nice, copic coloring day!

Sunday, January 17, 2016

Ships ahoy!

I had a little fun with this one and decided to play around with my airbrush, something I've not done in a while!

Without further ado here is my latest creation for Copic Europe:


The pirate image was coloured separately and then cut out with scissors and a craft blade before being mounted on to the sprayed background.
Whimsy Stamps - Pirate Boy
Sugar Pea - Heart Journal Card Set die
Copic Airbrush
Caran D'Ache Neocolor II crayons
Copics:
Bandana/Shirt - R22, R24, R29, B0000, N0, N1, N2
Waistcoat - E41, E42, E43, E44, E47, E49, W2
Trousers - B91, B93, B95, B97, B99, R29, R24
Sword - E21, E23, E25, E27, E29, E49
Hair - E00, E11, E13, E15, E17, E18
Patch - W0, W2, W4, W6, W8
Face - W9, RV32, RV34, W1, W3, E0000, E000, E00, E40, V20, R30, R20, C00, C0, C1
Hook - C1, C3, C5, C7, C9
Background - B01, B02, BG01, BG02, BG05, BG07, BG13, E55

I don't know about you but when I use my airbrush I always seem to end up spraying myself.
I had extremely inky fingers on my left hand where I'd been holding down my masking card - note to self to use more tape next time!
But atleast with my trusty cardboard airbrush booth I can keep my desk nice and clean!
(I cannot remember where I got it, sorry)


I hope this card inspires you all to dust off your airbrushes or go splurge on one and have a go; it really does give you a lovely background to showcase your stamped images and adds another dimension to your Copic colouring!!

Happy Colouring

Sunday, June 28, 2015

Super Fun with Copics!

Hello Copic fans!

My name is Jane, a Copic colour artist from the UK and one of the new members joining the Copic Europe Design team.
I've been using Copic markers since 2010 and I look forward to sharing my work, hints and tips with you!

To get things started I thought I'd create something using one of my favourite techniques:
No-lines Colouring


Super Boy - Whimsy Stamps

Copic Colour List
(beware - I tend to use a lot!!)

Cape: R21, R22, R24, R29, R39, W0, W1, W2, W4, W6, W8
Suit: B00, B12, B14, N1, N2, N3, YR20, Y23, YR31, Y26, W1
Skin: E0000, E000, E00, E41, V20
Hair: E23, E13, W1, E21, E53, E50
Boots: R21, R22, R24, R27, R29, R39, W1, W2, W4, Y23, YR21, Y26
Mask: R22, R24, W2, W4
Gloves: C0, C1, C2, C4, C6, R21, R24
Floor: YR30, E50, E51, E81, E42, E43

Hints & Tips:

In order to create a no-lines colouring you will need to stamp your image using a much paler coloured ink, I used Memento Angel Pink.

 I would also recommend that you stamp your image in your usual black ink on a scrap piece of paper for reference purposes - as you colour you will find that some of the pale lines will disappear and you will need to keep referring to the black image so you don't colour the wrong bit.  
Trust me, doing this makes the technique much easier!!


As you can see you will end up with a much softer looking image.

Well that's about it for now, 
I hope you've enjoyed reading my first post!!

Saturday, June 20, 2015

How I Colour Fur

Hi, everyone!
Here's Vili and today I'd like to show you the way I colour fluffy fur. I chose a really cute Silviya Zet's stamp - Fluffy Hanging There, which, sadly, can't be found digital anymore.


I decided to make my Fluffy not in the traditional "forest" colours but in more unusual ones. I chose the Warm Grey range of colours and started colouring the whole fur with the lightest one:


Then it comes a little bit darker one, and I mark the places of the shadows with it:


And the darker one:


And the darker ones:


I've said many times that after I've put the darker colours I return to the two lighter ones and I go over with them again:


Now I need my Copic Classic markers because they have fine nibs, useful for fine details:


After the darker spots are ready I put in the darkest colour:


 I leave out the other steps of the colouring because this post will become too long but my Fluffy is almost ready:


Now it's time to highlight the lightest spots, using white gel-pen:


And Fluffy is completely ready:


Copics used:
Fur: W0, W1, W2, W3, W5, W7, W9
Flowers: RV52, RV55, W3
Background: V20, V22, V25
Earth: E50, E51, E53, E55

Have a lovely day and thanks for stopping by!

Vili M. xxxx

Monday, March 30, 2015

Frog Tag

Good morning everyone!!!
this is Sarit, and I am so happy to be here today
with Beach baby Jayme digi stamp tag
this beautiful free digi stamp was made have a special story behind it.
it was made by Whimsy Stamp especially for Jayme. 
in 2010 Jayme was diagnosed with terminal lung cancer and her sister Lisa hold a special event to help brighten the remainder of the time she has left.

I love to color it and use it again and again.
this time I made it as a tag.

I colored the frog with olive greens (from the YG family) and for the texture on the skin I didn't use the blender as it wouldn't give a realistic look.
for more realistic look I used a lighter color from the same family 


Marker Used.....

Body: YG93, YG95, YG97, YG11
Lips: R22
Swimsuit: YR01, YR02, YR04
B24, B28
RV13, RV14
Y02, Y15
Umbrella: BV25, BV29
BV01,BV02,BV04
E31, W3

Have a wonderful day
Hugs, Sarit 


Sunday, December 14, 2014

No lines coloring for Christmas

Good morning Copic friends!

Elizabeth here today to give you some inspiration for your Christmas card- coloring.
I have colored this cute Whimsy Stamps image using the no-lines technique.

I stamped the image using Memento Tofee Crunch ink, wich is light brown. 
When I color the lines wont show, and it gives a soft look on the image.
Kruemel made a great tutorial on no lines coloring here on the Copic Europe blog. You can find it HERE if you want some tips on how to do it! Here's my card:

I used Maja Design papers in traditional Christmas colors, red, white and green. 

 Here's my image, it's named Berry, made by Sylvia Zet for Whimsy Stamps. 
I used the following copic colors: 
Skin: E13-11-21-00-000, R20
Hair: E29-27-21
Red: E18-09-07, R24-22, W7
"White": W7-3-1-00, 
Green: G99-94-82-21-40, W7
Cat: E35-33-31-30, R20


Here's the inside of the card.

Hope you are inspired to play with your markers !  
Enjoy the season! 

Untill next time! 

Crafty hugs, 


Elizabeth xx

Tuesday, December 24, 2013

Merry Christmas


Hello everyone! It's Delphine here with some very seasonal inspiration today! A very CAS Christmas card today using an image by Crissy Armstrong I fell in love at first sight with, a very long time ago. The colouring is totally inspired by and based on the watercoloured image she did which impressed me so much!


This image is a Whimsy Stamps digi by Crissy Armstrong called Touched By Love. I coloured it all with Copics and really could not add anything else to it, I think this image is gorgeous by itself and does not even require a sentiment.

Background: B41, 45, BV13, 17
Ground and straw: E50, 53, 55, 57, Y26 (and a bit of metallic gold pen)
Angel: 
Skin: E000, 00, 02, 11, 23, R20
Hair: E49, 51, 55, 59
Outfit: BV02, 00, 000, W0, 1, 3
Wings: W0, 1, 3

Baby Jesus: 
Outfit: C00, 0, 1, 3, W0, 1
Sheet: B000, 00, BV000, 0000, C0, 1, 3, Y11, 26, 28
Crib: E31, 33, 35, 37, 39, 59

Thank you very much for your visit - and Merry Christmas to you all! Hugs
Delphine xx

Thursday, May 16, 2013

Flower Fairy

Morning Copic Fans,

Tracy here and I am excited to show you one of the Whimsy Flower Fairies from BunnyZoe, these images are just the cutest.  I have also tried out Mariska's paper piecing tutorial, something I have wanted to do for ages.  A word of advice though, I think it would of gone a lot better had I had the correct tools, i.e. the scissors and the correct glue.  I have just used ordinary glue and you don't get quite as much dimension.  The tiny elements on this stamp were rather fiddly but I do love the result, but hats off to Mariska as you need a lot of time and patience.


The little paper bag that is holding the tag was white.  I used my copic airbrusth system and BV000 to colour the bag lilac, something I'd be doing more of as I love everything to match.


The Design papers are from Magnolia called Hydrangea. The leaves were cut from Marianne Design Swirl and Leaves 3 set, all available from BunnyZoe.


Here's a sideview.


The beautiful butterfly is by Magnolia called "Butterfly Kit.  It comes with two different size butterflies and also the butterfly text which I have used just underneath the butterfly here and also can be seen on the left hand side.

Copic Marker Ingredients:-
Skin E00, E000, E0000, E11
Hair E43, E31, E29, E50
Lilac's BV11, BV01, BV000
Cream E44, E42, E40


Links to all other ingredients can be found on my Blog tomorrow  HERE.

Hugs Tracy x
Follow Me on Pinterest