Followers

Showing posts with label Daria Myagkikh. Show all posts

Monday, August 10, 2015

Blooming beauty from Kellee Riley

Hi everybody!
Daria is here :) 


Couple of weeks ago I came across absolutely stunning artist - Kellee Riley. If you never heard this name...please follow this link and just enjoy!!! 
So...on 18th of June she had a birthday...and she decided to make splendid present for all art-lovers - freebie.

I was absolutely carried away by this image...so today I'm showing you card that I made with it:


The key numbers for image are:

Skin  - E000, E01, E11, R11
Hair - E53, E44, E47, E49, E79, E34, E39, E74
Flowers and leaves V0000, V000, V01, BV00,Y00,Y11,Y04,Y19,BV00,BV02,BV08, BV11,RV0000, RV02,RV14, RV21
B000,B21,B91,B93
YG91,YG93.YG95


Wishing you a great day and very creative mood!

Monday, July 13, 2015

Easy peasy...vegetable squeezy background.


Hi everybody!
Daria is here :) 


Today I would like to continue talking about backgrounds.
I heard several times in a past that real background stamps are not very practical - they usually cost the same as a whole stamp set but you use it very rarely.
Well - fair enough...:) But you know what?! You don't really need to spend a lot to create great backgrounds!
And I will prove my point today! :) Lets do it together actually.

All you need is ANY stamp set and your Copic Markers of course! 

As to me - I decided to create a very sweet gift pocket. 
First I took WRMemory Keepers Board and punched future package.
(In such case it will be easier to create your background as you will not need to color those pieces that will be cut off.)
I used Hampton Art - Jillibean Soup - Fresh Vegetable Soup Collection. Started with most "massive" image - onion. Stamped several times. To make it looks more "professional" sometimes I stamped image "off the edge". Then it was carrot and finally pea.


I coloured each image and then outlined them with grey markers to add "dimesion" and interest.


Finally it was time for sentiment and decor.....aaaaand here is my final project:


I stamped two image of a beet, coloured one of them, cut both out and glued them together with Bakers Twine in between. That brought real fun to this clean and simple gift pocket...don't you think?! :))

BTW I used the same background to create thankful card - you can see it over HERE.
So as you kinda guess this method can be used not only for gift bags... :)))

Anyway the key numbers are:
Carrots - YR0000, YR20, YR12,YR14, YR04,YR18
Onion - W00, E50,E81, Y23,Y32
Peas - YG0000, G0000, YG00, G21, G40,G82,G85, YG91
Beet - RV0000, BV00, V01,V04, V06, V93, RV17,RV04
Background - C00, C1


Wishing you a great day and very creative mood!

Thursday, June 18, 2015

Lets see...what are the colors of Sea? :)

Hi everybody!

Today I would  like to show you another clean and simple card.
I'm really into background stamps recently :)) Besides of it's beauty, I really want to show our followers that Copic markers can be used in so many different ways. So...lets expand horizons... Shall we? :))

At hot days like this all I can think of is SEA! So I took most suitable background stamp and than...went to google as I was completly at loss... What ARE the colors of the sea?!!! )


So after 20 minutes I selected all necessary markers...and here is the result:


After coloring the whole background I added sparkle with Wink of Stella and a bit of Ranger stickles (which looks like a foam on a wave). Small fishes are colored with Copics too...as all over parts of the card. So basically all you need is white paper, stamps and markers - and you ready to create something very special and fun.

The key numbers are:

Sea - BG000, B01, BG02, BG10, BG11, BG23, BG34, BG45 BG72,BG78
Fishes - Y11, Y32, Y35, YR12
Sentiment - RV04


Wishing you a great day and very creative mood!

Tuesday, May 26, 2015

Simple but glamorous background - Daria Myagkikh

Hi everybody,

Today is my turn to show you something interesting. Hope you'll enjoy it!


What I really love about Copics is opportunity to create something simple BUT very beautiful.

We all know that copic markers is a great instument for coloring images...so last weekend I thought... What about using them with background stamps?!

It was splendid experience to be honest.
I choose one background - stamp it - and then just....meditate with all RV colors that I had :)


The process of creating was easy and relaxing. I stamped background with Momento ink (grey) - took all my RV colors - colored each sell... sometimes mixing two colores - than glued it on grey cardstock - used Ranger stickles to decor cardstock and to add accents. Oh! And one more thing - in the end I outlined several sells with pencil... :)


The key numbers for backgound are:RV0000, RV02, RV04, RV11, RV14, RV21, RV23, RV17, RV 91, RV93


Wishing you a great day and very creative mood!


Thursday, April 30, 2015

Colorful envelope for best vacation - Daria Myagkikh

Hi everybody,

Today I would like to show you some non-traditional project. :) 
Couple of days ago I received very interesting order.
The story is that one man decided to give his wife a present. She is turning 40 in a week. Huge anniversary, don't you think?! 
So as a present he chose a splendid trip to Montenegro...and he needed a beautiful.... ENVELOPE,
where he can put all documents (map, tickets, etc).

So here what I came up with:


I decided to make a shacker-envelope with a real sand inside. :) Difficult part was required size - 240X140 sm. But I handled it :)))) 
I used splendid image from Mo Manning - To the Beach! - and a real photo of the sea s a background. Colored girl, added ranger stickles on sneakers, swimsuit, details of the bag and flower.
Die-cut "Always" panel - colored it with BV0000,BV00,BV02. Decorate with sentiment and rhinestones. and vuala!


I really hope that customer will enjoy it. Anyway...


The key numbers for image are:

Skin  - E000, E01, E11, R11(for blush)
Hair - E34, E44, E47, E49
Clothes, Towel, Sneakers
BV0000,BV00,BV02,BV08,
Y00,Y11,Y19,Y32, 
V0000, V000, V01,

G40 (for leaves)


Wishing you a great day and very creative mood!

Thursday, March 26, 2015

Pampered with Daria Myagkikh

Hi everybody,

Daria here with something very girly :) 

8th of March is traditional woman's day in Russia. I decided to celebrate it with my daughters in very special way...SPA party!!! What can be better?
I prepared a lot of fun stuff (including towel robes that I sewed by myself; present bags with sea salt, creams, etc) - more details at my blog over here.

One of the decoration that I made were frames with invitations. I used new stamps from Mo Manning (Girl time and Pampered).


The key numbers for image are:

Skin  - E000, E01, E11, R11(for blush)

Clothes - R0000, RV02,RV11, RV21,R32, YG0000,YG00,01
Cucumber - G40, G82, G85
Background - B000, C00, C1, C2


Here is close up of the second frame:


Wishing you a great day and very creative mood!


Saturday, February 28, 2015

Coloring poppies with Daria Myagkikh

Hi everybody,

Today is my turn to show you tutorial. :)

I thought that it is time to welcome spring. And the best way to do it - is to color some flowers. :)

For today tutorial I chose this splendid image from Aurora Wings:


So first thing that I'm doing before start coloring almost any image is checking how such thing looks like in real life. 
Here some options of poppies that I found in internet.  Apparantly there are a lot of different varieties!


I thought that I will go for classic red and black pallette.
As a reference (and a part of future card...hehehe) I chose this picture:


So lets start with coloring...shall we? :)
I will show you my way of coloring with only one flower (overwise this post will be endlessly long).
First I took YR0000 and moistened the whole flower


Secondly (one after another) I highlighted the most dark places with YR12, R22, R27

Smoothing colors with YR20 (NOT R20!)

Continue adding red colors R32 and R46

Smothing colors with YR20

At this stage adding light colors (on most light places :) ). Using YR20 and R32 for that.


Final stage - adding contrast with R39 and YR0000


So we are done with one flower...whole bouquet ahead :)... 
After some time here is the card that I created. I decided to leave it simple and fresh as coming spring. :)


Easy and Fun! :)

Hope you will find my tutorial helpful and interesting!
Have a great day and bunch of inspiration!

Daria Myagkikh

Sunday, February 15, 2015

Daria Myagkikh - Forget boring lessons! Study is FUN!

Hi everybody,

Today I would like to show you deffinatly non-traditional project :).
The story is - My older daughter takes classes with a speech therapist. She is only 4 and it is not very easy for her. There are many exercises that she has to do. 
One of which is gymnastics for lips and each exersise has its own name - Frog, Lion, Elephant and Baloon. Speech therapist was kind enough to give Tonya four cards - so she will remember what to do at home.

Weeeeeeeell... I thought that those cards are a bit boring...and created my own...with the help of stamps and Copics of course.


On the up right corner you can see "original" cards. I used four images from Mo Manning to create more colorful and fun equivalent.  I think that result is worth my efforts.
Well my daughter certainly think so :) 


Lets have more closer view....shall we?! :)


I deliberatly made very simple decoration - nothing should destract Tonya's attention from the picture - dots, machine stitching and names (so we can learn English words as well...hehehe).

If you ask me...I would say that my favorite card is with the Froggy...so let me tell you the key numbers of markers for that image.


The key numbers for image are:

            Skin  - E000, E01, E11, R11(for blush)
Hair - E31, E34, E51, E53, E99
Clothes
 - RV0000, RV02,RV14, RV21,RV17
Wings
 - B00, B000, RV0000, RV00 
Frog - YG00, YG01,YG03, YG93, YG95, YG97, G99, E84 (B00 for the eye)
Background  - B000 and C0


Add a bit of glossy accents and ranger stickles on wings of fairy - and voila!

By the way for those who are interested - you can find how I store those cards in my blog...;)

Wishing you a great day and very creative mood!


Saturday, January 24, 2015

Daria Myagkikh - Hush! Someone sweet took a nap!

Hi everybody!

How is your January going on so far? Mine was very busy to be honest. :)
Couple of weeks ago I became a godmother of  the beautiful girl - she has very rare name - Lada!
The day was absolutly magical and unforgettable!
So! for my beloved goddaughter I prepared special present and decided to decorate it.

That is another reason I just love Copics - you can make stunning things with limited supllies.

For my project I used image of Mo Manning - Hush! Isn't it just ADORABLE?!


I wrap present into simple craft paper, tie it with two different ribbons and than attached several pieces of patterned papers. In the end I attached colored image.


I think that this image is so sweet - can't imagine something better for this occasion.
And the best part of it - that it can be either girl or boy!


Anyhow....:) The key numbers for image are:

            Skin  - E000, E01, E11, R11(for blush)
Hair - E34, E44, E47, E49
Clothes
 - V0000, V000, V01, RV0000, RV02,RV14, RV21,RV17
Background  - C00, C01, C02


Wishing you a great day and very creative mood!

Saturday, November 8, 2014

The Snow Queen from Daria Myagkikh

Hi!

I think that everybody has already started their preparation for Christmas and New Year.
We here in Russia are not an exception. That is why for today post I decided to show you one of the cards that I created for that splendid holidays!


I love fairy tale The Snow Queen - and I thought that she could look like this. :)
I took this image over here - link

For this card I took accetate as a body and using mask and white acrylic paint made a frost on the window. I colored image with my Copic markers and glued inside the card. In the end I added ranger stickles all over the "snow", couple of reinstones and sentiments, That's it!
The key numbers for image are:

            Skin  - E000, E01, E11, V00 and V01 (for lips)
Hair - E53, E44, E47, E49, E79, E34, E39, E74
Background
 - BG0000, BG000,BG10,BG11,BG72
Crown and 
jewellery  - BV00,BV02,BV08, BV11, C00,C02,C04,C05 and Y11(for the stars)


Wishing you a great day and very creative mood!


Thursday, October 30, 2014

Daria Myagkikh - Treat Or Trick?

Hi everybody!

Today is the one day before Helloween and for this post I decided to create a card that is dedicated to this fun, naughty and spooky holiday! :)


I like creating cards using only copics - so here is my what came out this time.
As usual I took accetate as a body for the card Than I decided to create a scene using couple of dies and stamps. I colored house and little witch - both from Mo Manning - than cut them out.
Next I die cut tree and fense - colored them. And than gather everthing together + adding ranger stickles. :)
Bibbidi-bobbidi-boo - card is ready! 

The key numbers for image are:

            Skin  - E000, E01, E11, R11 (for cheeks)
Hair and cat - Y35,YR07,YR12,YR14,YR18,E35,E37,E99
Clothes
 - BV00,BV02,BV08, BV11,BV13,BV17,YG03,YG93,C2
House
 - 
BV00,BV02,BV08, BV11,E51,E53,C2,C4,YG93,E87
Tree - E53,E35,E37,E39,E44,YR14,Y35,YG95,E84,E87,E99
Fense - C1,C3


Wishing you a great day and very creative mood!

Thursday, September 25, 2014

"Cup of tea?" card from Daria Myagkikh

Hi everybody!

Hope September went well and all of you are in a great mood!
For today post I decided to create a card that illustrates cozy mornings (or evenings) of warm autumn.
And for this project I used images from A Day for Daisies.


So I thought...how nice it would be to get up in the morning.... go to kitchen...and see a true miricale - breakfast made by this cute little fairy. That would be really great - to seat next to the window and drink this tasty tea...agree? :)
For this project I used accetate as a body (as usual), vellum as a background, 3 images from A Day for Daisies, a lot different shiny stuff - ranger stickles, reinstones and ZIG wink of stella - and a little piece of thread for tea beg. Basically all card made with copic markers only :) 


The key numbers for image are:

            Skin  - E000, E01, E11, R11 (for cheeks)
Hair  - E53, E44, E47, E49
Clothes
 - BV00,BV02,BV08, BV11
Wings,Sentiment,Flowers
 - V0000, V000, V01, BV00
Botlle - G0000, G40, BG10,BG70
Tea bag -  E50, E53, E34,
Cup and Jar - Y00,Y11,Y04,Y19


Wishing you a great day and very creative mood!

Sunday, August 31, 2014

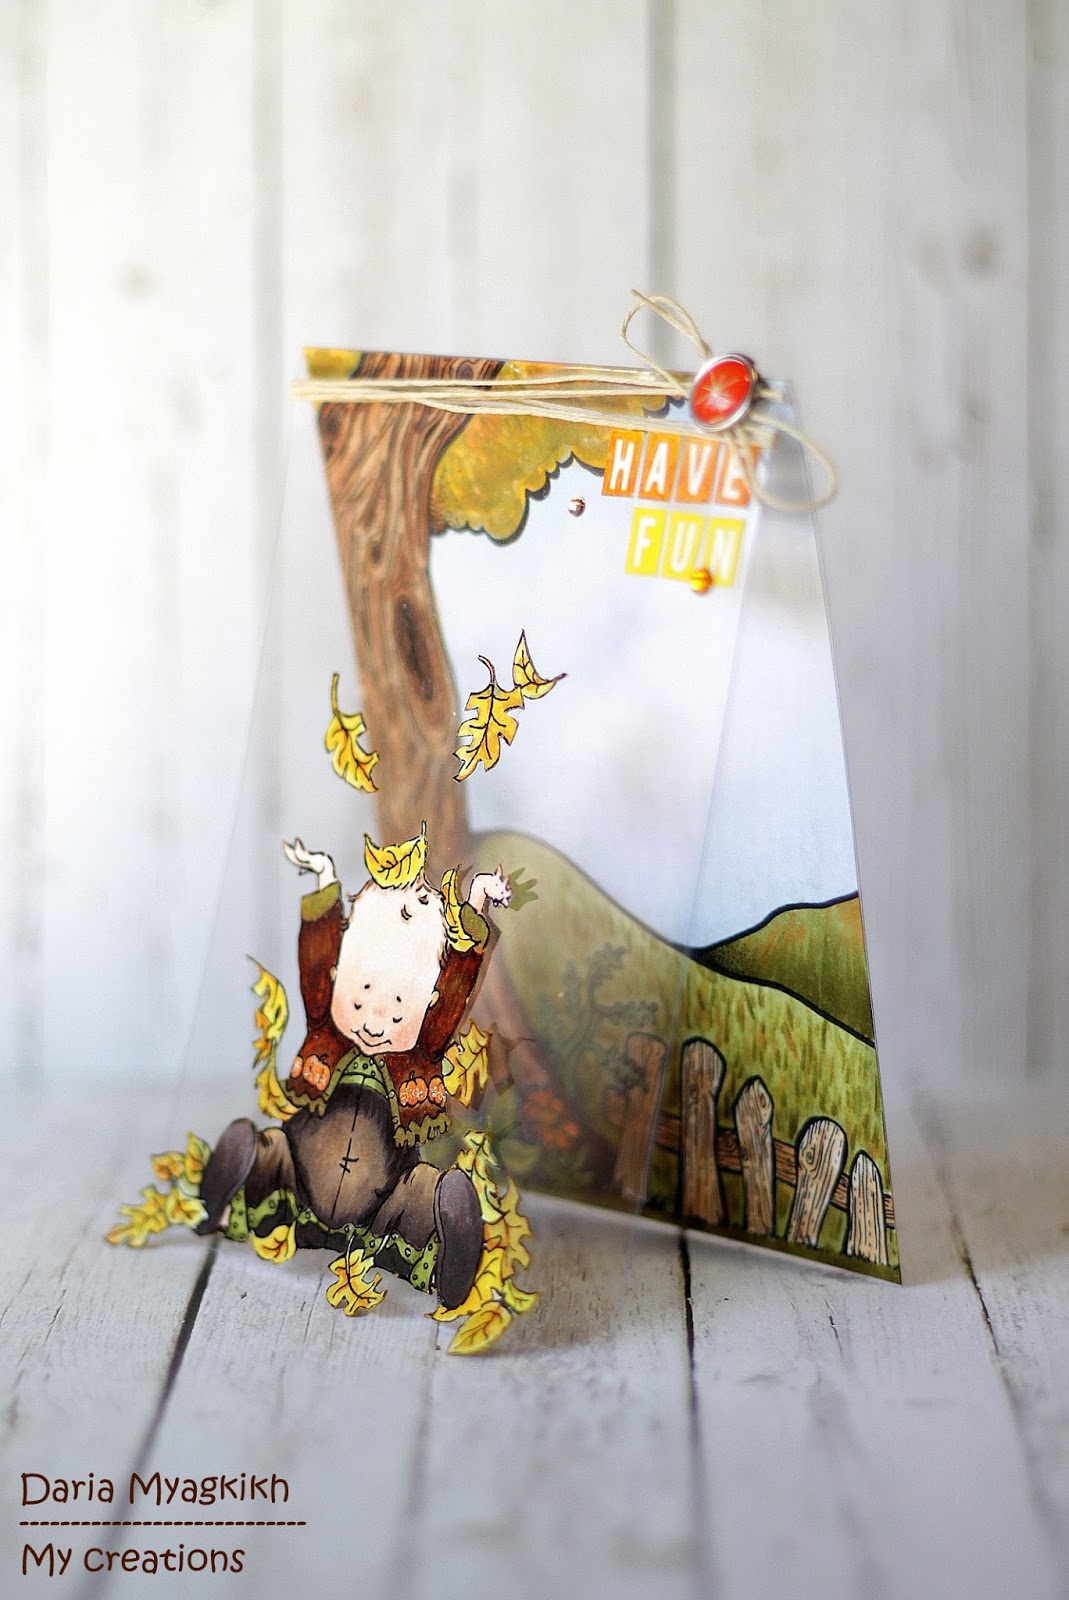
Autumn Fun card from Daria Myagkikh

Hi everybody!
To be honest I was waiting for this day whooooooole summer. Know why?
Because I just adore Autumn! It is the most beautiful, joyful, cozy season of all.
Also I find it very inspriring. That is why I decided to dedicte my card to it!

I used splendid digi stamp from Mo Manning - Kai as a main character and image from Lilyboo Designs - Old Tree for the background.


As usual I used an accetate as a body for my project.


As both of the images are rather "busy" I decided not to use a lot of embalishment.
Just coloring :))
So I took Accetate and create a body for the card. Than cut and colored the background scene and attached it inside the card with doubleside tape. Than I colored lovely boy, cut and glued with glue dots. Than added sentiment, couple of jems and brads. That's it!


The key numbers for image are:

            Skin  - E000, E01, E11, E50, R11 (for cheeks)
Clothes
 - E53, E44,E47,E49,E99, YR14, YG93, YG 95
Leaves
 - Y19,Y21,Y26,Y32, YR12,YR14, YG93
Grass
 - G0000, YG93, YG 95, YR 12
Tree
 -  E34, E37, E39, Y19,Y21,Y26,Y32, YR12,YR14, YG93
Sky 
- B0000, C00, C1
Fence 
- E34, E44,E47, C1


Wishing you a great day and very creative mood!


Sunday, August 17, 2014

Hair tutorial from Daria Myagkikh

Hi everybody!


Today it is my turn to create a tutorial for you. I am very excited as it is my first Copic tutorial!
So I decided to show you my way of coloring hair - as I find it most relaxing, interesting and enjoyable thing to color :)


So for this post I decided to use image from Artist Catzilla (you can see her library over here)


I start coloring all pictures with the skin because of two reasons.
1. It is the most noticable part of the picture (the first thing you will look at is a face). So if I made any mistake there I would not use spoiled image.
2. Skin is lighter than the hair (Almost all the characters that I color are brunettes). So if you accedently touch dark hair with your light marker - a bit of dark color will stay on the tip. You may not notice it and when you continue coloring skin - you will have a blur right in the middle of characters face. :)


Any way let's start creating our hairstyle :) This lady will be a brunette (as usual in my case he-he)... I would say with dark walnut color.

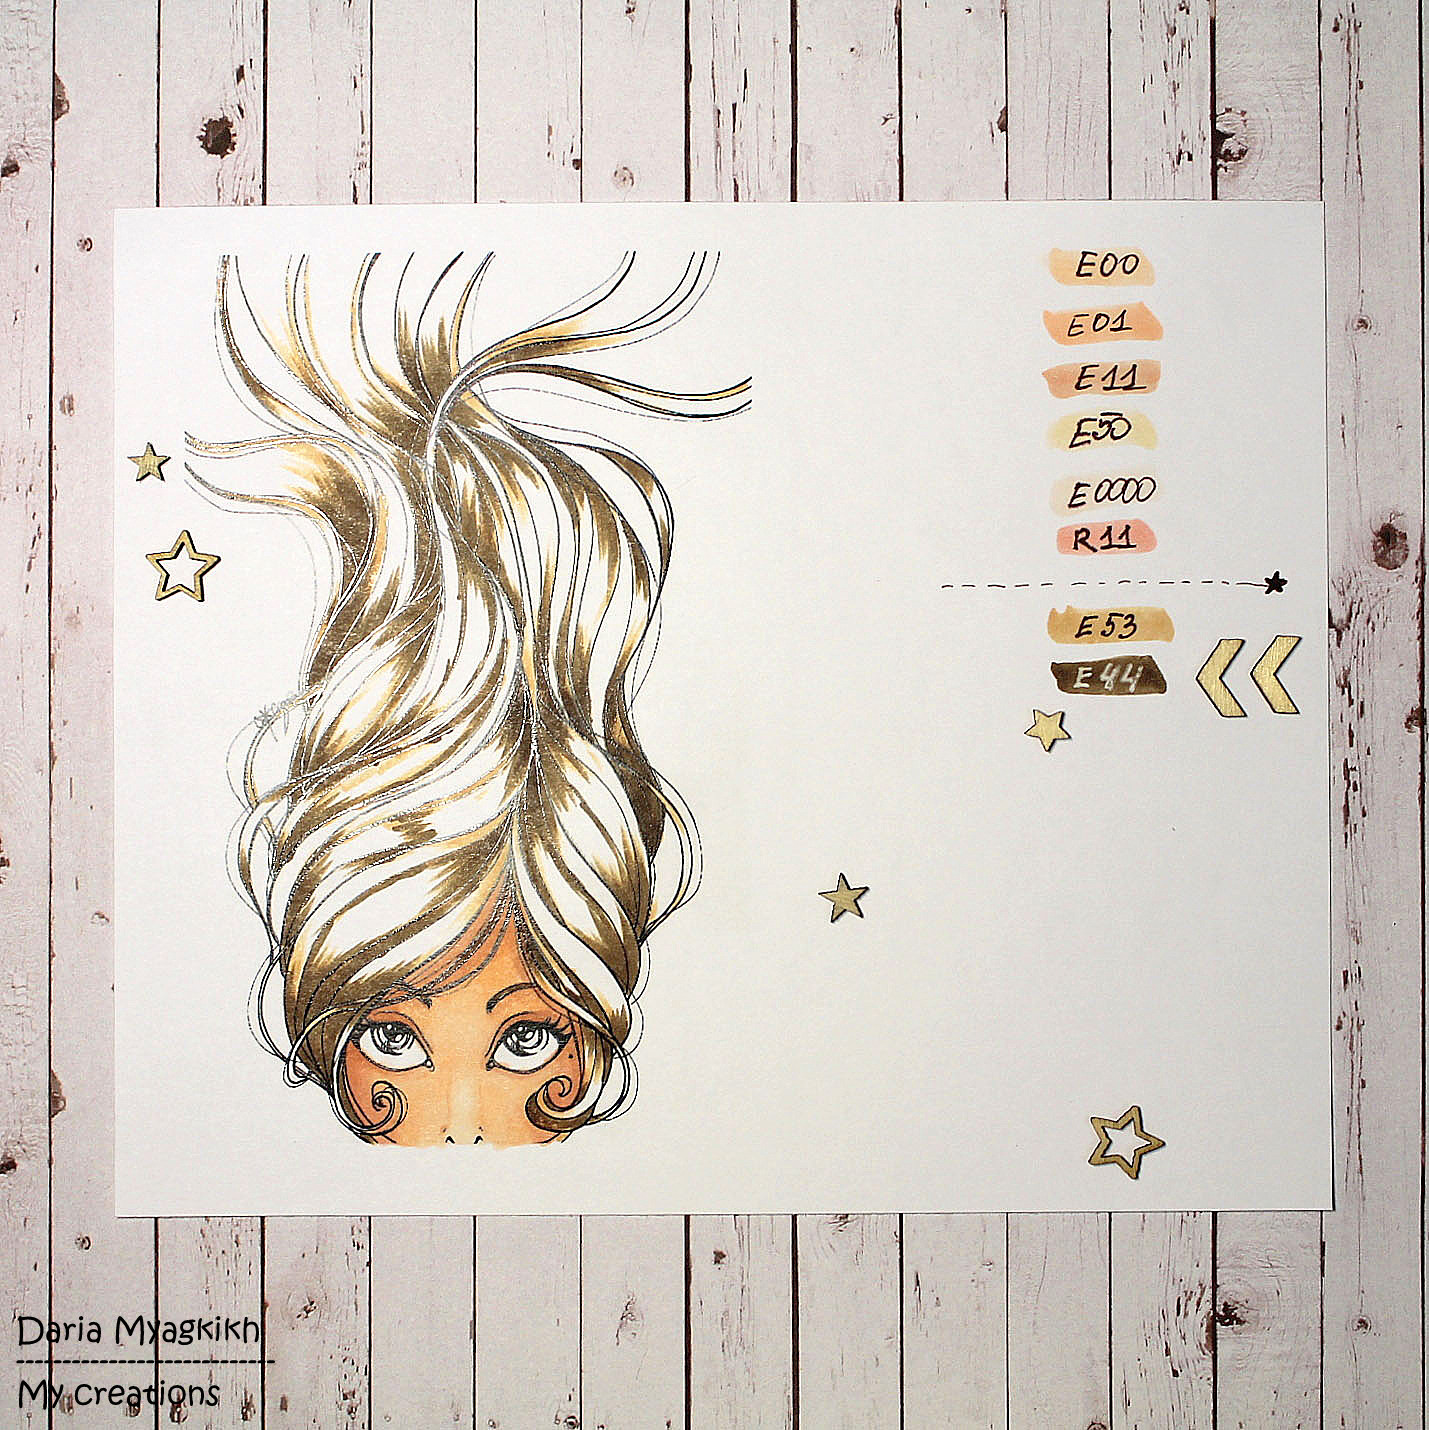
I use a classic way of coloring - "from light to dark". So I started with the lightest color - E53.  With the flicking motions I added color to those places which would be the darkest. Do not rush to color every bit. If you are not sure - just leave it blank. 


Than if you are happy with the result start adding darker shades.

Е44 и Е47


So we have the structure of our future hairstyle. I like it! :)
That means that we can continue adding more colors.
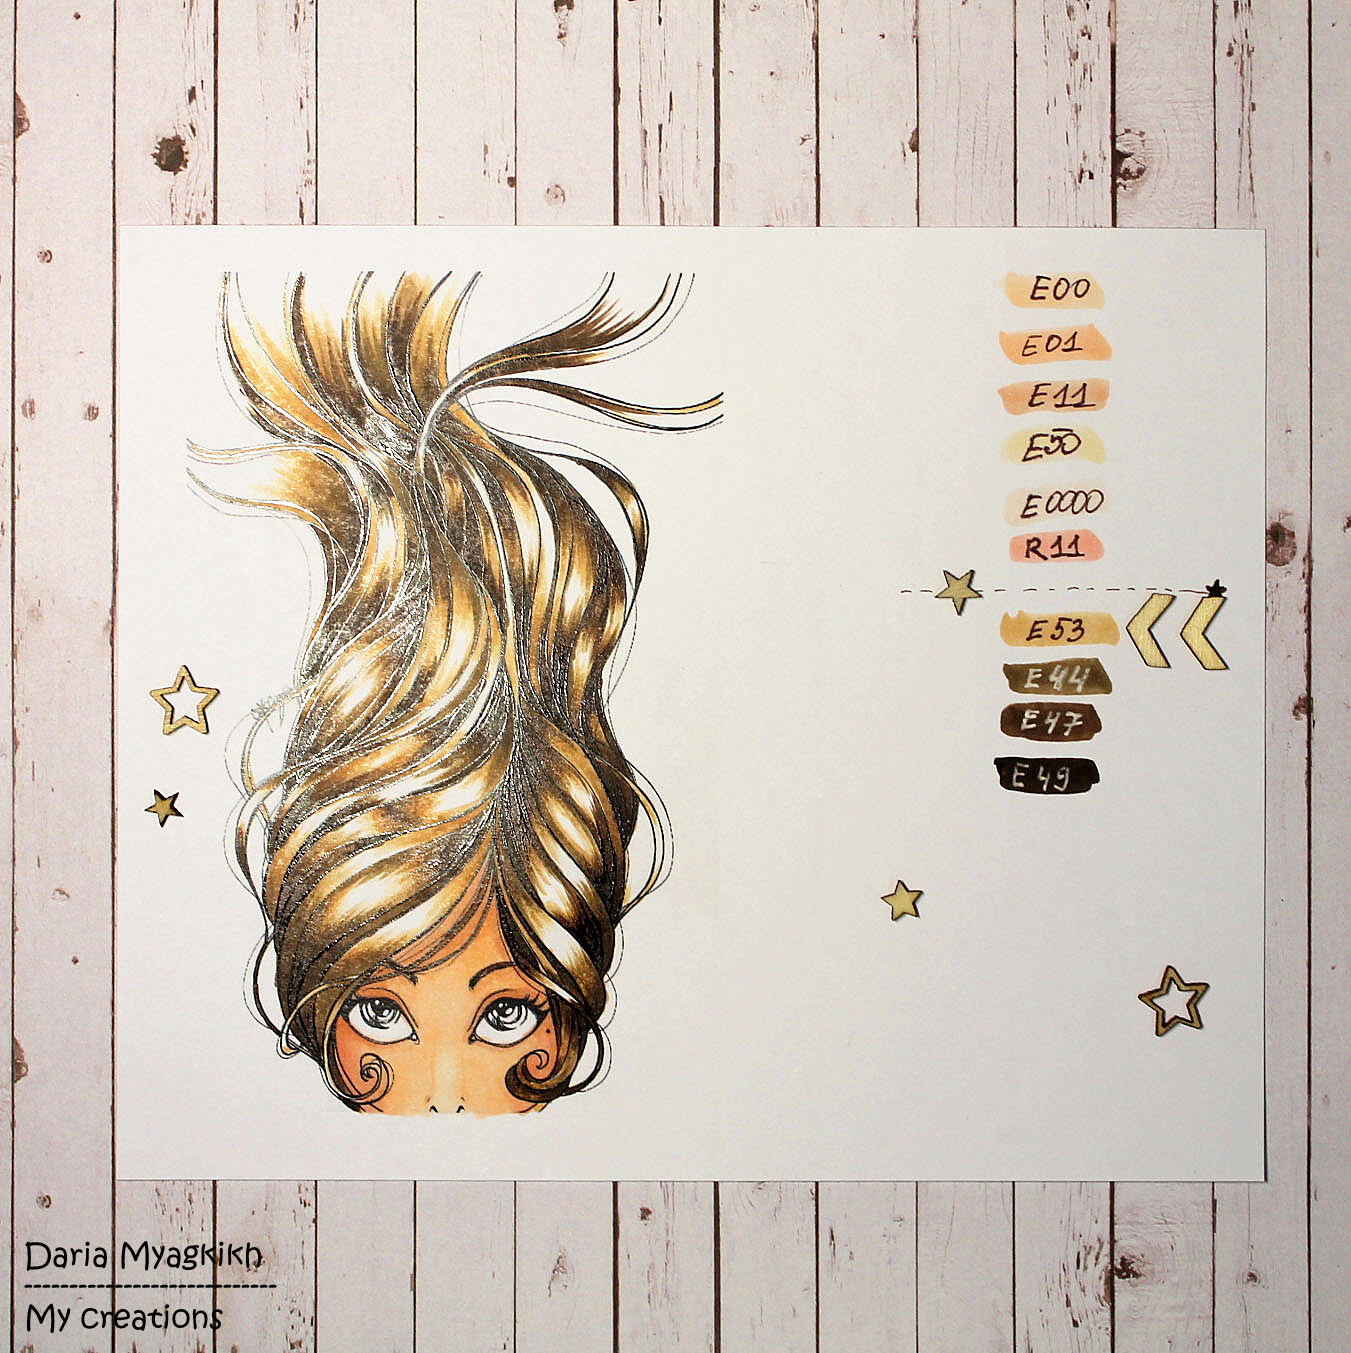
And again - from light to dark:


Е53, Е44


This time I will add E49 for more deep dark brown.


After that I would like to soften strong contrast. I use Ð•53, Е44 again. :) 


Finally we have our brunette girl ready...but do you remember - we decided that it will be dark walnut color. So I used E79 for this purpose and final touch - Ð•53 to gather all shades together.


And....the only thing that is left is to create a card...Here what I came up with:


Easy and Fun! :)
Hope you will find my tutorial helpful and interesting!
Have a great day and bunch of inspiration!
Daria Myagkikh