
Hi, Helen here hoping you all are in a good mood today.

I thought I´d show you some bokeh effects today.
Bokeh is what you get with your camera when you focus on an object in front of you and light sources in the background will end up just as dots.

I thought I´d show you some bokeh effects today.
Bokeh is what you get with your camera when you focus on an object in front of you and light sources in the background will end up just as dots.
It has a dreamy feeling to it.

I chose light colours for this, I wanted the dreamy, romantic feeling.
Soo just scribbling in some areas with my colours, B0000-RV0000-Y0000, letting they overlap each other to blend.
And this time I wanted to not color my whole background so the colour fades out, used flick marks.

With my colourless blender I made circles in different sizes in the background. I took a drop of the colourless ink on the nib to be sure the nib was really wet. And I worked all circles, to blend the colour beneath, moving the pigment to the edges of the circles.

I also wanted some bokeh effect to be coloured, as if the light sources was coloured.
Used the same colours as for my background, but putting them in another colours area.

Letting the backgroud dry.

Starting with the skin tone, E000, my lightest for the whole areas.

Got on with my darkest skin tone, E21. And I wanted the girl to be dark in the face pointing towards me, and light where the light from the background hits her face.

Softend E21 out with E50 and coloured in some cheeks with R11.

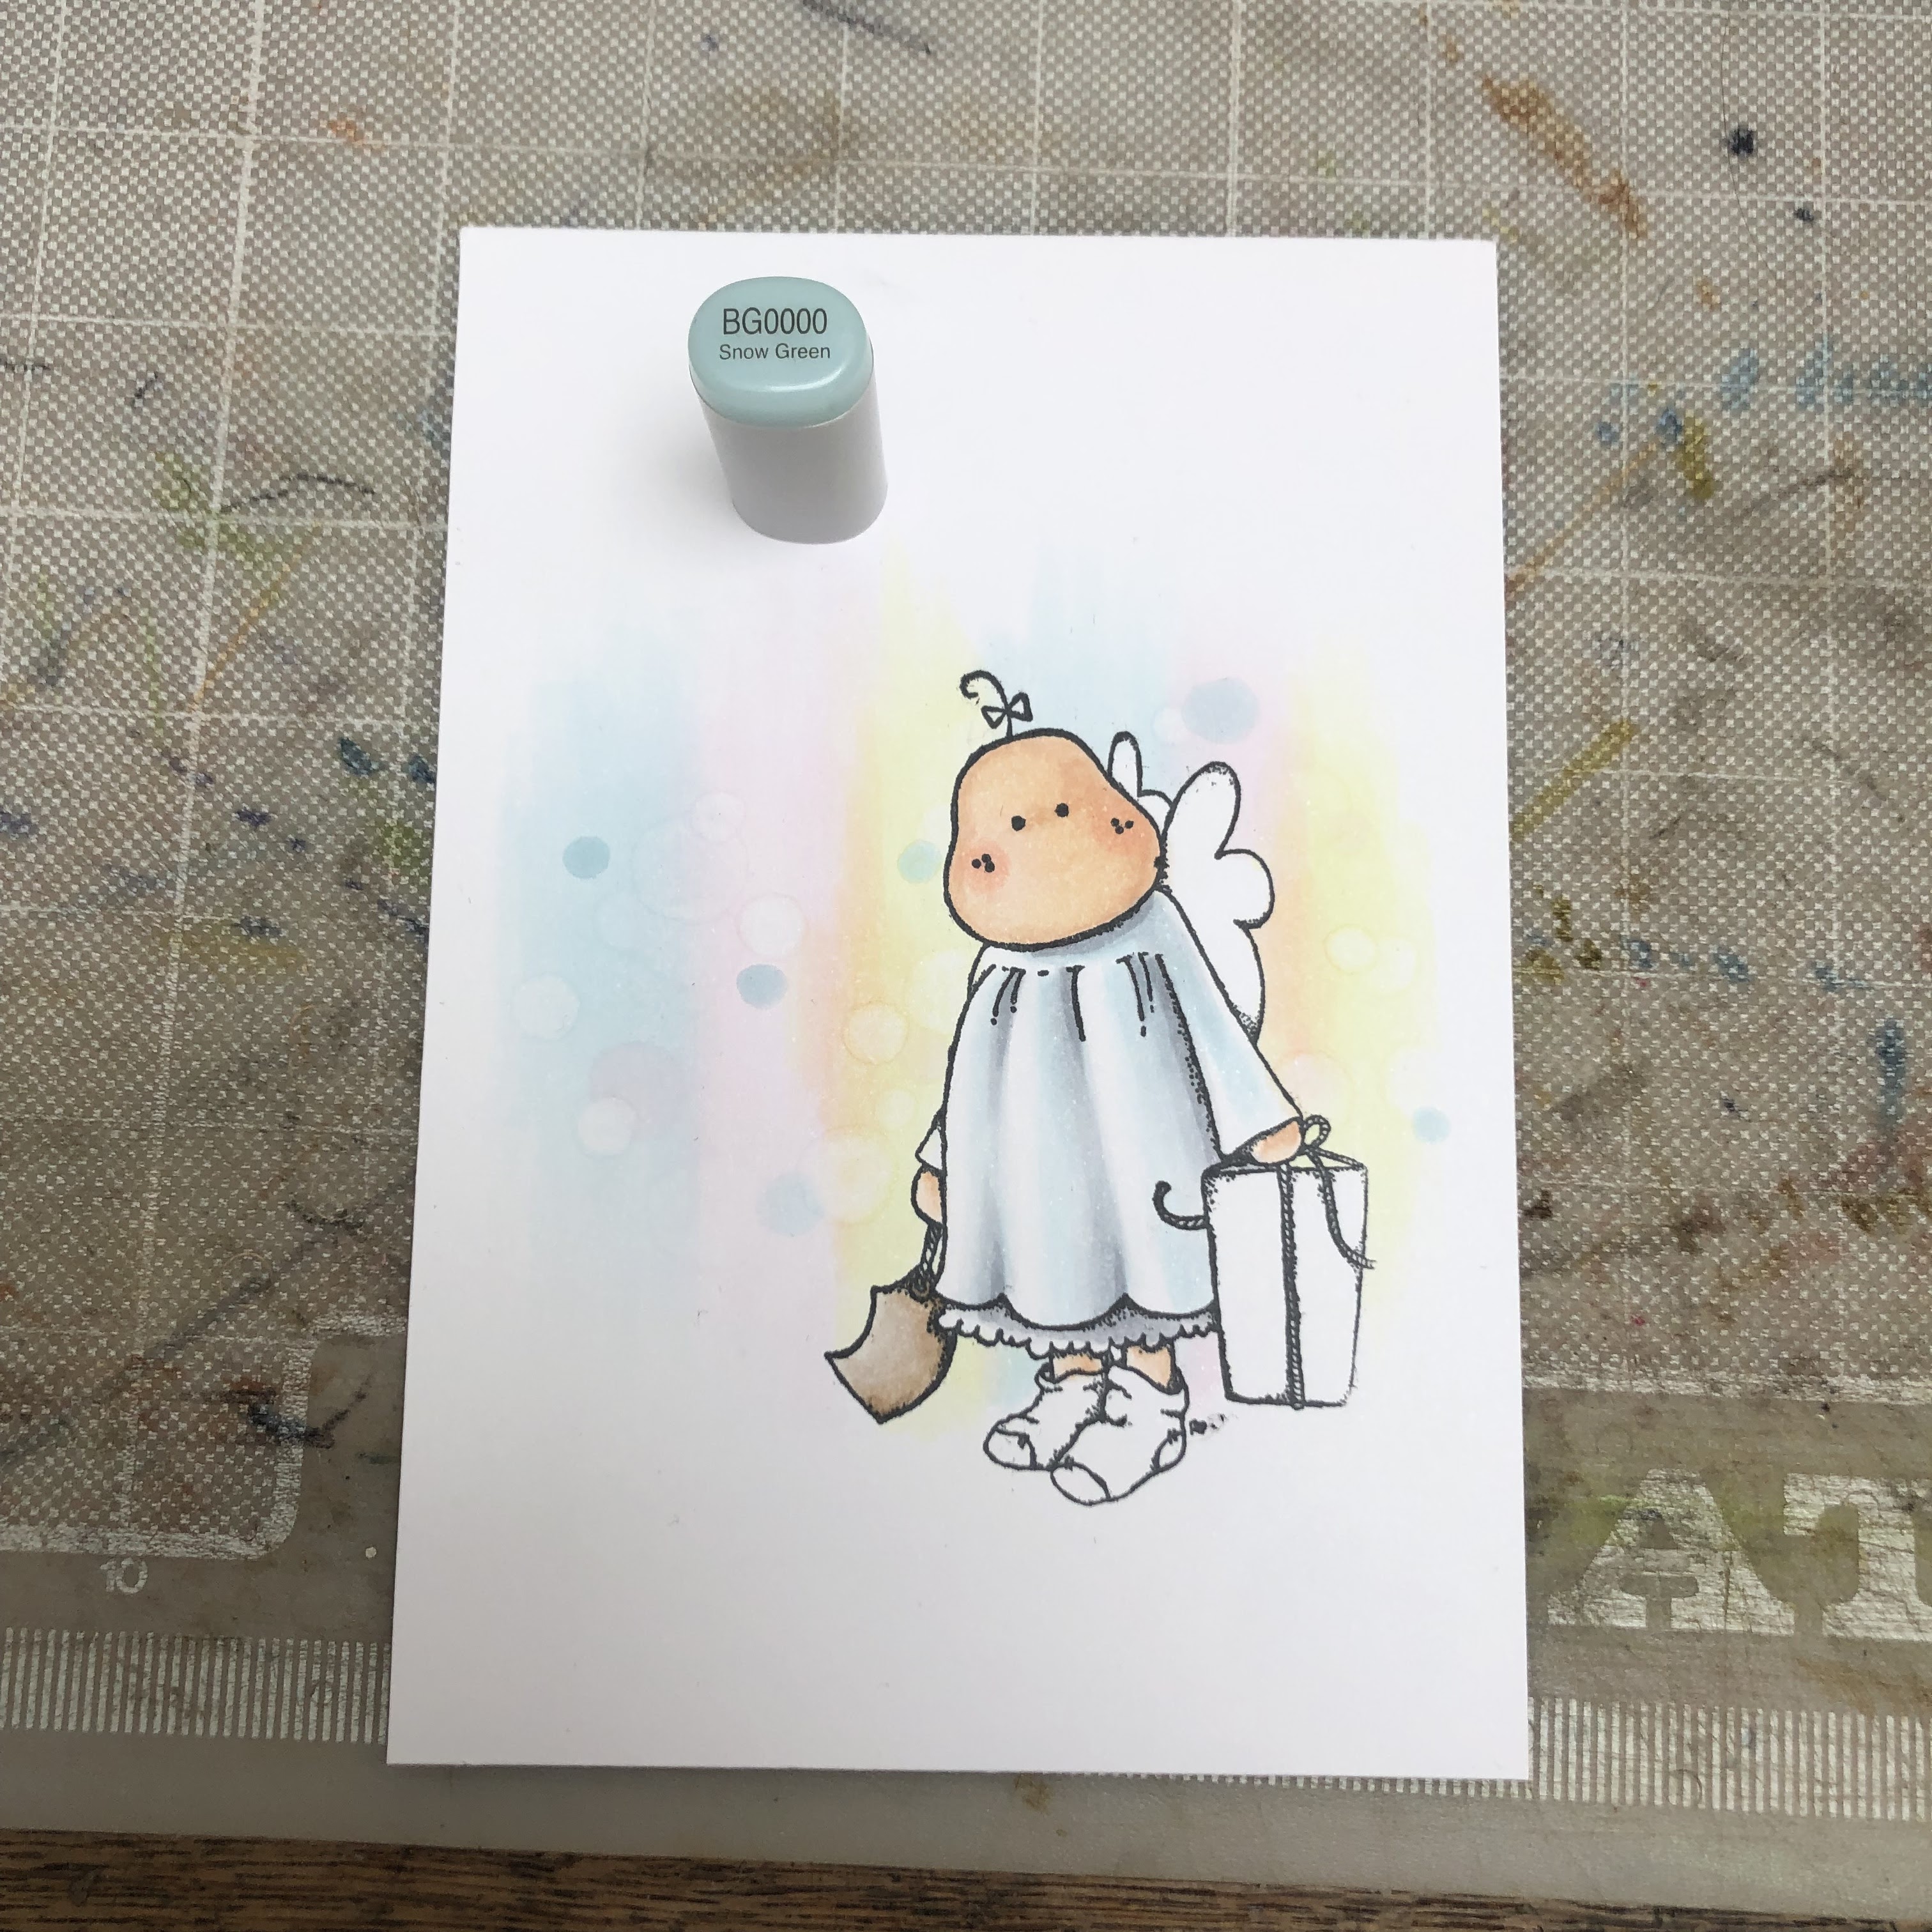
Now to her dress. I wanted it to be crisp white but yet dark towards me.
Started with a pale blue, B0000, to get the crispness of the white.

In the folds I used C1.
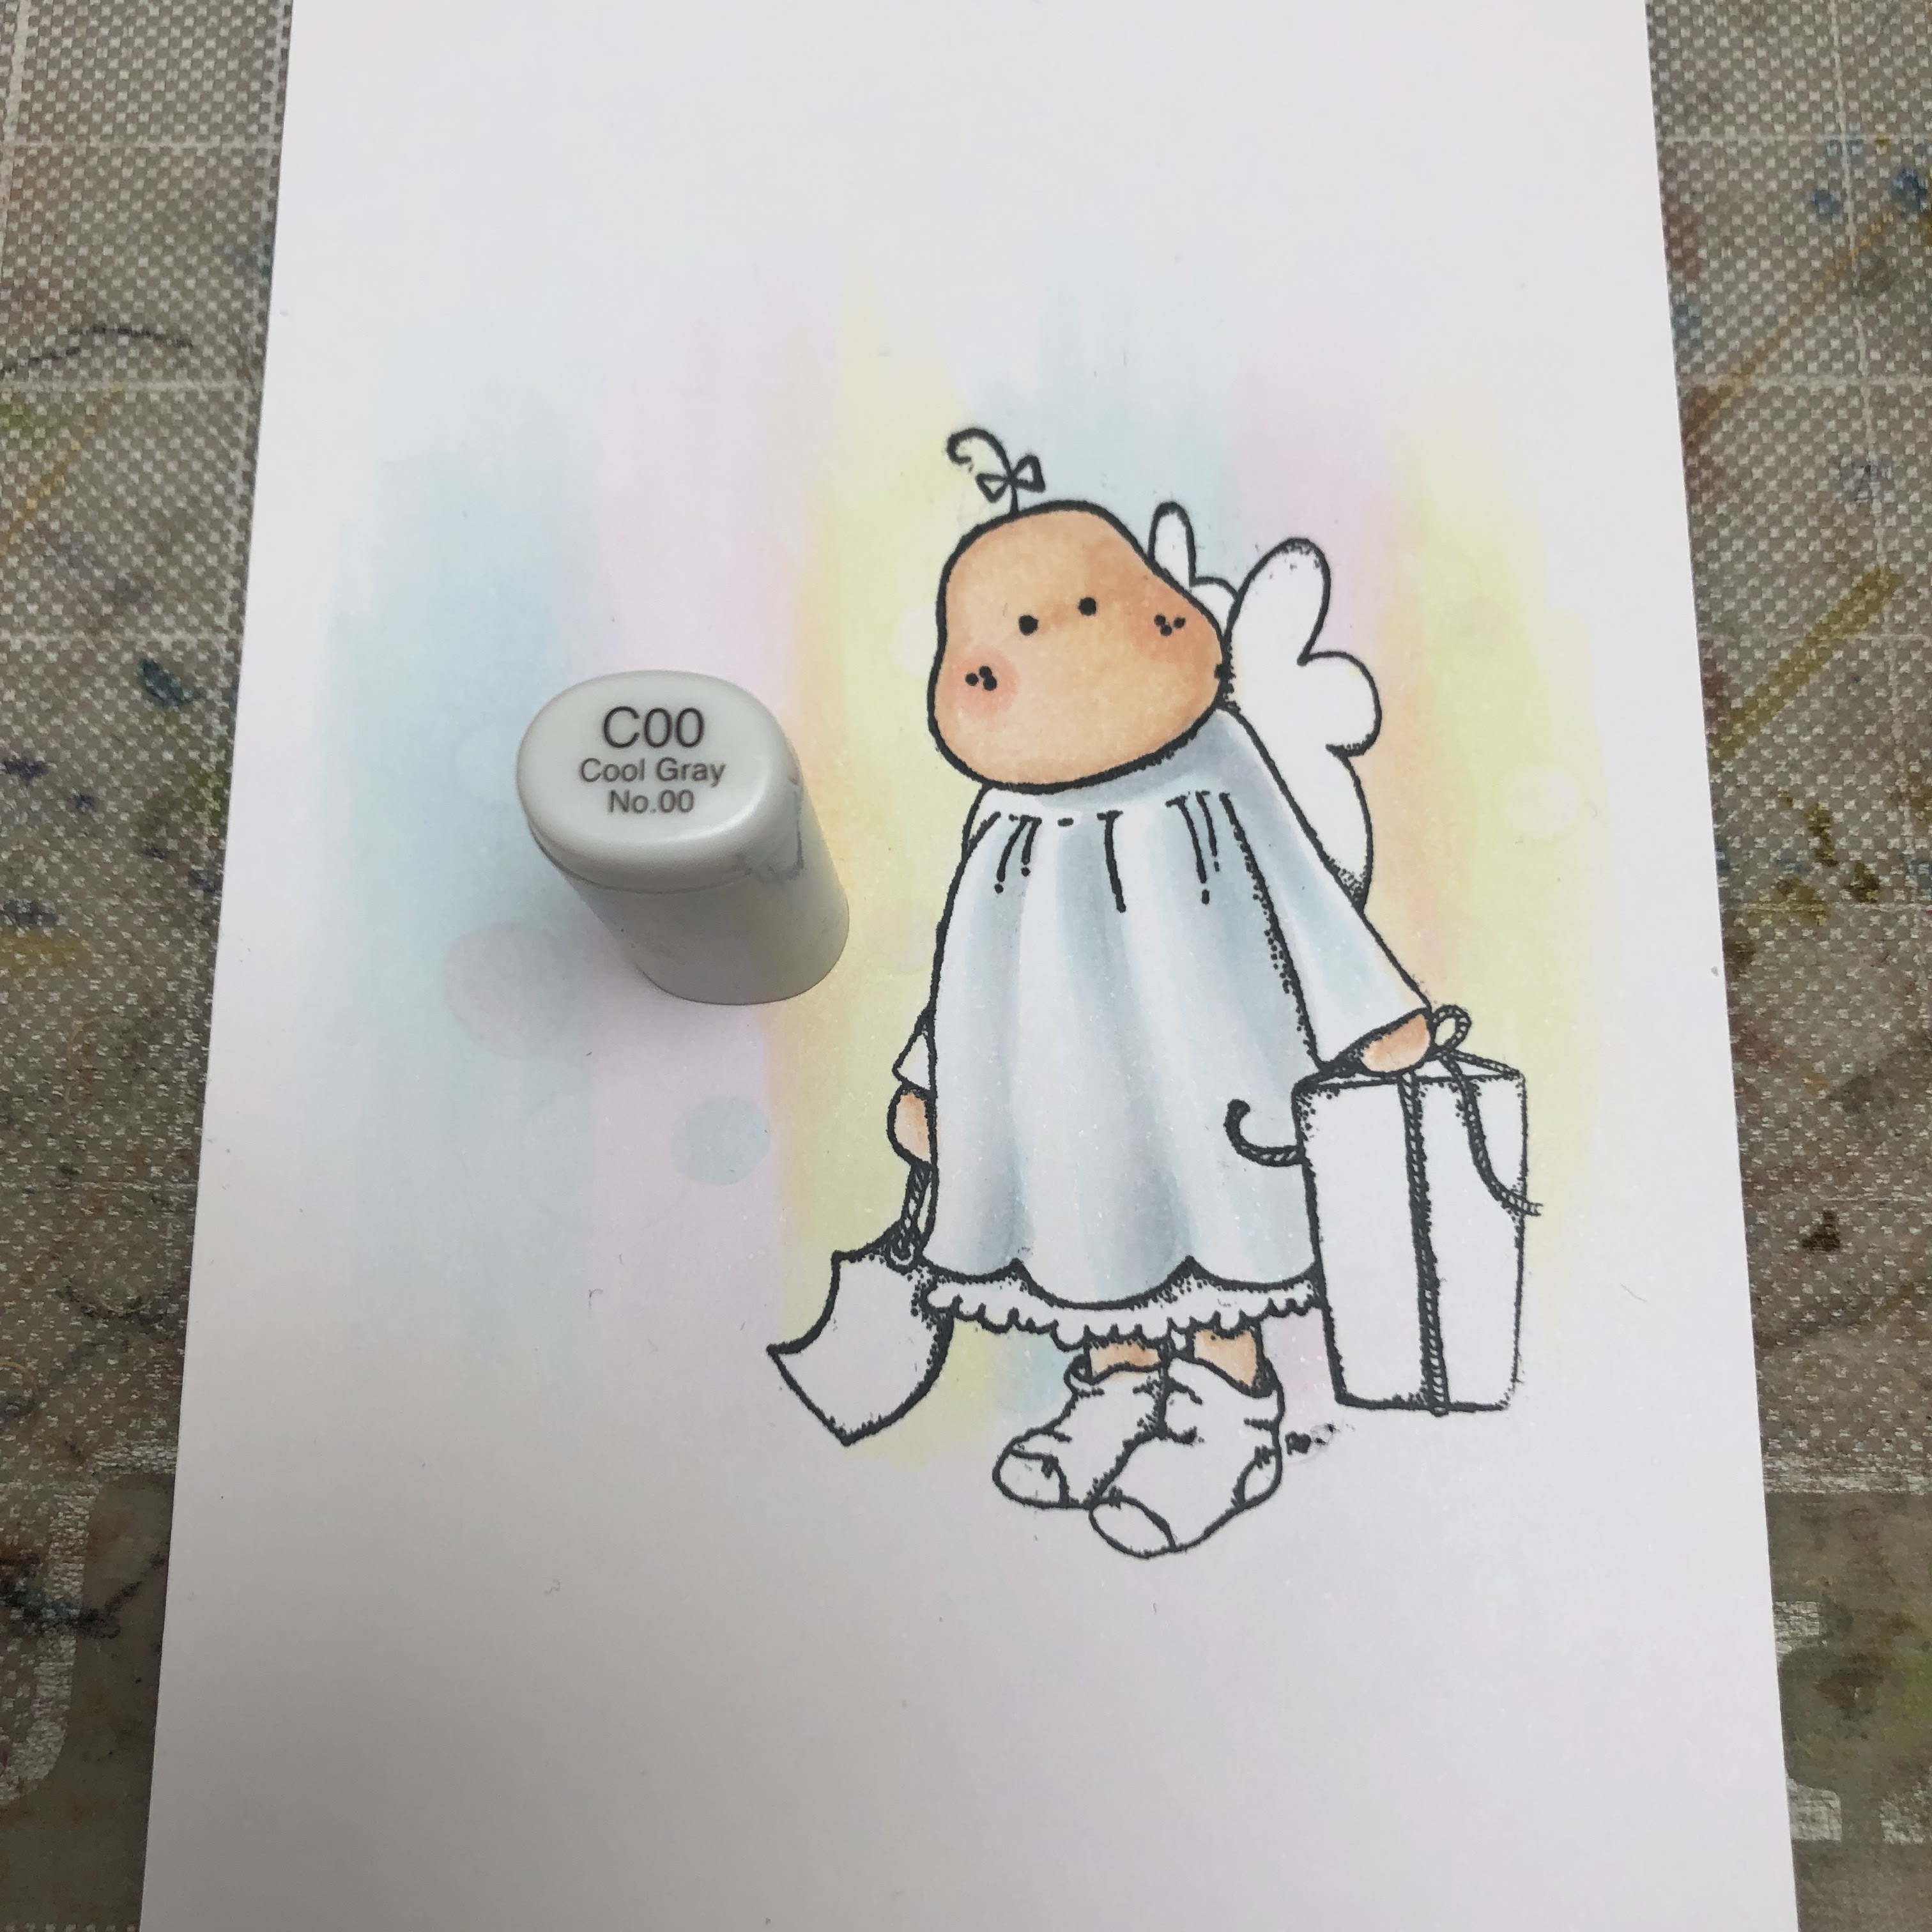
Blending C1 with C00 and B0000.

And got over the colour edges with some colourless blender to softened it out to the white parts.
And made more bokeh dots in the background.
And made more bokeh dots in the background.

The dress under got C3 on it, leaving the edges white as if they where hit by the light.

Her little tag got a first layer of E40.

The next layers was with E44-E42.
Got on with my bokeh dots and now coloured ones.

More bokeh dots, and in different sizes.


I layered some of the dots on top of each other to blend, Don't forget to have some dots going behind the object.
.jpg)
I wanted her wings to be sheer so first I got in with my background colours, RV0000-B0000.
.jpg)
On top of that I just coloured some BG70-BG72 on the edges.
.jpg)
Her present got a coat of R81-R85-R83.
Her socks got R81-R85, C0-C3.
Her socks got R81-R85, C0-C3.
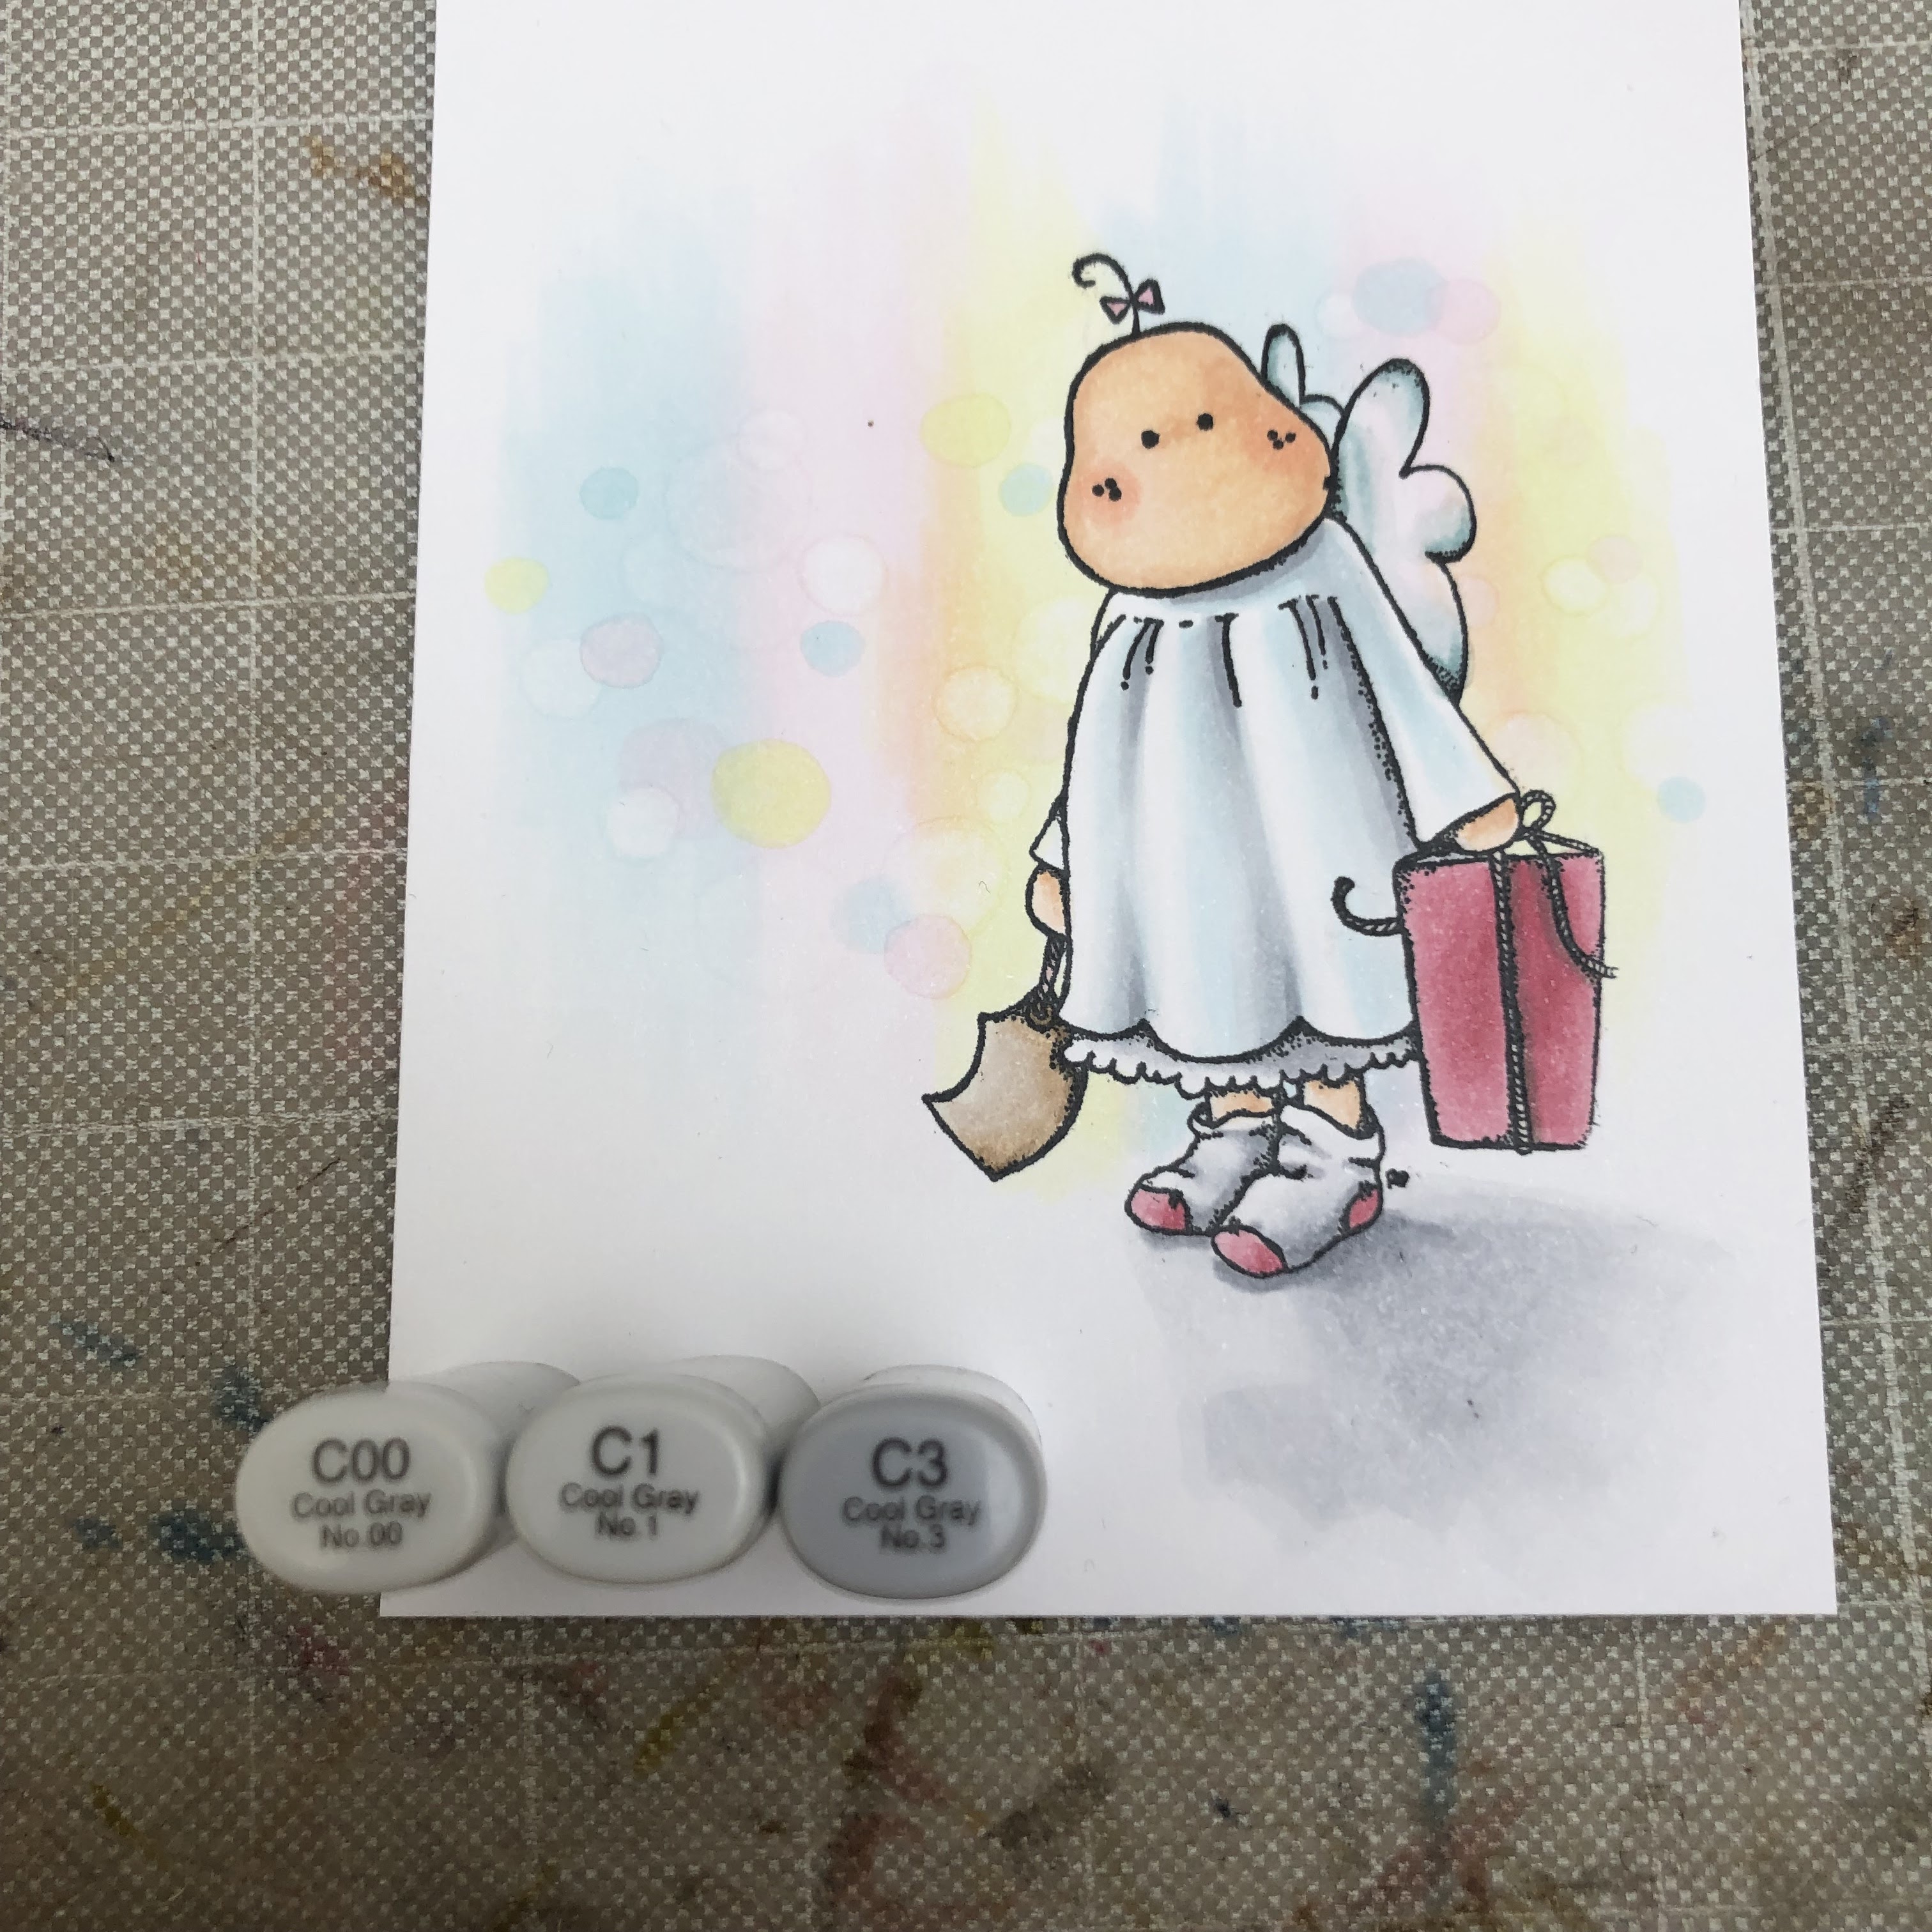
And a shadow casting toward me as the light is coming from the background. Used C00-C1-C3, and the shadow is darker as closer it is to her.


As I tend to do, I coloured another one. I started with this but messed up my background by dropping the colourless blender right on to the paper. The bokeh dot got little to big for me and as you can see a dark ring around. But I liked it aswell...
Here is the dress just coloured in grey tones and the crispness is lost, it´s just dark or a grey dress.
For the face and skin I used B20 for shadows, so she got more dark and I liked that. I also used darker tints for the shadow casting from her to fit the darker dress and face.
If you use darker colours in your background the bokeh effect will be easier to make and see, using colourless blender or light colours for the bokeh dots.

If you liked this blog post, please, try out the technique by yourself and show us the results in Copic Marker Europe at Facebook.
Please, follow me on Instagram, Hellenbell.
Love
Helen
1 comment:
Beautiful
Post a Comment