And that is true, I am a DRAGON. I am born in 1964 which is the year of the Dragon....
I just love combining Copic Markers with another colouring medium. That way I can get the best of both. For today's tutorial I used Copic Markers in combination with colouring pencils.
I just love combining Copic Markers with another colouring medium. That way I can get the best of both. For today's tutorial I used Copic Markers in combination with colouring pencils.
I used Canson Illustration paper because it's suitable for both Copics and pencils.
Most quality pencils are either oil or waxed based. That means that it is better for your Copic nibs to do all the Copic work first and than add the colouring pencils later otherwise the nibs of your Copics get greasy and you"ll have to clean or replace them.
I have made this photo-tutorial in which I would like to show you how I have coloured this lovely dragon and fairy by Selina Fenech.
Copic Markers
I started with a layer of E50. I add the layer quickly not bothering about streaks because there are many other layers to come.
My 2nd layer is with E51. I add the E51 on the paces where I want my shadows.
Than I add more shadow using the W1 and BV00. By blending the warm W1 with the cool BV00 you will get a nice shadow colour.
I love purple hair. The combination of V12, 15 and 17 gave me a wonderful purple. I started with the darkest colour first. Add your darkest colour where you want your shadows. Then add V15 leaving some white spots for the highlights. Add your lightest colour V12 last.
Because the drawing by Selina is a fairy and a dragon, it's very important to keep a balance between the both of them. So I move on to colouring the dragon now. And I will return back to the fairy later.
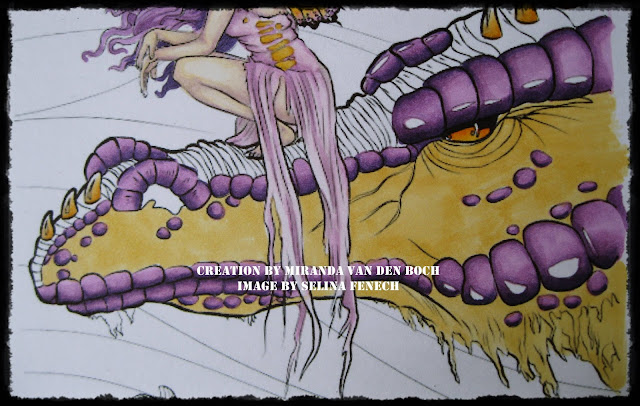
I decided to use the same purples for the dragons, I started again using the darkest colour first, the V17. Than I used the V15 and V12. I also had to decide now which other colours I should use for the fairy and the dragon. Purple is great with many other colours too like green or blues, but I like a bit of contrast and went for a warm yellow- orange, the Y32, 35 and 38. I also added some YR04.
I did the wings first, this time I started with the lightest colour. I don't want the wings to be too dark. I used Y32 from inside out and added V00 from outside in so the colours met in the middle of the wing. Carefully I added Y35 and a tiny bit of Y37 in the orange part of the wing and used the V01 and 12 for the purple part of the wing.
The dress is coloured with the V00, 01 and 12.
I coloured the dragon's eye orange first, but while colouring the dragon's skin I didn't like it any longer. I removed the colour with a blender marker and as you will see later, the eye will be a dark piercing blue.
The dragon's skin is quite large part to colour. I used the lightest colour first which is the Y32. I have added a quick thin layer not worrying about any stripes or spots. There are many other layers to come and in the end all the stripes will be gone.
The dragonfly's wings and dragon's eye are coloured with the B0000, 32, 34, 37 and 39.
ADDING COLOURING PENCILS
After I was happy with the Copic work, I got my pencils out for adding more and deeper shadows and some details.
I used a very dark orange, and red for more shadow on the skin.
Added a bit of more colour to the dress.
And this is how the drawing turned out after adding colouring pencils. You probably will notice more depth and highlights in some parts of the drawing.
I cut out the fairy, dragon and dragonflies and glued them on a art journal page.
see you next time
happy creating
Miranda


2 comments:
Wauw Miranda! Je hebt jezelf overtroffen! Wat een prachtig geheel!
groetjes Renata
Wow this is so lovely your colouring is stunning and thank you for the tutorial x
Post a Comment