Followers

Showing posts with label Diny. Show all posts

Monday, April 6, 2015

Love in CAS

Hello,
I made this post, because our Vili has some hard time with a lost in her family

This card is a Clean And Simple one, not my usual way of making cards. But after a lot of cards with an overload of decorations, this gives me a free feeling.


Some other DT members are great in this kind of clean cards, I will mention 
 Faye , she is a star in this technique. Also Delphine doesn't need dies, flowers etc. to create beautifull cards.

It is great to have a DT with so much different qualities.


I colored my image a Ppinkydoll, cutted her out and put her with foam tape on the topcard. Behind this top card I glued some mounting board for dimension.

The outline is hand drawn with a Multiliner 0,3 mm . I took paper with a  nice structure.


To color this doll, I took ofcourse my Copics, this is and stays my favorite coloring medium

Skin E000-00-21-11-04-21
Hair G29-YG00-033-17-67
Wings B 60-63-66
Dress BG 34-45-49
CatC1-3-5-7

I would love to hear your comments
Diny


Wednesday, December 3, 2014

Purple Christmas

Hello Copic fans,
after a very joyfull Copic Conference in the headquarters of Copic Europe in Wiesbaden Germany, I found some hours to do what I love to do, colouring with my Copics.
To create this card I have used design paper from the Bo Bunny collection Altitude,
 it has my favorite colour purple.


In my craftroom were much Magnolia's waiting for me to use them. I choose two Tilda's for this card. After stamping with Versamark I have embossed them with a very fine white embossing powder from Stampendous. Every detail stays visible. I always stamp the same stamp with black, use it as a guide. Some times I colour it first, before starting with the image with white lines.
In the second image I did not embos the eyes, but drawn them later with a black Multiliner.
.

I made a template from the card shape for you to download.

Most of the dies and the stamps are from the Noor!Desing collection. I also used some Magnolia dies.
Some extra pictures


Used Copic colours
Skin E000-00-21-11-13-R21
Hair E47-44-43-40
PurpleV000-12-15-17-09
Aqua BG000-10-11-13
Warm White W00-01-03-05


Please take the template if you want, I made it for you. Sorry for the Dutch in the template
snijden = cut
rillen = score
bergvouw is mountain fold
dalvouw is valley fold


Groetjes Diny

Wednesday, October 29, 2014

Window card with Ppinky Dolls


Hello blog readers,
with my DT package of the company Dutch Doobadoo I recieved a Shape Art template to create this window, I made a so called diorama card with it. Between the front and back panel is a space where you can make your decorations at various depths.


First I put the template on a piece of white card stock and tracked it with a pencil. Then have cut all the lines and the line between the window and shutters is creased. 
Then I just folded the shutters down and measured the window. The inside measures  9.5 x  9.5 cm . To create my diorama card I took two pieces of card stock 15 x 19.5 cm. On the short side, I shivered at 1.5 cm, 3 cm and 4.5 cm. I did this with both pieces of card stock, one part forms the back and the other the frontpanel. 
The first 1.5 cm is the adhesive strip. 
On the front I glued a square design paper 14.5 by 14.5 cm (I took from Studio Light " Lovely Christmas"). 
Then I cutted a square of 9.5 x 9.5 cm in the middle. there I have glued my window. Then I decorated the window and the shutters with PaperArt flower pots, stars, ice crystals and a bow, I colored parts of it with a red Copicmarker. 

On the outside of the shutters and the card I have glued lanterns, ginger bread guys and some stars.


Then it was time to decorate  the rear panel on the inside processed in 3D. Starting with glueing the design paper and  the paper with my colored Ppinky doll dolls.


Some cardboard squares and little birds completed the inside.


I colored a lantern with my Copic R46 which I glued back on Softboard squares. The kraftlabel holds my Christmas wish. I stuck the two pieces together, please consider, that you have the fold strips at the bottom at the front panel and the rear panel to the top.


Here the picture of the Ppinky Dolls I have colored with myCopics.
Skin E000-00-11-13-04 cheeks R21
Hair boy: R255-53-52-50
girl: E47-44-43-41-40
Reds : R21-43-46-59-T5
Greens BG 90-93-96-99
Shirt and shoes Boy: W00-1-3-5-7
Fence: N0-2-4-6'
Deer: 40-43-44-47
bag E31-33-35-37

 I've just created a schematic drawing of the two parts cardstock.


I have a surprise for the readers of this post. Leave a message and you make a change to win one of the two Shape Art templates, a give away from Dutch Doobadoo.
I will draw the winner on Sunday the 2 of November.


Hugs Diny Sprakel

Sunday, April 13, 2014

Butterfly on Design Paper

Hello,
I am glad that I can post a  card today. As an administrator I always admire the work our DT is doing for the CME blog.

I love to let you see, that it is possible to colour directly on design paper. First you need to a test on the paper to discover how much ink the paper can carry. Is it bleeding very quick, take than the technique from dark to light and use less color. Is the paper not so absorbant than you can also use the layering technique from light to dark. What gives more depth.

If this is abacadabra for you, try to take some classes with our Copic Instructors. We offer the ECCP programm in almost every European country. In one of the tabs on this site, you can find information and links to all the countries that offer them.


I made this card with a butterfly stamp from Studio Light, on a show in the Netherlands and people were wondering how I made this. I took a nice piece of design paper, in this case the paper from Janneke Brinkman from Studio Light (also available in Germany and the UK). It is a very nice soft coloured paper with flowers on it. I stamped the Butterfly wit with Memento in a dark red color.


Mostly I advise people who want to start with Copic colouring, to take first flowers or butterflies, much easier than colouring faces and hair from cutie stamps. To get familiair with the techniques it is better.
It will cost you less sweat.

I started with the  R89 on the spot that need to be the darkest, than I added the R85,83 en 81. At the end I went back with the R89 for deeper shadows.
To give the wings more accent, I took  the new Opaque White bottle to give these small white accents.
You can also use a white acrylic marker.


Then I cut only the wings, not the body, I curled the wings over a marker.


I rolled some cutted roses, took some Dutch Paperart leaves from Dutch Doobadoo and made a label to complete my card. With a glue gun I added the pearls in the roses.
I love these nice stamps with sayings,
therefore I stamped one in Versafine Black on the card, to make it more visible.


A clay butterfly was also allowed on my card, he became some glitter. 
I glittered also the wings with a Spica Atyou pen.
Here is my colour palet


Thanks for fluttering by, hope to inspired you a little bit.
Regards Diny


Wednesday, January 23, 2013

Adorable Faces


Hello,
here am I again. Did not post cards the last weeks, therefore I have a special card for you now, with 4 coloured images.

Perhaps you have seen these images called: So Adorable Vintage, there are six of them. The manufacturer is Sugar Nellie.
In the digital images the shadow is already indicated, to make it easy for us to colour them.
The light outlining gives them also a little bit the idea of colouring without lines.


I immediately was falling in love with this type of card, during one my Copic Colouring Classes a student showed it. In this card you can place two or four images, Norma from the blog frommycraftroom has a great tutorial on het blog, look at the tab tutorials and find a lot of nice cards and other ideas.

My friend Annie and I started again with a crafting afternoon, ones a week. The first thing we made were two of these cards.


I have used Pion papers, love the colors of this line. The leaves at the front are made with dies from Noor-design and Cottage Cutz. De nice white flowers are made with one of the five new Noor flower die-sets, they will be released end of Januari. I made an extra hole in the top of flowers leaves. 


All the faces are coloured with my favorite colorcombo for skin: 
E000-00-11-13
The clothing and the flowers are made with the Copic markers from the V-20 group. 


Hair E25-21-50-29


Hair E53-51-50


Hair E44-42-40-47

Hair E44-42-40-47

To colour these faces was a great practice in colouring hair, my favorite part of an image. I hope you enjoyed watching them and I wish you a lot of colouring -fun.

Do you want to learn to color with Copics, the way we show it here, watch the announcements on the country-blogs from Germany, Norway and the Benelux.
Don't wait to long, because I know the classes in Norway are almost filled.
Did you know there is a DT Call for the German-blog?

So, now I want to thank you for coming by. Have a great day.
Diny


Tuesday, December 25, 2012

Wishes for our readers


Hello dear readers,
Hallo, liebe Leser,

we want to wish you all a very Happy Christmas. Each of us posts a Christmas card specially for our readers.
***
Wir möchten euch ein sehr glückliches Weihnachtsfest wünschen. Jede von uns zeigt eine Weihnachtskarte speziell für unsere Leser.

Here they come:

Merry Christmas from Diny Sprakel from the Netherlands 
Zalig Kerstfeest en een Gelukkig Nieuwjaar
Frohe Weihnachten und ein glückliches Neues Jahr wünschen Diny Sprakel aus den Niederlanden 


Best Wishes from
Keren Mostov,  Israel


I hope you all have a warm and cosy Christmas,
Ich hoffe, ihr habt alle warme und kuschelige Weihnachten,
hugs Mariska van der Veer


My wishes for all the readers of the Copic Marker Europe Blog are a Merry Christmas, cozy hours with your loved ones and a peacefull, healthy and creative year 2013.
Ich wünsche allen Lesern des Copic Marker Europe Blogs
sehr fröhliche Weihnachten, gemütliche Stunden mit euren Lieben und ein
friedliches, gesundes und kreatives Jahr 2013.
Big Hugs
Barbara/Kreativmonster


My message to our readers is:-
Wishing you a Healthy and Happy Christmas and New Year
Meine Botschaft für unsere Leser ist:
Ich wünsche euch gesunde und glückliche Weihnachten und Neues Jahr
Hugs Tracy
x


Dear Copic Lovers and CME Blog Followers,
I wish you a colourfull and creative NEW YEAR 2013.
May many great surprises cross your way and make you happy.
And that you and your loved ones will enjoy uncountable and unforgettable moments together.
Keep healthy and the Lord may bless you,
Big Hugs to you,
Angie

Liebe Comic Liebhaber und CME Blog Folger,
Ich wünsche Euch ein farbenfrohes und kreatives NEUES JAHR 2013.
Mögen viele grosse Überraschungen Eure Wege kreuzen und Euch erfreuen.
Und dass Ihr und Eure Geliebten unzählige und unvergessliche Momente miteinander geniessen werdet.
Bleibt gesund und Gott segne Euch,
Herzliche Umarmung,
Angie


Wishing you a Happy Christmas and New Year
Ich wünsche euch Frohe Weihnachten und ein frohes Neues Jahr
from Wenda 


Dear copic fans and CME readers, I wish all of you a warm Christmas and a colourful new year, have a lovely and relaxing holiday time.
Liebe Copic-Fans und CME-Leser, ich wünsche euch allen warme Weihnachten und ein farbfrohes Neues Jahr und schöne und erholsame Feiertage.
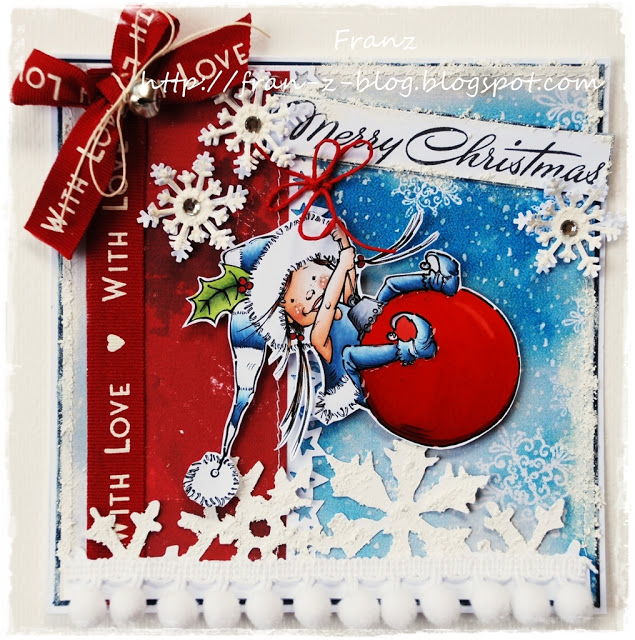
Warm hugs from Italy by Francesca aka Franz. 


Im wishing you all a wonderful and lovely Christmas Holiday!
Hoping Santa brings you all lots and lots of Copic presents!
Ich wünsche euch allen ein wunderbares und schönes Weihnachtsfest!
Hoffentlich bringt euch der Weihnachtsmann ganz viele Copic-Geschenke!
Big hugs from Ã…sa


Wishing you all a Very Merry Christmas and a wonderful New Year, full of Copic colouring!
Ich wünsche euch allen ein sehr föhliches Weihnachtsfest und
ein wunderbares Neues Jahr voller Copic Kolorationen!
Hugs from Delphine xx


May the magic of Christmas fill your hearts with love and your lives with joy.
Wishing you all a Merry Christmas with hugs and kisses.
Möge der Zauber der Weihnacht eure Herzen mit Liebe erfüllen und eure Leben mit Freude.
Ich wünsche euch allen Frohe Weihnachten mit Umarmungen und Küssen.
Cinzia xx


I wish all the readers of the Copic Marker Europe blog a 
lovely Christmas holiday and a Happy New Year 2013!
Ich wünsche allen Lesern des Copic Marker Europe Blogs einen wunderbaren Weihnachtsurlaub und ein glückliches Neues Jahr 2013!
Hugs from Kjersti:)

Wishing you all a truly magical Christmas surrounded by loved ones.
Love, Peace & Joy & may 2013 fill your lives with delight.
Ich wünsche euch allen wirklich magische Weihnachten im Kreise eurer Lieben.
Mögen Liebe, Frieden und Freude 2013 euer Leben mit Glück erfüllen.
Love Vicky xxx


Merry Chirstmas dear readers.
I hope you have a wonderful time with a lot of 
joy and Hapines.
Big hugs Lydia


Have a nice day
the CME blogteam