
Hi Everyone!
Today I, Cicci, am going to colour a tree and show how I do that.
I have not used any image this time, instead I drew it by myself.
I'm only going to show a section of the tree in this tutorial
but I do the same steps all over.
The Copic Markers I have Used are:
Tree: E53 57 59 49 11 Y21
Books: Blue: B39 37 34 B000 Y26 28 Y02
Red: R14 24 35 39 89 E49
Green: YG03 BG99 97 95 93 YG23
Green: YG03 BG99 97 95 93 YG23
Brown: E43 40 E53 51 Y21 Y02 26 28
Owl: E53 31 43 40 41 RV000 Y21 E25 23 29
White Posca pen for white details
and Aqvarell pen light and dark
White Posca pen for white details
and Aqvarell pen light and dark
Grass:
Sky: B99 39 95 93 34 32 B00 B000 BG0000
Moon: C0 2 B000 BV000
Ground and Forest: B0000 00 C0 1 BG0000

Ground and Forest: B0000 00 C0 1 BG0000

Step 1
Draw a tree or use a digital image
Just fill the drawings lines with E53

Step 1

'
Step 2
Add E57 in the same area you have coloured with E53

Step 2

Step 3
Add E29 at the bottom of the tree, that's the area that I'm going to make darker
because it's further away from the light source (Moon)

Step 4
Blend With E11

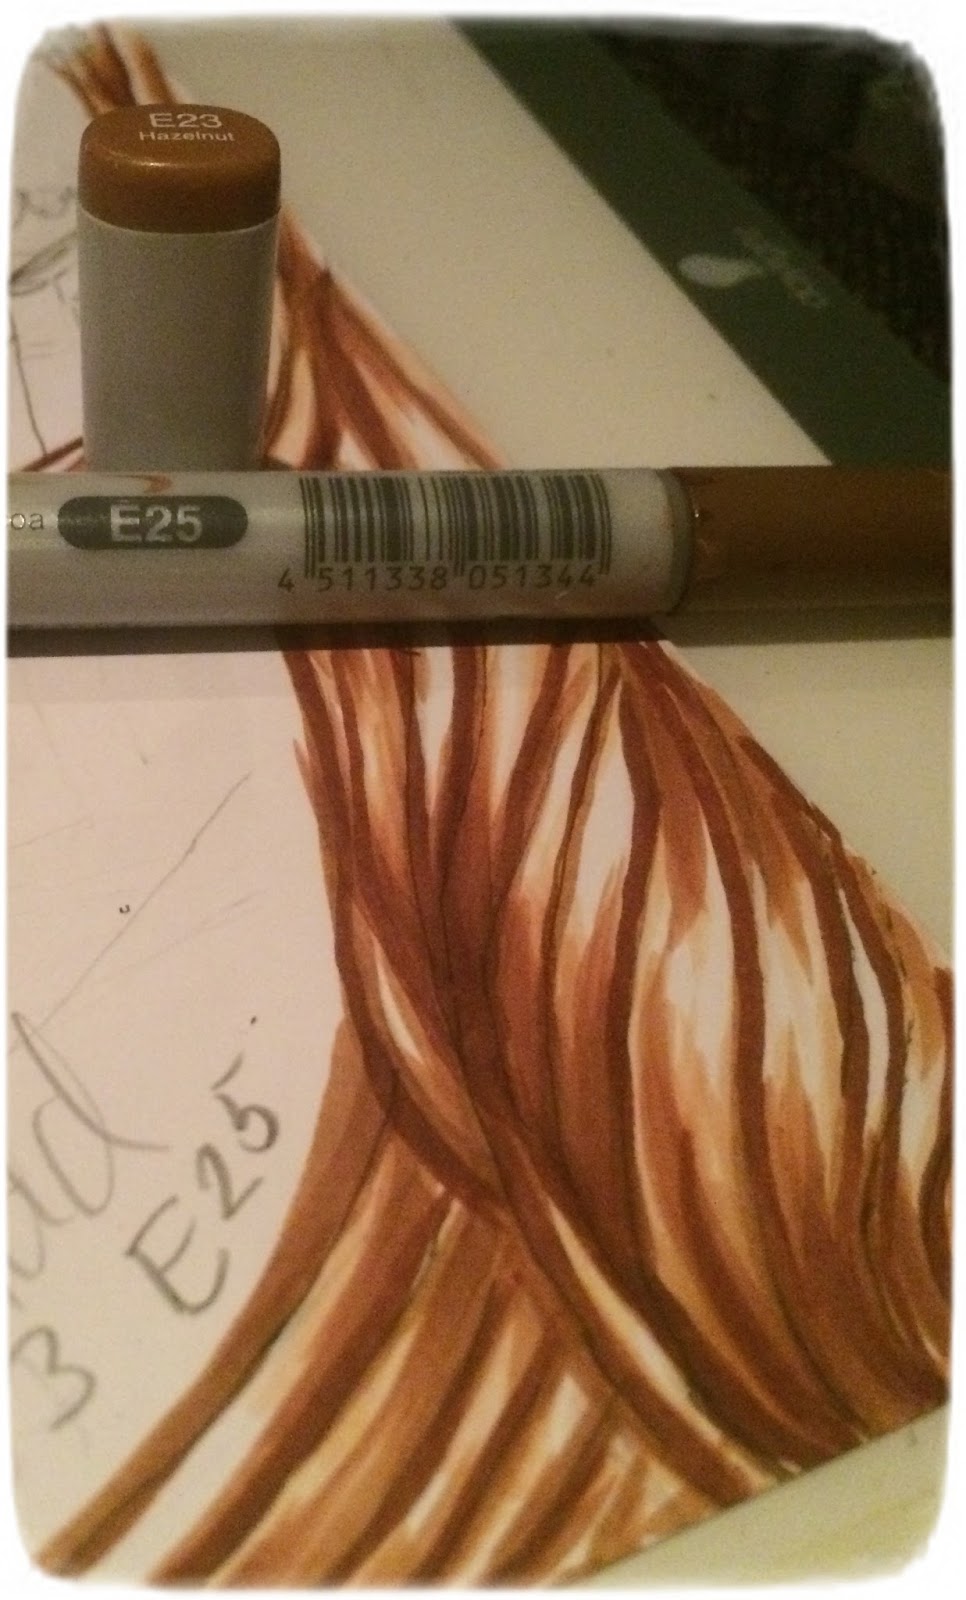
Step 5
Add E25. Blend with E23 on the lines
Step 6
Blend with E11

Step 7
Add E29 on the parts that are furthest away
from the moon and blend with E23

Step 8
Blend Y21 everywhere

Step 9
I'm going to use E49 as my darkest marker
Add E49 carefully because at this point in the colouring I already have done lots of
layers and I don't want the ink to go sticky


Step 10
Add a little more E59 - carefully as you did with E49

Step 11
Blend with E23 and Y21


Thank you for your Visit and hope to see you here again soon !!
Have a lovely day
Hugs and Smiles
from us at Copic Marker Europe
No comments:
Post a Comment