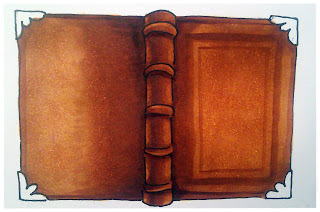
Dear Copic friends, this is a new tutorial that I preprared to show you how I create leather effects
with Copic Markers.
I use 3 brown tones to get it:
I will show you few examples of the steps I follow to get the leather effect:
STEP 1:
We will apply E 35 on the lighter areas of the image that we want to colour:
STEP 2:
Now we will apply E 37 for the medium tone shadows:
STEP 3:
Below, we emphasize the darkest shadows using E 29:
STEP 4:
Now you can add little details to create volume, in this case I used blender to mark the highlighted areas of the belt and then I used an orange ink pen for little details:
Using same tones, E35 + E37 + E29 you can colour many leather objects, here you can see another example using these 4 steps:
 |
| using step 1 |
 |
| using step 2 |
 |
| using step 3 |
 |
| using step 4 |
Here you can see few examples of illustrations using these simple and easy 4 steps:
Feel free to contact me if you have any question.
See you! (^___^)/
Suki Manga Art


1 comment:
Very cool - awesome work :-D
Hugz
IKE in Greece xxxx
Post a Comment