Followers

Showing posts with label Texture. Show all posts

Sunday, July 12, 2020

"You're Mermazing" Underwater Scene


Hello,

How are you doing? Summer has started ..in Italy it is very hot.

So I have prepared a little refreshing underwater scene with this pretty mermaid and sweet little seahorse. I have stamped the stamps from the clear stamp set You're Mermazing from the Canadian brand Kraftin Kimmie. 

Using Perfect Colouring paper.


I have started to colour the skin 


then the sea around her


added some sand


added rocks 


added sea plants 


added some texture to the sand 


coloured the sweet little seahorse 


coloured her tail and top and have added some details with a white gel pen.


and finally I have coloured her hair..


ready!

Hope you have got some inspiration to make your own summer fresh sea scene too.


Copic:

Skin :  E 000, E 00, E 04, E 11 and  RV 42 for the cheeks
Hair : Y 23, YR 23, E 29, E 35, E 37
Tail Mermaid : YG 01, YG 05, YG 17, YG 23, BG 78
Seahorse : YR 02, YR 07, YR 09, YR 61, YR 68 and B 02, B 05 for the eyes
Sea:  B 000, B 00, B 02, B 05
Rocks : BG 53, BG 09, BG 07, BG 02, B 39
Sea plants : BG 07, BG 53, BG 49, B 39
Sand:  E 50, E 53, E 31, E 33
Black multiliner 0.3 for some details
Sakura white gelly roll 0.8 

Hugs Blankina


Monday, August 5, 2019

Textured Clothing

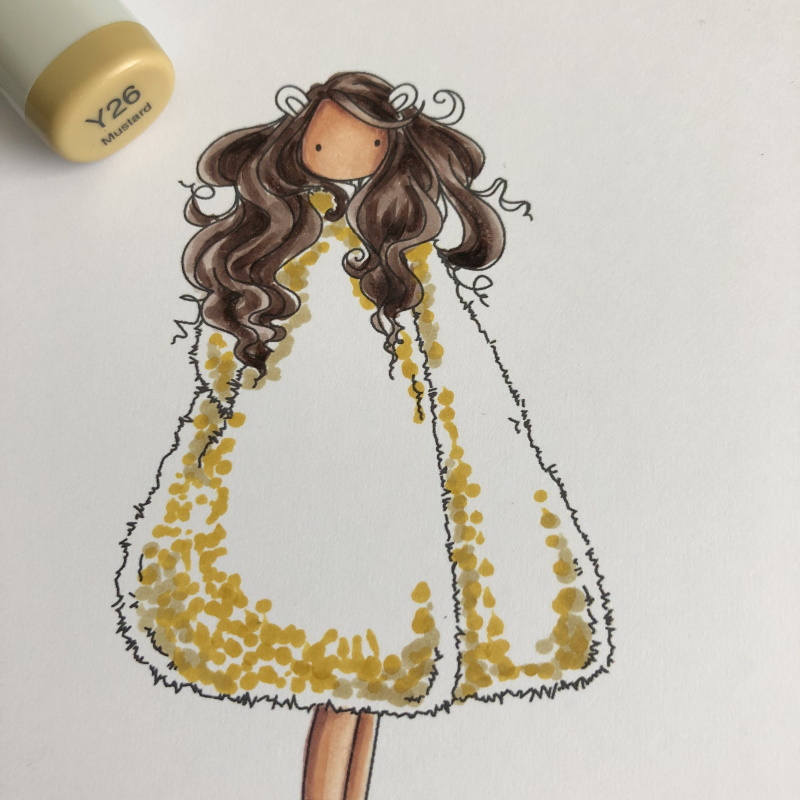
Hi everyone. Today I'm sharing how I add texture on a 'fur' coat. The image I'm using is Zodiac Girl Leo from Stamping Bella. 


First I colour the skin and hair. I use my go-to colours for skin - E00, E11, E04. I didn't add any cheek colour on this image. I also started with the darkest colour and worked to the lightest. I know some people like to do the opposite but this way works better for me. 


For the hair I used E70, E71, E74 and E77. I started with a mid tone, E74, then I dragged that out with some E71. I added the E77 and then went back with the E74/E71. I like to play around a little with it until I'm happy with the colour. I covered all the white space with E70


For the "lion's coat" I am using they Y family - Y21, Y23, Y26 and Y28. 


Again, I use the darkest colour, Y28, to map my shaded areas. I make dots instead of brush strokes. 


Then I add more dots in Y26. 


I completely cover the coat in Y23 dots and then I go back in with Y26 to fill out the colour. 


Lastly, I use the Y28 again and go over the darkest areas. I also use these colours for the lions ears. 


I used the same colour for the boots as I did for the hair, to tie in all the colours. 


Finally, I add some shading on the ground using N1 and N3 and I blend them out with 0. Now she's ready to pop on a card. 


Thanks for dropping by and I hope you're inspired to take out your markers today. 
Sandie
xXx

Thursday, June 4, 2015

Fur is fun!


Hi Everyone. It's Faye here today :)

With Father's Day just around the corner, I thought it might be a good idea to colour an image with a slightly more masculine feel. This sweet chap is a fairly new release from Little Miss Muffet Stamps, called Father's Lion. I think he'd also make a great card to celebrate the safe arrival of a new baby boy too. 


I love the challenge of colouring fur, it's certainly very easy to add texture. Keep your colouring rough and messy, dot your colour on in layers, and you can use the Colourless Blender to your advantage too. If you're not confident adding texture with your Markers, you could use a piece of scrunched up kitchen paper, material, hessian, anything with texture, that you can add a few drops of Colourless Blender to. Then dab your texture cloth onto your image. Just remember to do this, before you colour the parts of the image you do not want texture on!


Markers Used...
Lion; E30, E31, E33, E71, Y26, N3, N5
Lion's Nose; N3, N5, N7
Blue; B00, B01, B04, N3, N5
 Green; G82, G85, N3, N5

Thank you for stopping by today, have a great day.

Faye xx