Followers

Showing posts with label Sue Hastead. Show all posts

Monday, April 8, 2019

so long, farewell, auf wiedersehen, adieu!

Hello everyone, it's Sue here today!

Today's post is one of mixed emotions for me.

It is my last post at Copic Marker Europe which feels a little sad but when I look back over my two years designing here I feel very proud and happy about how far I have come with my Copic colouring! 

I thought I would show you three cards I have made during my time here which according to the viewing figures you all liked the most, followed by the three I enjoyed making the most! 
I wonder if they will be the same? (-;

I will add a link to the original posts just in case you want to look at the tutorial again!

This was such a fun technique involving Copic Various Refills, washing up liquid and a straw! I thought the background was perfect for a mermaid!

This technique used Copic Various Ink Refills with a stencil and some paper towels!

...and the final card that you all really liked is a surprise as this was my first tutorial back in February 2017!
This Copic blended background technique remains one of my favourites and is so easy to achieve!

Here are the three cards I like the most and really enjoyed making during my time on this lovely team.

This card was a real challenge but I think that is why I love it so much.  The fur took ages and was quite difficult but I so enjoyed photographing every stage and making the tutorial for you!  

This technique is my absolute favourite and I loved how the background looked when I had finished! That polar bear is cute too!


I agree with you all about this card!  It is one of my favourites too!  

Thank you to Diny, Faye and the lovely Copic Marker Europe team for the fun and friendship during my time here!

You can still catch up with me anytime at my blog

Thank you for popping by!

Happy Copic colouring
love from
Sue...xxx


Friday, March 8, 2019

Copic Watercolouring Technique...

Hello everyone!

it's Sue here today with a really easy and pretty technique.

I'm going to show you how to paint with your Copics as if they were watercolours!
I am using a beautiful stamp from Stamping Bella - 
Uptown Girl Melanie - The Modern Bride, a paint palette, a paintbrush, Copic Various Ink Refills E00, YR21, YG63, BV08, BG23, B60 and Colourless Blender.  I also kept a piece of paper towel handy for wiping my paintbrush.

This is such a lovely technique and it is really simple to achieve lovely results.  Here are a few top tips for you!

If you don't have Copic Various Ink Refills you can use Copic Markers by scribbling them onto an acrylic block and using a paintbrush dipped in Colourless Blender to pick up the colour.

Copic Colourless Blender will lighten the colours you are using so you might want to choose darker colours than you usually would and practice on a piece of spare card first to see how the colours come out!

Use the smallest brush you are comfortable with and once you have dipped it into the colour and the blender you might need to just lightly dab the tip of the brush onto the paper towel so it isn't too wet. 

Clean your brush each time you have used a different colour and dry it on paper towel.  

Replace the Copic Colourless Blender as it becomes dirty.
 Put a few drops of E00 and Colourless Blender into the paint palette.  Dip the tip of the paintbrush into the E00 and then into the blender and quickly paint the face, starting in the area of the face with the most shade.  You can repeat this if you want to, until you have a depth of colour you are happy with.  Repeat with the shoulders and arm.  Clean the paintbrush with colourless blender and dry on a paper towel.

Put a few drops of YR21 into the paint palette and repeat the same technique with the hair - dip the brush into the YR21 and then the colourless blender and paint the hair, starting in the part of the hair where there is the most shade.
Put a few drops of YG63 into the palette.  Dip the brush into YG63 and then into the colourless blender and dab some spots of green onto the leaves.
Put a few drops of BV08 into the palette.  Dip the brush into the BV08 and then into the colourless blender and paint the flowers.  You can repeat this adding more colour to the petals where you want them to be darkest.
Dip the brush into YG63 again and then into the colourless blender and dab some spots of green onto the centre of the flowers.
Using B60 add some folds to the frock - you only need a light touch here, if the folds look too dark you can smooth them out by painting with some colourless blender. 
Put a few drops of BG23 into the palette.  Dip the brush into the BG23 and then into the colourless blender and paint the ribbon.  You can repeat this adding more colour to the ribbon where you want it to be darkest.
I had nt tried this technique before, I promise it is really easy to do and It would be great if you could have a go and show us at

Friday, February 8, 2019

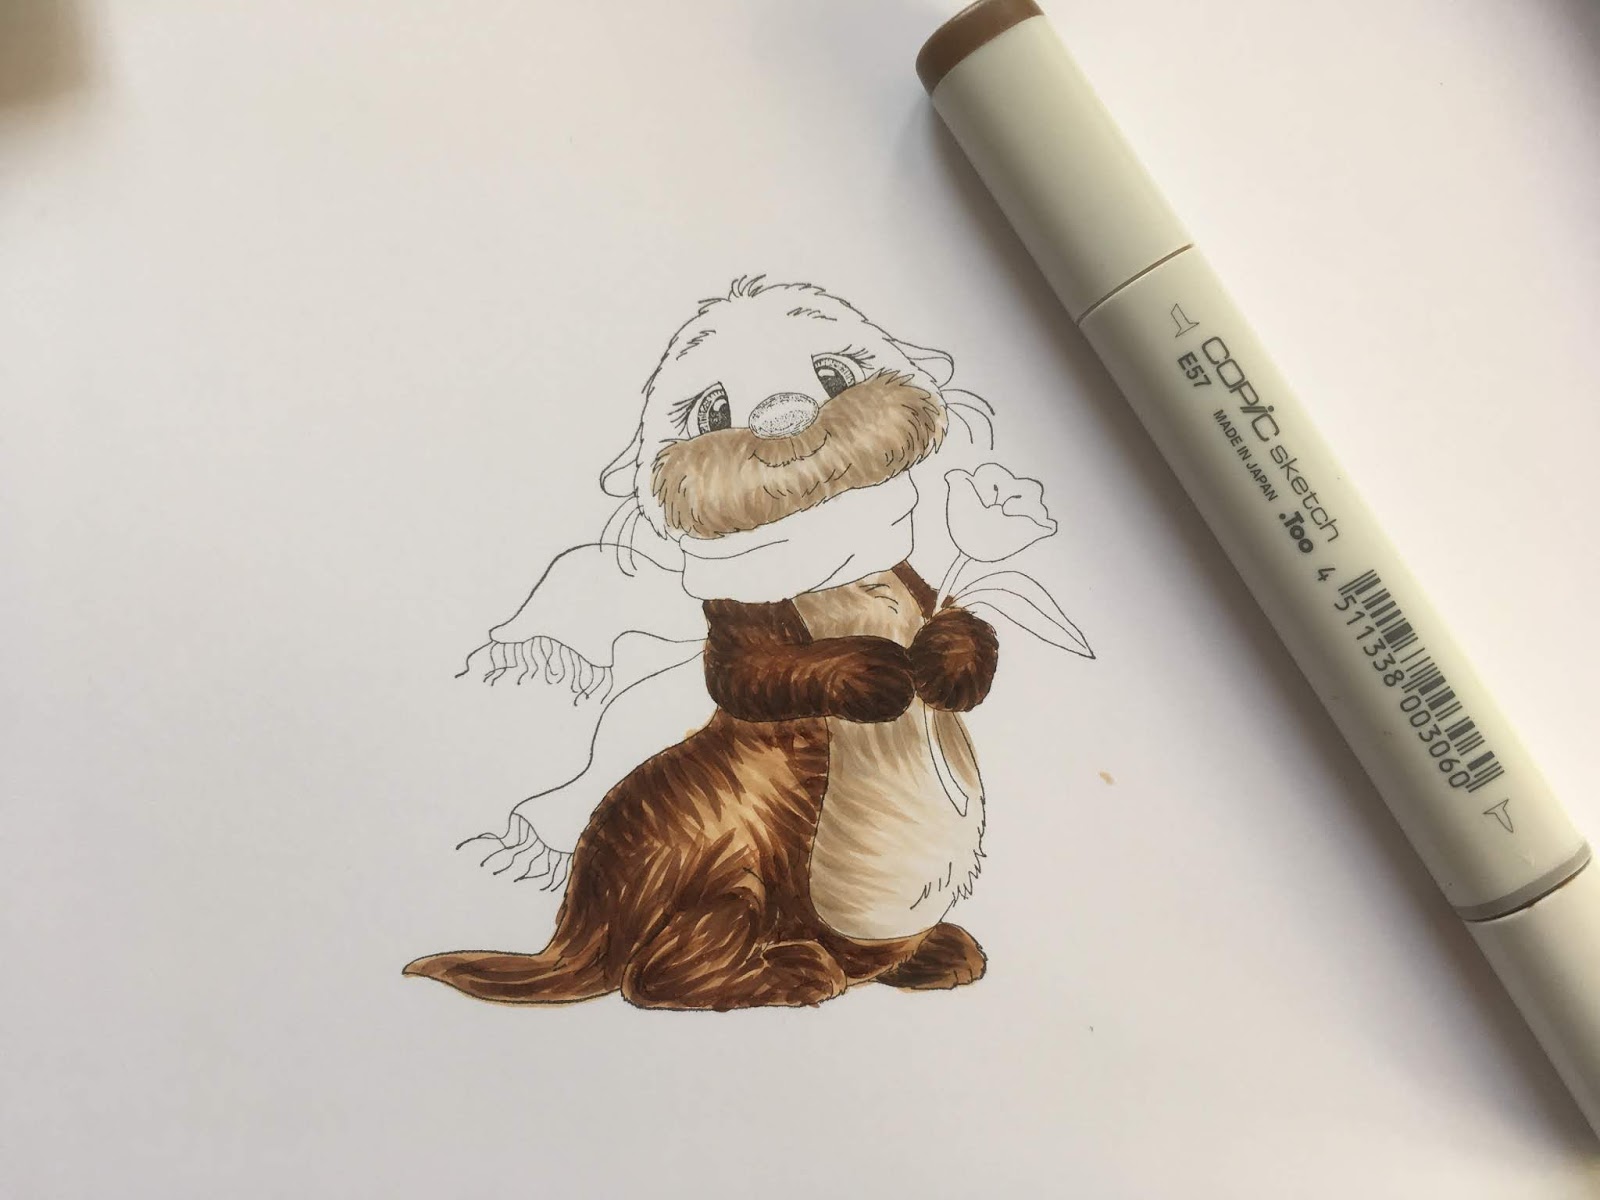
Colouring Fur with Flicks!...

Hello everyone,

I really love colouring fur so I thought I would do a tutorial for you!
I am using a stamp by Whimsy Stamps - My Significant Otter and Copic Markers
E40, E41, E42, E43, E44, E51, E53, E55, E57, E59

The technique I have used is very similar to one you would use for colouring hair!  Here are a few top tips for you!

It's good to use a flicking motion to apply the ink, this helps add texture.
Always make a flick in one smooth movement.
Always flick in the direction the fur grows. 
Let each layer of ink dry before adding the next so the colours don't blend together

I always practise my flicks on a piece of scrap card before I start colouring my image, this gets my hand used to the flicking action - it might sound silly but trust me - it works!

There are a lot of photo's for this tutorial so please be patient!
To begin, I lightly coloured the otter's tummy with E40.  This does nt need to be too neat or perfectly blended, it is simply a base layer for the fur to sit on.
Then, I started to add flicks in E42, in the darker parts of the tummy area, some of these need to be quite long and go across the tummy to add texture.
Then add more flicks with E43.
 Next I coloured the mask, again with a light layer of E40.
Then, exactly like the tummy, I started adding flicks in E42...
 E43
 and W3, which adds some depth.
 I then moved on to the paw, lightly colouring all of it with E55.
 followed by flicks in E57
 and E59.
I did exactly the same with the other paw, a light layer of E55
 Followed by flicks in E57
 and E59.
 The same technique is then used for the feet (paws)!  E55 coloured all over and followed by flicks in E57
 and E59.
 Then I moved onto the otter's body.  It is a good idea to take this really slowly - do not rush!  You can still break the body down into smaller parts, the tail, the foot and the area under the am and tummy.  I used exactly the same technique as before, colouring the whole body with E55 and then starting to add colour and texture by flicking with E57
 and E59.
 To enhance the shaded parts of the body, where I wanted it to look darker, I added a few flicks of E49.  If you choose to do this you only need a few - do not add too much of this darker colour!
 Next, I moved on to the face and head, colouring the whole area lightly with E55.
 Then I added flicks of E57 around the eyes, down the sides of the muzzle and on the top of the head,
 Followed by Flicks of E59...
 ...and W6
 You might want to go for a break and a cup of tea here, before you start the colouring the last parts of the image! (:
 I coloured the darkest, shaded areas of the scarf in BG32 to map out where my darkest colour would go.  It's a good idea to do this first, in a light colour because if you get it slightly wrong at this stage, you can cover it up later, you have n't ruined your colouring by going straight in with your darkest shade!
 I then went back and coloured these parts with BG49
 and then started blending the colours out to the lightest area with BG13.
 I repeated this, colouring the same darkest part again with BG49, 
then blending BG49 out with BG13
 followed by BG11.

I used exactly the same technique to colour the rest of the scarf.
 I coloured the flower next in BG04
 followed by BG37,
 BG06...
 ...and BG04.
 For the leaves and stalk I used G43, 
 followed by G46...
 G43...
...and finally YG03

I hope you have found this tutorial useful!

It would be great if you could try this technique and share with us on Facebook at 

It's our 30th Wedding Anniversary this weekend and this card is for my lovely husband!

Thank you for popping by
Sue...xxx