Followers

Showing posts with label Birthday Card. Show all posts

Saturday, April 10, 2021

Cheeky Birthday Card in Fun Cheery Colours


Hello ,

Today I have prepared a cheery birthday card for you.

For me April means a month full of birthdays.

I have stamped this beautiful stamp from The Greeting Farm (cheeky birthday) with wicked black hybrid ink onto Perfect Colouring Paper.

And have started to color her skin, this combination caught my eye during a coloring video and wanted to give it a go too.

Yes it starts with a dark purple, V 17...

In the video I show all steps of the colouring of the whole card ..

 VIDEO 

STEP BY STEP COLORING VIDEO

Here it seems she is floating in the air, so I have added something to sit on with my Copic multiliner.

You can see what I did , just two simple lines which were coloured with Copic and I have also added a sentiment from another set from The Greeting Farm called warm wishes.

Here gifts are pilling up, did some masking.

In order to add a piece of design paper on the bottom I have fussy cut the left side, just along the line and her legs. 

Now it is easy to add the design paper  and glue it onto the Perfect Colouring Paper.

This is the final card, hope you have enjoyed your visit here on the blog and that you liked the video too. 

Copic : 

Skin : V 17, E 35, E 33, E 13 

Rainbow colors : 

Pink - RV10, RV 21, RV 25

Orange - YR 20, E 02, YR 07

Yellow - Y000, Y 15, Y 19

Green - YG00, YG 05, G 05

Blue - B00, B 12, B 14

Violet : V 000, V 01, V04 

Hair : T 8, T 4, T 6

Dress : RV 10, RV 21, RV 25

Copic multi liner  0.5 

White gelly roll pen for accents 

Stamps: The Greeting Farm ( cheeky birthday, warm wishes )

Wicked black hybrid ink and enamel dots/hearts Kraftin Kimmiestamps

Design Paper LOTV 

Hugs Blankina 


Friday, March 12, 2021

A Bright Birthday Card with Flowers and Fairies


Good morning,

How are you doing?
Today I would like to share my bright birthday card with flowers and fairies.
These sweet stamps are from Kraftin Kimmie Stamps, the flowers are from the set love bugs, the fairies are from the set fairy folk and the sentiment from party time sentiments.

I have used some wicked black hybrid ink to stamp some of the flowers onto perfect colouring paper.


The first centre flower was coloured with R 81, R 83, R 85, R 89


The right flower was coloured with RV 02, RV 04, RV 09


And later I have also added some R 39 for some more contrast


The left flower was coloured with R 02, R 05, R 17, R 59


The flower buds were coloured with Y 35, Y 38, YR 18


The petals of the  flowers are coloured.


Now I have stamped two fairies with wicked black hybrid ink.


The skin of the fairies was coloured with YR 000, YR 00, E 97, E 99, R 20, R 22


The dress of the right fairy was coloured with BV 00, Y 02, Y 15, Y 18


The hair of the fairy on the right was coloured with V 04, BV 08, BV 29


The dress of the left fairy was coloured with YG 00, YG 03, YG 95


Her necklace with V 04, BV 08


The hair of the left fairy was coloured with Y 35, Y 38, YR 18


The sky was coloured with B 000, B 00, B 12, B 05


On the wings I have added some glossy accents and when it was dry I have also added some little dots with a white gelly roll pen.

A happy birthday sentiment and some other layers of coloured paper to finish the card..
The "pearls" were made with some dreamy drops from Nuvo in the colour fairy wings :).

The slimline dies are from the new Crealies collection..


I hope I have inspired you to try some of these cheery Copic combos. 
Thanks for your visit see you next month!

Hugs Blankina

Saturday, December 22, 2018

Celebrate Birthday Card

Hi everyone! Today I am sharing a Birthday card I made. The stamp, Uptown Ava Loves to Celebrate, and Celebrate sentiment die are from Stamping Bella. 


First I start with the skin. My go-to colours for skin are E00, E11, E04 and R20. E04 should be used very sparingly as it's quite dark. 


I love light coloured hair and I tend to lean towards E50's. On this image I used E50, E51, E53 and E35 for the darkest areas. 


With the dress I decided to colour using the yellows. I laid down some colour where I wanted the shadows to be, using the lightest of the yellows


Then I applied Y13, Y15, Y17 and Y19, layering them until I was happy with the result. 


On the hairband I used the same yellows as for the dress, only using Y17 and Y13 though. For the flowers and leaves I used R43, R46, YG03, YG25. I also used R43, R24 and R46 for the bow on her dress and the flowers on her shoes. 


Becaue the shoes are so small I used only N7 to colour them. 


On the cake I applied E21, E23 and E25 for the cake base, and R81, R83, R85, V00, V12, V15 for colour. 


I used the same yellow and red colours as before on the gift pile. For the bottom gift I simply added some yellow dots using Y17 and used C1 and R81 for shading. 


Once I had the images all coloured up I fussy cut them. 


To embellish my card I cut a Celebrate sentiment and applied enamel dots on the card. 
The card measures 120mm x 148mm. 


Thanks for popping by
Sandie
xXx

Wednesday, December 12, 2018

Trios of Various Ink cards, no stamps required


Hi Copic friends,

Today I have three different cards for you.
Made with the same technique but different styles of cards and colours.

No stampes required :) 
I have used YUPO paper for the background with Various Ink.

Various Inks ( refills ) are not only to fill your dry Copic markers,
there are many other fun ways to use them.

For this technique, fluid art,
you will need several Various Ink colours including the blender "0",
a straw and a dropper. 

The straw is to blow the wet various ink on the YUPO paper
to make the ink flow.
 The dropper to let drops of blender fall onto the ink to create fun effects.


GREY CARD

Okay my first card, the grey card was made with:

VARIOUS INK :"0" ,W00, W 3, B 000 , 
fab foil gold, 
a Krafty Kimmie stencil, decoglass volume : moon dust, 
YUPO paper,
dixi die, Modascrap die ,
foam sheet : white


Please follow the step by step photos


you can follow my photos to get an idea of the process, 
I have started with W00


afterwards with W 3 and blender "0"


and B 0000


Adding some gold too ,with the fab foil,
just rub the foil unto the background ( over the sticky bits ) .
The Golden side of the foil must be facing up.


I have die cut the reindeer from the background,
to the die cut reindeer I have added two layers of white foam sheets to 
give a 3 d effect. Then I have glued it into the die cut space.


BROWN CARD

For the brown card I have used :
VARIOUS INK : "0" , E 33, E 51, E 37,
 Marianne Design die , MFT die
fab foil : gold , 
YUPO paper,  avec paper 


Please follow my step by step photos...


I have started with E 51


afterwards with  E 33


and E 37


and blender "0" , drops onto the background


some gold..with fab foil


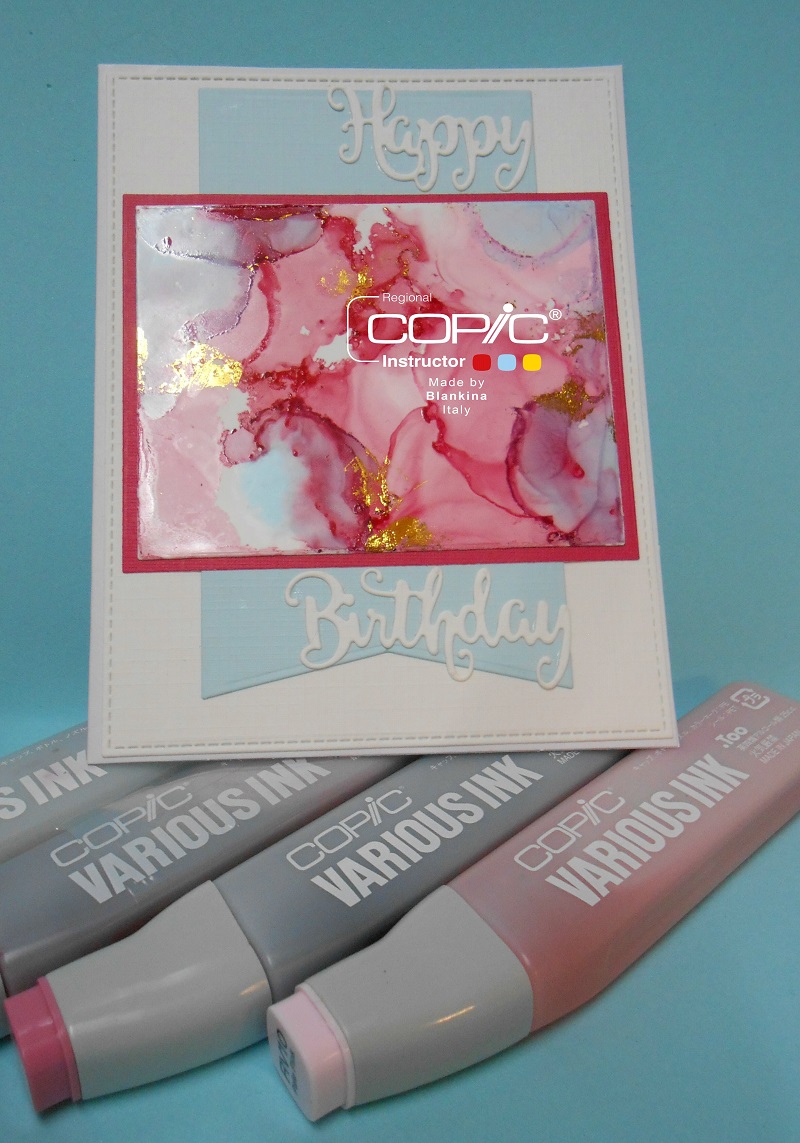
PINK CARD

To make this card I have used ;

VARIOUS INK : R 81, R 85, RV 10, "0" , B 00
YUPO paper, avec paper , 
creative expressions die , MFT die, 
fab foil : gold, 


I have started with R 85


afterwards with RV 10


R 81


RV 10 again


and a few drops of B 00 too..


again some gold with the fab foil

So these are the three cards I have made,
below you can find the VARIOUS inks used for each card.


VARIOUS INK : R 81, R 85, RV 10, "0" , B 00


VARIOUS INK :"0" ,W 00, W 3, B 000 , 


VARIOUS INK : "0" , E 33, E 51, E 37,

Which card do you like most ?
It is almost like three seasons cards, summer, autumn and winter :) .
CAS cards with Various Inks  , fun to make, please try it yourself too !

Hope you have enjoyed watching this step by step tutorial,

hugs Blankina