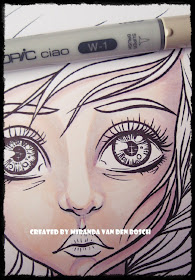
Some time ago I promised to do a hair tutorial and even better today I have a hair and face tutorial.
I have got a lot of photographs to show you so let's get started:
I started with a layer of E50 and E00. The first layer does look a bit stripey, but I don't worry about that yet. Many more layers will come and eventually I will blend all layers together with E000.
Fot some shadows I used BG0000. Blue is a cool colour and things in the distance always look more cool. I used the BG for the edges of her face and under the nose and chin.
For the 3rd layer I used the BV000 and BV00. These blue violets are just awesome for shadows.
When you only use cool colours in the face, it might look a bit weird in the end. So I decided to add some RV00 for some warmth. allthough the RV is a cool colour too, it looks warm next to the BV and BG I have been using in the previous layers.
Aading some more shadow with the W1, especially around the eyes and under the nose.
In this stage I took out the E000 and started blending all the layers together.
The eyes have shadows as well. The eyelid casts a shadow on the eyeball. I used W1 and BV00 to create this shadow. The R20 is for the fleshy parts of the eyes.
For colouring the eye I use several layers too. I started with YG61.
The 2nd layer is with YG23.
And the 3rd layer YG67. The darkest part of the eye is where the eyelid casts a shadow. So add a little of your darkest green just at the top of the eye.
Eyes usally have more than just one colour. So I added some tiny brown spots using E34 and E57.
The lips were coloured with E93, 95, 04 and 000.
Colouring hair can be tricky. There is always a lot of shadow in hair, all those strands going underneath other strands of hair. So I find it easier to start with my darkest colour, in this case E09. In a flicking motion I colour the darkest parts of her hair.
Then I use the E08, YR16, YR15 and YR14 to colour the rest of the hair. I keep adding layers of ink until I'm happy with the result. The darkest colour might have been faded out a little with all those layers I put on top of it. So for some more depth I go back to the E08 and E09 to add more detail and depth to the hair.
And this was how she looks after all those layers, but I thought she looked a bit pale and her lips weren't sparkling enough.
I completely covered the skin in a layer of YR61 and blend it in with E000. On the lips I added some YR14, 15 and E08.
I liked it much better this way.
And this is the end result. I used the face in my art journal and doodled a little in the background.
See you next month.
Miranda


Loved this - thank you so much for sharing your wonderful talent with us!! Hugs
ReplyDeleteThanks sooooooooooooo much for doing this. I have copied and put in my copic notes. This is very very helpful and you have written so even I can understand. Hihihi thx again♡
ReplyDeleteWow Miran thank you so much for your tutorial!
ReplyDeletexxx Yvonne
Beautifully done!
ReplyDeleteGreat job, thanks for sharing. Hugs Diny
ReplyDeleteA great post Miran and the results are wonderful! xx
ReplyDeleteGeweldig kleurwerk zo mooi
ReplyDeleteGr miranda