Hello everyone!
This is Kathrin here today and I want to share a tutorial for how to make an underwater background with the airbrush system and our beloved Copics.
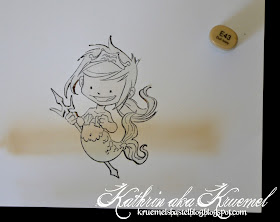
First stamp your image on a quite large piece of paper - it will be cut down to the desired size afterwards but the result is better if your paper is bigger and you get an idea where to airbrush which color if you're able to see the actual image. Then stamp your image again on masking tape and put it on top of the stamped image.
For my card I used the Aquarius stamp by Whiff Of Joy.
Now put the E43 marker in your airbrush system and spray a line of color a little lower than the middle of your image.
Then use E42 underneath the E43. This will later be the sand ground.
Next color we use is BG23. Place strip of this over the E43 line, going slightly into the E43 color.
Then use BG11 where the BG23 and E43 meet to kind of blend those colors together. You should go into the E43 line because this will later look like a real underwater background where ground and water meet.
Now let's bring in some stronger colors. Usa BG05 above the BG23 line, again blending them together a little.
Then I used the BG07 and added it in about the middle of the BG05 strip that we sprayed before.
Since the color of the water looks lighter the closer we get to the air I went on with BG02.
And the last and lightest color I used is BG53. I made this strip a little thicker because, as I mentioned before, the image/background will later be cut down in size to fit our card.
As the next step I took off the masking tape und colored the image in.
To make the ground look more real I used the E43 marker and drew some lines on the ground like the waves create on the sandy ground in the real sea.
Then I used E42 on those lines again, making them just a tad thicker than the E43 lines.
Now we need some sun beams. Therefor I put on the masking tape again - just because it's easier to not have to pay too much attention to not go over the colord image. Then I decided where my light should come from and used BG0000 and BG000 to draw the sun beams. Since the layer of color is really thin if you use the airbrush system, using the Colorless Blender would create too much contrast and the beams would look unreal. I also used the YR30 just at the top area of my beams to give them a sunny touch.
When you take off the masking tape again you can see that the sun beams look quite natural and seem to go behind the image.
As a last step and to make the scene look even more real I used BG96 and BG93 and drew some seaweed in the background. As you will see on the pictures of the finished card I later decided to add some more in the front of the scene.
All that's left to do now is to use this on your card. And here's mine:
I made a center step card, putting the image in the focus.
I put some flourishes that remind me of seaweed next to the image and added a punched out ancor. Underneath the image I used some cheesecloth ad added a few pearls to it.
The saying is by Catslife Press.
And I also decided to add a little bottle with "sand" - made using light brown/golden glitter - and a little message...
The mermaid tail and the crown got some Stickles to add some sparkle.
Here's a closeup of the finished image and how it looks cut down:
And these are the Copics that I used to color the mermaid in:
skin: E31, E11, E51, E30, E000
cheeks: R32, R20
mermaid tail: BG75, BG72, BG70, G20, YG11, YG23, YG25
hair: E47, E44, E42, E41, E40
crown and whatever it is called that she holds in her hand: C3, C1, C0
Hope this tutorial is helpful to you and you enjoyed this trip into the tropical sea! ;)


Thank you for the tutorial I'll get my airbrush next week, and I'm definitely going to try to make a background this way.
ReplyDeleteMarie-Anne
Stunning card! Love the way you made the background!
ReplyDeletewow this is amazing, love that background and how you added the sunbeams and your colouring of the image is great too x
ReplyDeleteThis is a fabulous tutorial. Thank you for the step by step instructions.
ReplyDeleteNadja
Thank you Kathrin for this clear instructions
ReplyDeleteThis is stunning x
ReplyDelete