Goodmoring dear readers,
At our Copic Meeting with the other instructors from Europe,
I was talking with Inga, She is a very talented Manga artist.
When you see her work, you know what a mean.
At the meeting she draw and color a feather for us,
I ask her to make a tutorial for you here at the blog.
Thank you Inga for your great work, and making this tutorial
Feather – Step by Step
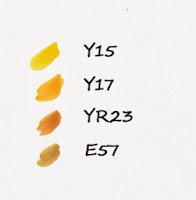
In this short tutorial, I’ll show you how to color a feather with COPIC Markers: I picked the colors Y15, Y17 and YR23, which are yellow tones and also a brown shade, E57.
Step01
In a first step I create the lineart using a Multiliner Sepia. Especially with warm colors a sepia or a brown Multiliner works quite well to avoid a too stark contrast.
Step02
I create the basic feather structure with Y15. I paint, using the brush tip making quick small strokes. The ‘shiny’ white part has been left empty.
Step03
First shades are added with Y17. To get an even smoother structure just overpaint the Y17 again with Y 15.
Step04
To intensify the shades even more use YR23 now. Again, to make everything a bit smoother you can create another color layer with Y15. Keep in mind not to draw the darker lines too far into the white area or the contrast might take away the shine.
Step05
Finally some last shades are added with E57.
I hope you liked this small tutorial, if you have any questions, feel free to ask me.
Yours,
Inga Semisow
Pages:
https://www.facebook.com/ingasemisows.ghostworld
I hope Inga has inspired you, please leave a message for here,
She love to read them.
Big hugs
Lydia


Great job, Sweetie!
ReplyDeleteThis is so beautifully coloured x
ReplyDeleteThis looks awesome.. Thanks for the great tutorial..
ReplyDeletethank you all very much :)
ReplyDeleteBeautiful!!
ReplyDeleteAwesome colouring Lydia.
ReplyDeleteJasmina